Introduction
This manual provides detailed instructions for the installation, operation, and maintenance of your Beretta RC05 Remote Programmable Thermostat, model 10021057. This device is designed to offer precise and programmable temperature control for your heating system, featuring weather control capabilities for enhanced comfort and energy efficiency.
Product Overview
The Beretta RC05 is a digital, wall-mounted thermostat with remote control functionality. It allows users to program heating schedules and monitor ambient conditions. Familiarize yourself with the device's components:
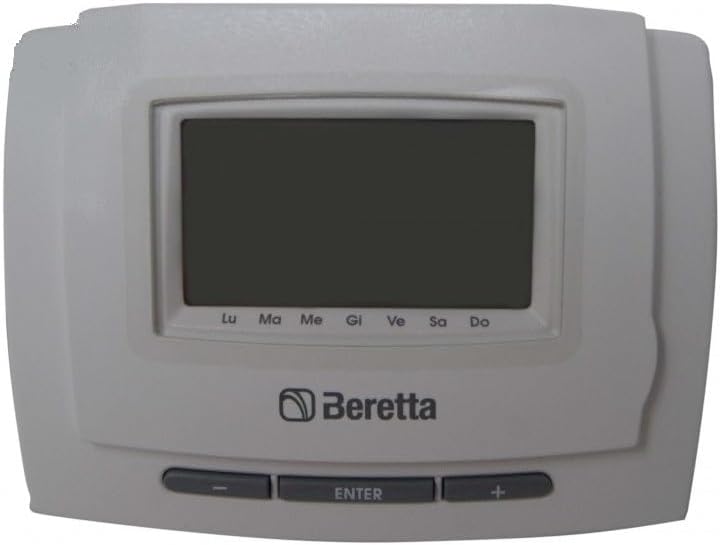
This image displays the Beretta RC05 Remote Programmable Thermostat. It features a large digital screen at the top, below which the 'Beretta' logo is visible. At the bottom, three control buttons are present: a minus button, an 'ENTER' button, and a plus button. The screen also shows abbreviations for days of the week: Lu, Ma, Me, Gi, Ve, Sa, Do.
Setup and Installation
Proper installation is crucial for the optimal performance of your thermostat. It is recommended that installation be performed by a qualified technician.
1. Mounting the Thermostat
- Choose a suitable wall location, away from direct sunlight, drafts, or heat sources that could affect temperature readings.
- Mount the thermostat at approximately 1.5 meters (5 feet) from the floor.
- Follow the wiring diagram provided with your heating system for correct electrical connections. Ensure power is off before wiring.
2. Battery Installation
The thermostat is powered by batteries. Ensure fresh batteries are installed correctly.
- Open the battery compartment, typically located on the back or side of the unit.
- Insert the required batteries, observing the correct polarity (+/-).
- Close the battery compartment securely.
3. Initial Configuration
Upon first power-up or after battery replacement, you may need to set the date and time.
- Use the + and - buttons to adjust values.
- Press the ENTER button to confirm selections and move to the next setting.
- Set the current year, month, day, and time.
Operating Instructions
The Beretta RC05 offers various modes and programming options to manage your home's heating.
1. Setting the Temperature
- In normal operating mode, the display shows the current room temperature.
- Press the + or - buttons to temporarily adjust the desired temperature. This override will typically last until the next programmed event or until manually cancelled.
2. Programming Schedules
The thermostat allows for daily or weekly programming to optimize energy consumption.
- Press the ENTER button repeatedly until you reach the programming menu (refer to the display for indicators like 'PROG' or a clock icon).
- Use the + and - buttons to select the day or period you wish to program.
- Set the desired temperature for different time slots throughout the day (e.g., morning, day, evening, night).
- Confirm each setting with the ENTER button.
3. Mode Selection
Your thermostat may offer different operating modes:
- Auto Mode: Follows the programmed schedule.
- Manual Mode: Maintains a constant temperature set by the user, overriding the schedule.
- Off Mode: Turns off the heating system.
- Weather Control: This advanced feature adjusts heating based on external weather conditions, requiring connection to an outdoor sensor (if applicable). Consult your installer for details on this function.
Maintenance
Regular maintenance ensures the longevity and accuracy of your thermostat.
1. Battery Replacement
When the battery low indicator appears on the display, replace the batteries promptly to avoid interruption of service.
- Follow the battery installation steps outlined in the 'Setup and Installation' section.
- It is recommended to replace all batteries at the same time with new, high-quality alkaline batteries.
2. Cleaning
- Wipe the thermostat's exterior with a soft, dry cloth.
- Do not use abrasive cleaners, solvents, or spray directly onto the unit.
Troubleshooting
If you encounter issues with your Beretta RC05 thermostat, refer to the following common problems and solutions:
| Problem | Possible Cause | Solution |
|---|---|---|
| Display is blank or dim. | Dead or low batteries. | Replace batteries with new ones. |
| Heating system not responding. | Incorrect mode selected; wiring issue; system fault. | Check thermostat mode (ensure it's not 'Off'). Verify wiring connections. Consult a technician if the issue persists. |
| Incorrect temperature reading. | Thermostat located near a heat source or draft; sensor malfunction. | Relocate thermostat if possible. Ensure no obstructions. If problem continues, contact support. |
| Programming not working. | Incorrect programming steps; thermostat in manual override. | Review 'Operating Instructions' for programming. Cancel any manual overrides. |
If you cannot resolve the issue using these steps, please contact customer support.
Specifications
Key technical details for the Beretta RC05 Remote Programmable Thermostat:
- Model Number: 10021057
- Brand: Beretta (as indicated on product)
- Power Source: Battery
- Display Style: Digital
- Plug Profile: Wall Mount
- Special Features: Weather Control, Programmable
- Usage: Oven (Note: This specification from product data may refer to compatibility with certain heating systems, not direct oven control. Consult your heating system manual.)
- Included Components: Thermostat unit
- Controller Type: Remote Control
- Type of Temperature Control: Heating
Warranty Information
This product is covered by a manufacturer's warranty. Please refer to the warranty card included with your purchase or visit the official Beretta website for detailed terms and conditions regarding coverage, duration, and claims procedures. Keep your proof of purchase for warranty validation.
Customer Support
For technical assistance, troubleshooting beyond this manual, or warranty inquiries, please contact Beretta customer support. Contact information can typically be found on the manufacturer's website or on the product packaging.
- Online Resources: Visit the official Beretta website for FAQs, updated manuals, and support contact details.
- Professional Assistance: For complex installation or repair issues, it is always recommended to consult a certified HVAC technician.


