Introduction
This manual provides essential information for the safe and efficient operation, maintenance, and troubleshooting of your thinkkitchen Promix Plus Stand Mixer. Please read this manual thoroughly before first use and keep it for future reference.
The thinkkitchen Promix Plus Stand Mixer is a versatile kitchen appliance designed for mixing, kneading, and whipping various ingredients. It features a powerful 600W motor, a 5.5-liter stainless steel bowl, and multiple attachments to assist with a wide range of culinary tasks.
Important Safety Instructions
When using electrical appliances, basic safety precautions should always be followed, including the following:
- Read all instructions before operating the stand mixer.
- To protect against risk of electrical shock, do not immerse the mixer base, cord, or plug in water or other liquid.
- Close supervision is necessary when any appliance is used by or near children.
- Unplug from outlet when not in use, before putting on or taking off parts, and before cleaning.
- Avoid contact with moving parts. Keep hands, hair, and clothing, as well as spatulas and other utensils, away from beaters during operation to reduce the risk of injury to persons and/or damage to the mixer.
- Do not operate any appliance with a damaged cord or plug or after the appliance malfunctions, or has been dropped or damaged in any manner. Return appliance to the nearest authorized service facility for examination, repair, or electrical or mechanical adjustment.
- The use of attachments not recommended or sold by the manufacturer may cause fire, electric shock, or injury.
- Do not use outdoors.
- Do not let cord hang over edge of table or counter.
- Do not let cord contact hot surfaces, including the stove.
- Always ensure the appliance is switched off and unplugged before assembling, disassembling, or cleaning.
- Do not use the appliance for other than intended household use.
- The appliance features non-slip feet for stability and a locking mechanism for the bowl. Ensure these are engaged before operation.
Parts and Features

Figure 1: The thinkkitchen Promix Plus Stand Mixer in red, featuring a stainless steel mixing bowl and a whisk attachment. The control dial and tilt-head lock are visible on the side.
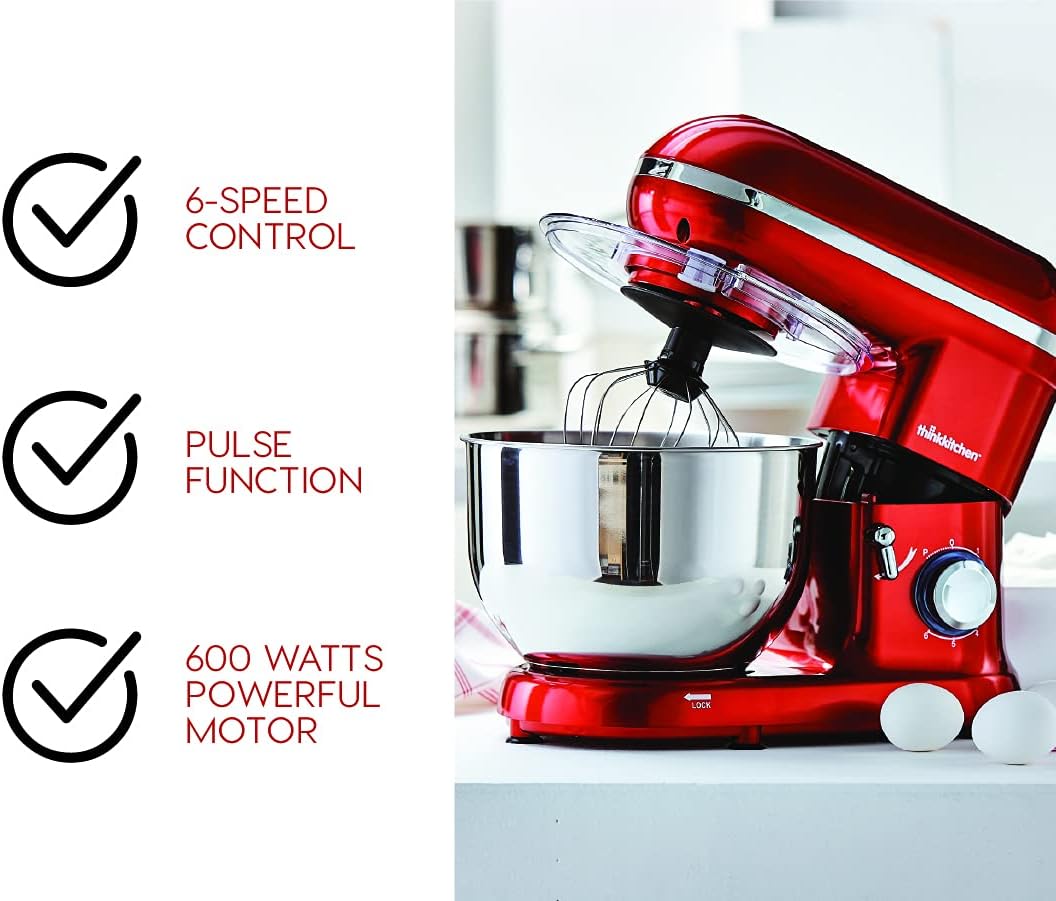
Figure 2: Key features of the stand mixer, including its 6-speed control, pulse function, and powerful 600-watt motor, indicated by checkmarks next to the appliance.

Figure 3: The three primary attachments included with the mixer: the whisk for aerating, the beater for general mixing, and the dough hook for kneading.
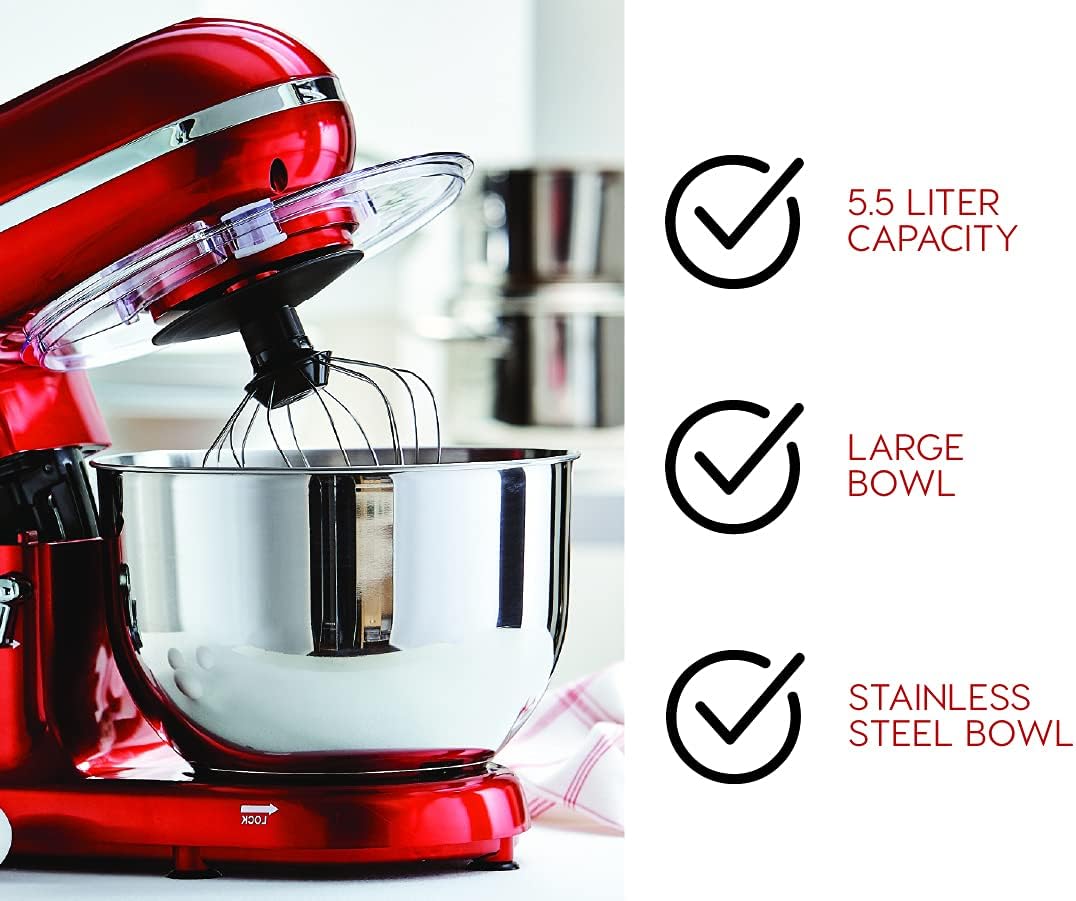
Figure 4: The stand mixer equipped with its transparent splash-proof bowl cover, designed to prevent spills during operation.

Figure 5: Features emphasizing the mixer's 5.5-liter capacity, large bowl size, and durable stainless steel construction.
Component List:
- Mixer Base: Contains the motor, speed control, and tilt-head mechanism.
- Stainless Steel Mixing Bowl: 5.5-liter capacity, removable.
- Whisk Attachment: For whipping cream, egg whites, and light batters.
- Beater Attachment: For mixing cakes, cookies, and general batters.
- Dough Hook Attachment: For kneading bread dough, pizza dough, and other heavy mixtures.
- Splash Guard: Transparent cover to prevent splashing during mixing.
- Speed Control Dial: Offers 6 speed settings and a pulse function.
- Tilt-Head Release Lever: Allows the mixer head to tilt back for easy attachment and bowl removal.
- Non-slip Feet: For stability during operation.
Setup
- Unpacking: Carefully remove all components from the packaging. Retain packaging for future storage or transport. Remove any protective films or stickers.
- Initial Cleaning: Before first use, wash the stainless steel bowl, whisk, beater, dough hook, and splash guard in warm, soapy water. Rinse thoroughly and dry completely. Wipe the mixer base with a damp cloth. Do not immerse the mixer base in water.
- Placement: Place the mixer on a clean, dry, flat, and stable surface. Ensure there is adequate space around the mixer for ventilation and operation. The non-slip feet will help secure the unit.
- Attaching the Bowl:
- Ensure the mixer is unplugged and the speed control is set to "0" (OFF).
- Place the stainless steel bowl onto the base, aligning the grooves on the bowl with the locking mechanism on the base.
- Rotate the bowl clockwise until it locks securely into place.
- Attaching the Accessory:

Figure 6: The mixer head tilted upwards, providing access to the attachment shaft for easy installation or removal of accessories.
- Press the tilt-head release lever and lift the mixer head until it clicks into the tilted position.
- Select the desired attachment (whisk, beater, or dough hook).
- Align the top of the attachment with the shaft and push upwards, then rotate slightly until it locks into place.
- Lower the mixer head by pressing the tilt-head release lever again and gently pushing the head down until it locks into the operating position.
- Attaching the Splash Guard: If desired, place the splash guard over the mixing bowl before lowering the mixer head. Ensure the opening on the splash guard aligns with the attachment.
Operating Instructions
General Operation:
- Ensure the mixer is properly assembled with the bowl and desired attachment.
- Add ingredients to the mixing bowl.
- Plug the power cord into a suitable electrical outlet.
- Turn the speed control dial to the desired setting (1-6). Start with a lower speed and gradually increase as needed to prevent splashing.
- For short bursts of maximum power, turn the dial to the "P" (Pulse) setting and hold. Release to stop.
- During operation, you can use the feeding chute on the splash guard to add ingredients without stopping the mixer.
- When mixing is complete, turn the speed control dial back to "0" (OFF) and unplug the mixer from the outlet.
- Press the tilt-head release lever and lift the mixer head to remove the attachment and bowl.
Recommended Speed Settings:
| Speed Setting | Application | Attachment |
|---|---|---|
| P (Pulse) | Quick bursts of power for chopping or quick mixing. | All attachments |
| 1-2 (Low) | Mixing heavy batters, mashing potatoes, kneading dough. | Dough Hook, Beater |
| 3-4 (Medium) | Mixing cakes, cookies, creaming butter and sugar. | Beater |
| 5-6 (High) | Whipping cream, egg whites, light batters. | Whisk |
Note: Always refer to your recipe for specific speed recommendations. Do not overload the mixer.
Maintenance and Cleaning
Proper cleaning and maintenance will ensure the longevity and optimal performance of your stand mixer.
Cleaning:
- Always unplug the mixer before cleaning.
- Mixing Bowl, Attachments (Whisk, Beater, Dough Hook), and Splash Guard: These parts are dishwasher safe. Alternatively, they can be washed by hand in warm, soapy water, rinsed thoroughly, and dried immediately.
- Mixer Base: Wipe the exterior of the mixer base with a soft, damp cloth. For stubborn stains, use a mild detergent. Do not use abrasive cleaners or scourers. Never immerse the mixer base, cord, or plug in water or any other liquid.
- Power Cord: Wipe clean with a damp cloth if necessary. Ensure it is dry before storage.
Storage:
Store the mixer in a clean, dry place. Ensure the power cord is neatly wrapped and not kinked. Store attachments with the mixer to prevent loss.
Troubleshooting
If you encounter issues with your thinkkitchen Promix Plus Stand Mixer, please refer to the following table before contacting customer support.
| Problem | Possible Cause | Solution |
|---|---|---|
| Mixer does not turn on. | Not plugged in; power outlet not working; speed dial not at "0". | Ensure the power cord is securely plugged into a working outlet. Check if the speed dial is set to "0" before turning on. |
| Mixer stops during operation. | Overload protection activated; power interruption. | Unplug the mixer, reduce the load in the bowl, and let it cool down for 15-20 minutes before restarting. Check power supply. |
| Attachment not reaching ingredients at bottom of bowl. | Attachment not fully engaged or bowl not locked. | Ensure the attachment is pushed up and rotated until it clicks into place. Verify the bowl is securely locked onto the base. |
| Excessive vibration or noise. | Mixer not on a stable surface; bowl or attachment not properly secured; excessive load. | Place the mixer on a flat, stable surface. Ensure the bowl and attachment are securely locked. Reduce the amount of ingredients if overloaded. |
| Splashing during mixing. | Speed too high; splash guard not used. | Start at a lower speed and gradually increase. Use the splash guard for liquid ingredients. |
Specifications
- Brand: TK (thinkkitchen)
- Model Number: 10591254
- Colour: Red
- Power/Wattage: 600 watts
- Capacity: 5.5 liters (Stainless Steel Bowl)
- Number of Speeds: 6 + Pulse function
- Product Dimensions: 17.53 cm (D) x 36.58 cm (W) x 32 cm (H)
- Item Weight: 5.58 kg
- Material: Stainless Steel (Bowl, Attachments), Plastic (Housing, Splash Guard)
- Special Features: Dishwasher Safe Removable Parts, Safety Lock, Tilt-Head Design
- Manufacturer: Stokes
- Date First Available: May 2, 2019
Warranty and Support
Your thinkkitchen Promix Plus Stand Mixer comes with a limited 2-year warranty on all parts. This warranty covers defects in material and workmanship under normal household use from the date of original purchase.
This warranty does not cover damage resulting from misuse, abuse, accident, alteration, lack of proper care, or normal wear and tear. Any attempt to repair or modify the appliance by unauthorized personnel will void the warranty.
For warranty claims, technical support, or to inquire about replacement parts, please contact the manufacturer, Stokes, or your point of purchase. Please have your model number (10591254) and proof of purchase readily available.
For more information, you may visit the official TK Store online: TK Store on Amazon.ca