1. Introduction
Thank you for purchasing the SENCOR SWS 3000 W Weather Station. This device provides accurate indoor and outdoor temperature and humidity readings, along with time and date display. Please read this manual carefully before operating the device to ensure proper use and to maximize its lifespan.
2. Safety Information
- Do not expose the main unit or sensor to extreme temperatures, direct sunlight, or moisture.
- Avoid dropping the device or subjecting it to strong impacts.
- Do not attempt to disassemble or repair the unit yourself. Refer all servicing to qualified personnel.
- Dispose of used batteries responsibly according to local regulations.
- Keep the device out of reach of children.
3. Package Contents
Please check the package contents to ensure all items are present:
- SENCOR SWS 3000 W Main Unit (Weather Station)
- Wireless Outdoor Sensor
- User Manual (this document)
4. Product Overview

Figure 4.1: The SENCOR SWS 3000 W Weather Station main unit (left) and its accompanying wireless outdoor sensor (right).

Figure 4.2: Angled view of the SENCOR SWS 3000 W main unit, showcasing its display and control buttons.
The SENCOR SWS 3000 W Weather Station consists of a main display unit and a wireless outdoor sensor. The main unit features a clear LCD display with white backlight, showing indoor and outdoor temperature, humidity, time, and date. The wireless sensor transmits outdoor data to the main unit.

Figure 4.3: Close-up view of the wireless outdoor sensor, which transmits temperature and humidity data to the main unit.

Figure 4.4: Rear view of the main unit, showing the battery compartment and the integrated stand for tabletop placement.
5. Setup
5.1 Battery Installation
The SENCOR SWS 3000 W Weather Station is battery-powered. Ensure you have the correct battery types as specified in the specifications section.
- Main Unit: Open the battery compartment cover on the back of the main unit (refer to Figure 4.4). Insert the required AAA batteries, observing the correct polarity (+/-). Close the cover securely.
- Wireless Sensor: Open the battery compartment cover on the back of the wireless sensor (refer to Figure 4.3). Insert the required batteries (typically AAA), observing the correct polarity (+/-). Close the cover securely.
5.2 Sensor Placement
Proper placement of the wireless sensor is crucial for accurate outdoor readings.
- Place the sensor in a shaded area to avoid direct sunlight, which can cause inaccurate temperature readings.
- Ensure the sensor is protected from direct rain or snow.
- Position the sensor within the effective transmission range (up to 30 meters in open air) of the main unit. Walls and other obstacles can reduce this range.
- Avoid placing the sensor near large metal objects or electrical appliances that may interfere with the wireless signal.

Figure 5.1: Example placement of the main unit indoors and the wireless sensor outdoors for optimal performance.
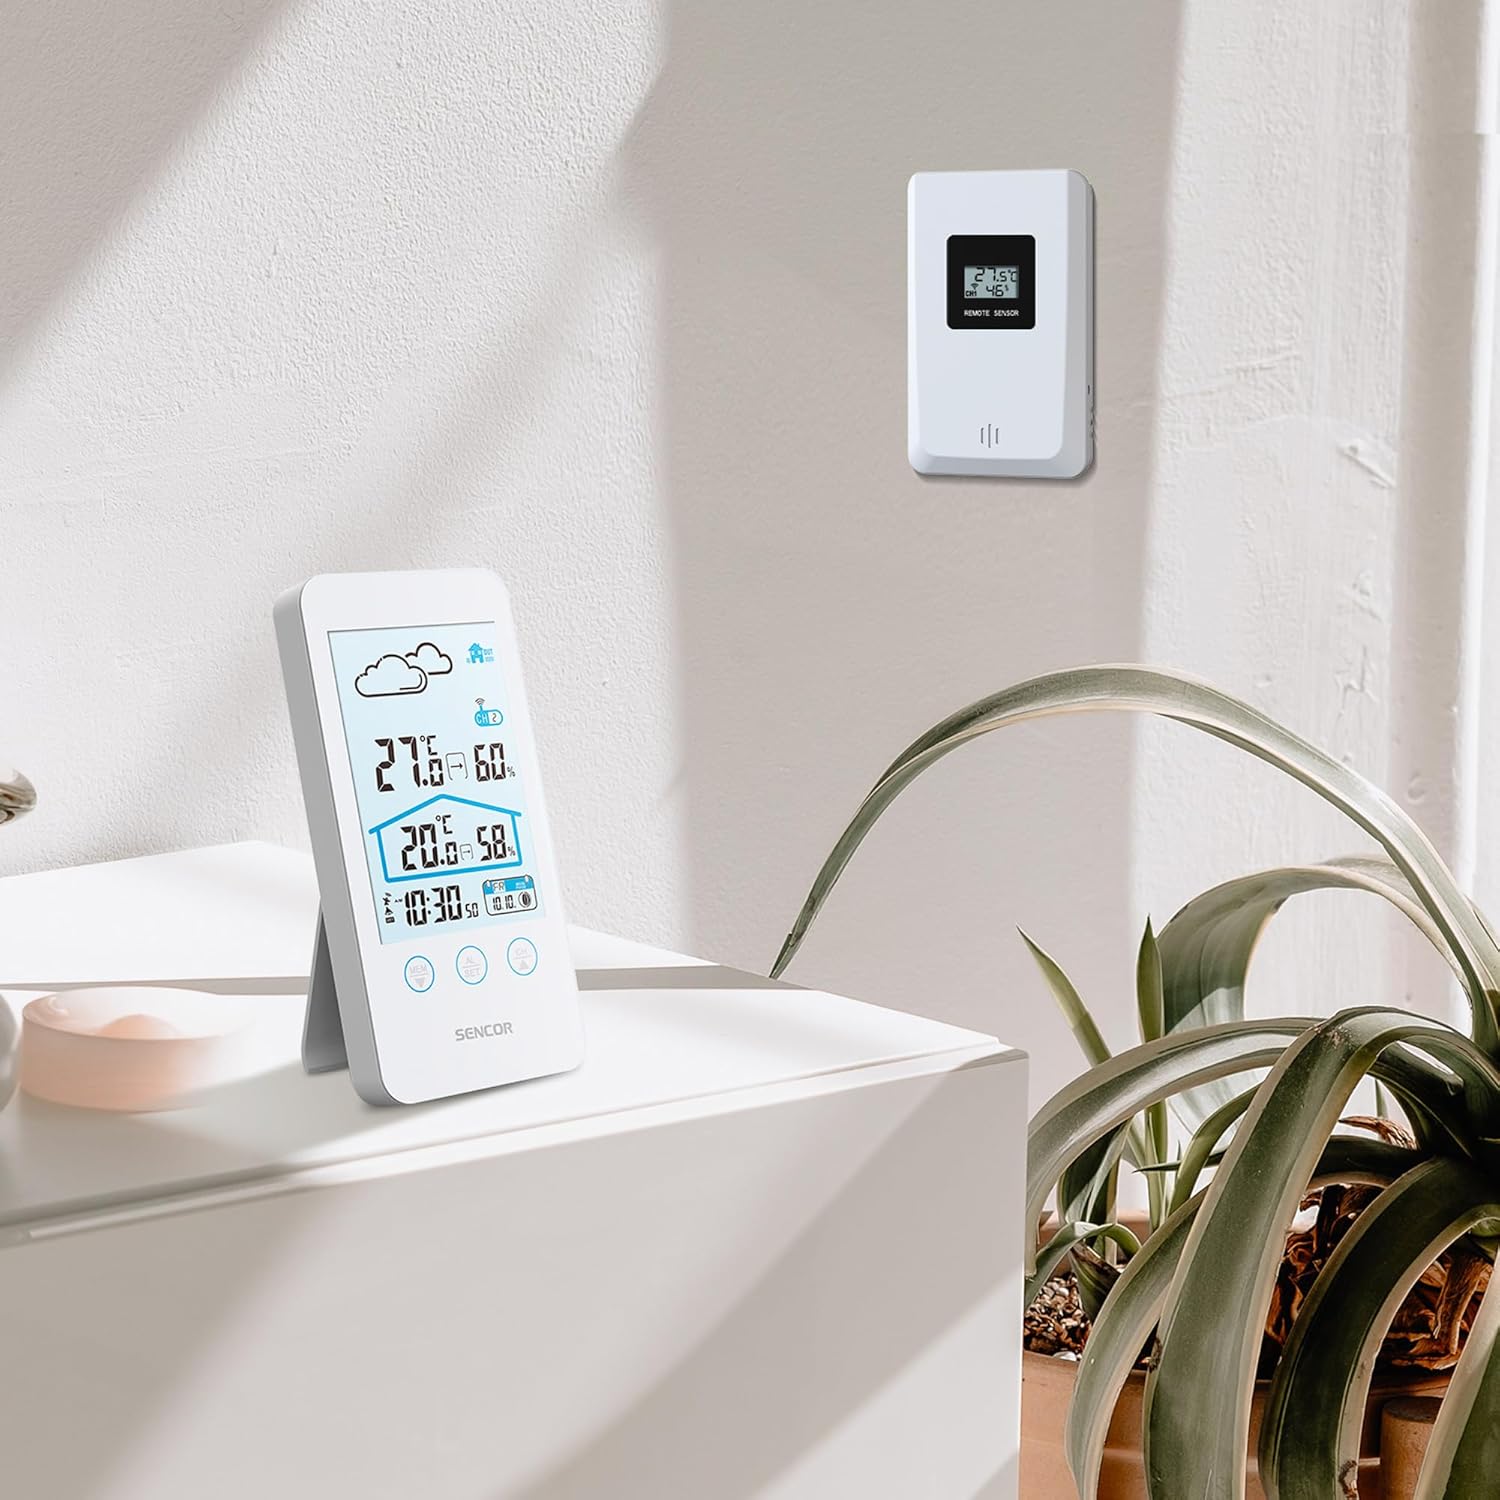
Figure 5.2: The main unit can be placed on a flat surface, while the sensor is mounted on a wall or suitable outdoor location.
5.3 Initial Power On and Pairing
After installing batteries in both units, the main unit will automatically search for the wireless sensor. This process may take a few minutes.
- Place the main unit and the sensor close to each other during the initial pairing process.
- Once connected, the outdoor temperature and humidity will appear on the main unit's display.
- If the connection is not established, remove and reinsert the batteries from both units, then try again.
6. Operating Instructions
6.1 Display Information
The LCD display provides various information at a glance:
- Outdoor Temperature & Humidity: Displayed prominently at the top.
- Indoor Temperature & Humidity: Displayed below the outdoor readings.
- Time & Date: Located at the bottom of the display.
- Weather Forecast Icon: An icon indicating predicted weather conditions (e.g., sunny, cloudy, rainy).
- Channel Indicator: Shows which sensor channel is currently displayed (if multiple sensors are used).
- Battery Indicator: Alerts when batteries are low for either unit.

Figure 6.1: Detailed view of the SENCOR SWS 3000 W display, highlighting various information segments.
6.2 Setting Time and Date
To set the time and date on your weather station:
- Press and hold the "AL/SET" button (usually located below the display) for a few seconds until the time digits start flashing.
- Use the "CH" or "MEM" buttons to adjust the flashing value (e.g., hour, minute).
- Press "AL/SET" again to confirm the setting and move to the next adjustable item (e.g., minute, year, month, day).
- Repeat until all settings are configured. Press "AL/SET" one last time to exit the setting mode.
6.3 Temperature Unit Selection (°C/°F)
To switch between Celsius (°C) and Fahrenheit (°F):
- Locate the °C/°F button, usually on the back or side of the main unit, or sometimes integrated with another button (e.g., "MEM" or "CH" with a short press).
- Press this button to toggle between the two temperature units. The display will update accordingly.
6.4 Channel Selection (for multiple sensors)
If you have multiple wireless sensors (up to 3 supported by SWS 3000 W), you can switch between their readings:
- Press the "CH" button (Channel) on the main unit.
- Each press will cycle through the available channels (CH1, CH2, CH3) or an auto-cycle mode.
- Ensure each sensor is set to a different channel using its internal switch (if available).
6.5 Memory Function (Min/Max Readings)
The weather station records the minimum and maximum temperature and humidity readings over a period.
- Press the "MEM" button (Memory) to view the maximum recorded values.
- Press "MEM" again to view the minimum recorded values.
- Press "MEM" a third time to return to current readings.
- To clear the recorded Min/Max values, press and hold the "MEM" button while viewing them.
7. Maintenance
- Cleaning: Wipe the main unit and sensor with a soft, damp cloth. Do not use abrasive cleaners or solvents.
- Battery Replacement: Replace batteries when the low battery indicator appears on the display. Always replace all batteries in a unit at the same time.
- Storage: If storing the device for an extended period, remove all batteries to prevent leakage. Store in a cool, dry place.
8. Troubleshooting
| Problem | Possible Cause | Solution |
|---|---|---|
| No display on main unit. | Batteries are dead or incorrectly inserted. | Check battery polarity and replace with new batteries. |
| Outdoor reading not displayed or flashing. | Sensor out of range, low sensor battery, or interference. | Move sensor closer to main unit. Replace sensor batteries. Relocate units away from interference sources. Re-pair units if necessary. |
| Inaccurate temperature/humidity readings. | Sensor exposed to direct sunlight or moisture. | Relocate sensor to a shaded, protected area. |
| Time/Date incorrect. | Not set correctly or batteries removed. | Follow instructions in Section 6.2 to set time and date. |
9. Specifications
| Feature | Detail |
|---|---|
| Model Number | SWS 3000 W |
| Brand | SENCOR |
| Main Unit Dimensions (L x W x H) | 80 x 161 x 23 mm |
| Main Unit Weight | 165 g |
| Indoor Temperature Range | 0 °C to 60 °C |
| Outdoor Temperature Range | 0 °C to 60 °C |
| Temperature Accuracy | ±1 °C |
| Humidity Range | 20% to 95% RH |
| Wireless Frequency | 433 MHz |
| Transmission Range | Up to 30 meters (open air) |
| Power Source (Main Unit) | AAA batteries (not included) |
| Power Source (Sensor) | AAA batteries (not included) |
| Special Feature | Lightweight design |
| Color | White |
Note: Specifications are subject to change without notice. Battery quantities are typical and should be confirmed with product packaging.
10. Warranty and Support
SENCOR products are designed and manufactured to the highest quality standards. For warranty information, please refer to the warranty card included with your product or visit the official SENCOR website. For technical support or service inquiries, please contact SENCOR customer service through their official channels.
Keep your purchase receipt as proof of purchase for warranty purposes.