
PIX-LINK AC1200
PIX-LINK AC1200 WiFi Range Extender User Manual
Model: AC1200 | Brand: PIX-LINK
1. Introduction
Thank you for choosing the PIX-LINK AC1200 WiFi Range Extender. This device is designed to extend your existing Wi-Fi coverage, eliminate dead zones, and provide a stronger, more reliable wireless connection throughout your home or office. It supports dual-band operation (2.4GHz and 5GHz) and can function as a Wi-Fi Repeater, Access Point (AP), or Router.
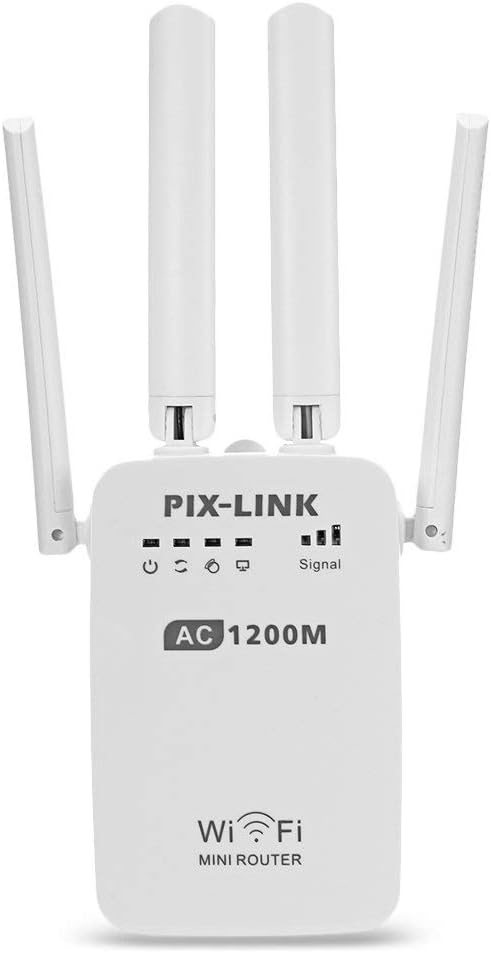
Image: Front view of the PIX-LINK AC1200 WiFi Range Extender, showing the brand logo, AC1200 rating, and signal indicator LEDs.
2. Product Features
- Dual Band Connectivity: Supports both 2.4GHz (up to 300Mbps) and 5GHz (up to 867Mbps) for a combined speed of 1200Mbps, ensuring fast and stable connections.
- Multiple Operating Modes: Functions as a Wi-Fi Repeater, Access Point (AP), or Wireless Router to suit various networking needs.
- High Performance with External Antennas: Equipped with four external antennas for improved signal strength and wider coverage.
- Ethernet Port: Includes a Gigabit Ethernet port for wired connections to devices like smart TVs, gaming consoles, or PCs.
- WPS Button: Easy setup with a one-touch WPS button for quick connection to your existing router.
- Efficient Heat Dissipation: Designed with airflow vents for effective cooling, enhancing device stability and lifespan.
- Detachable Plug: Features a detachable power plug for convenience and portability.
3. Product Overview
Familiarize yourself with the components and indicators of your PIX-LINK AC1200 extender.

Image: Detailed view of the PIX-LINK AC1200 WiFi Range Extender, highlighting its key components including 4 external antennas, detachable plug, Ethernet port, WPS button, Reset button, Power Off/On switch, and airflow design.
- LED Indicators:
- Power LED: Indicates power status.
- WPS LED: Indicates WPS function status.
- WAN LED: Indicates WAN port activity (Router mode).
- LAN LED: Indicates LAN port activity.
- WiFi LED: Indicates wireless activity.
- Signal LED: Indicates signal strength from the main router.
- Buttons:
- WPS Button: For quick setup.
- Reset Button: To restore factory settings.
- Power Off/On: To power the device on or off.
- Ports:
- Ethernet Port (WAN/LAN): For wired connections.
4. Operating Modes
The PIX-LINK AC1200 supports three main operating modes: AP Mode, Repeater Mode, and Router Mode. Each mode serves a different purpose to optimize your network setup.

Image: Diagram illustrating the three functional modes of the PIX-LINK AC1200: AP Mode (connecting to internet via router), Repeater Mode (extending existing WiFi), and Router Mode (connecting directly to modem).
4.1. Repeater Mode
In Repeater Mode, the device extends the coverage of an existing wireless network. It receives the wireless signal from your main router and re-transmits it, effectively eliminating Wi-Fi dead zones.

Image: Visual guide for setting up the PIX-LINK AC1200 in Repeater Mode, showing steps from powering on to connecting to the primary network via a web interface.
4.2. Access Point (AP) Mode
In AP Mode, the device transforms a wired network connection into a wireless one. It connects to your router via an Ethernet cable and broadcasts a new Wi-Fi network, ideal for areas without wireless coverage.
4.3. Router Mode
In Router Mode, the device acts as a primary router, connecting directly to your modem to create a new private wireless network for all your devices. This is suitable for small offices or homes without an existing router.
5. Setup Instructions
Follow these steps to set up your PIX-LINK AC1200 in your desired operating mode.
5.1. General Setup Steps (Applicable to all modes)
- Power On: Plug the extender into a power outlet. Wait for the Power LED to light up.
- Connect to the Extender:
- Wireless: On your computer or smartphone, connect to the Wi-Fi network named "Wireless-AC_2G" or "Wireless-AC_5G". No password is required initially.
- Wired: Connect your computer to the extender's Ethernet port using an Ethernet cable.
- Access Web Management Page: Open a web browser (e.g., Chrome, Firefox) and enter mywifi.net or 192.168.10.1 in the address bar.
- Login: Enter "admin" for both the username and password when prompted.
5.2. Repeater Mode Setup
- After logging in, select "Repeater Mode" from the operation mode options.
- The extender will scan for available Wi-Fi networks. Select your primary Wi-Fi network (SSID) from the list.
- Enter the password for your primary Wi-Fi network.
- You can choose to keep the same SSID for the extended network or create a new one. It is recommended to use a different name (e.g., "YourNetworkName_EXT") to distinguish it.
- Click "Apply" or "Save". The extender will restart.
- Once restarted, connect your devices to the new extended Wi-Fi network.
5.3. Access Point (AP) Mode Setup
- Connect an Ethernet cable from your main router's LAN port to the extender's Ethernet port.
- After logging into the web management page, select "AP Mode".
- Configure the new Wi-Fi network's SSID (name) and password.
- Click "Apply" or "Save". The extender will restart.
- Once restarted, your devices can connect to the new Wi-Fi network broadcast by the extender.
5.4. Router Mode Setup
- Connect an Ethernet cable from your modem to the extender's Ethernet port (acting as WAN).
- After logging into the web management page, select "Router Mode".
- Choose your internet connection type (e.g., PPPoE, Dynamic IP, Static IP) and enter the required details provided by your ISP.
- Configure the new Wi-Fi network's SSID (name) and password.
- Click "Apply" or "Save". The device will restart and function as your primary router.
6. Maintenance
- Placement: For optimal performance, place the extender in a central location between your router and the area with weak Wi-Fi signal. Avoid placing it near large metal objects, concrete walls, or other electronic devices that may cause interference.
- Cleaning: Use a soft, dry cloth to clean the device. Do not use liquid cleaners or aerosols.
- Firmware Updates: Periodically check the manufacturer's website for firmware updates to ensure optimal performance and security.
- Heat Dissipation: Ensure the airflow vents are not blocked to maintain proper cooling and extend the device's lifespan.

Image: The PIX-LINK AC1200 extender highlighting its heat dissipation design and the 90-degree adjustable external antennas for improved signal stability.
7. Troubleshooting
| Problem | Possible Solution |
|---|---|
| Cannot access the web management page (mywifi.net or 192.168.10.1). |
|
| No internet access after setup. |
|
| Weak or unstable signal from the extender. |
|
| Forgot login password for the web management page. |
|
8. Specifications
| Feature | Detail |
|---|---|
| Brand | PIX-LINK |
| Model | AC1200 |
| Wireless Standard | IEEE 802.11ac/a/b/g/n |
| Data Transfer Rate | 1200 Mbps (867Mbps at 5GHz, 300Mbps at 2.4GHz) |
| Frequency Band | Dual-Band (2.4GHz & 5GHz) |
| Antennas | 4 x External Antennas |
| Ports | 1 x 10/100Mbps Ethernet Port (WAN/LAN) |
| Security | WPA-PSK/WPA2-PSK encryption |
| Operating Modes | Repeater, AP, Router |
| Special Features | Dual Band, Access Point Mode, Detachable Plug, Airflow Design |
9. Warranty and Support
For warranty information and technical support, please refer to the documentation included with your purchase or visit the official PIX-LINK website. Keep your purchase receipt for warranty claims.
Related documentsAC1200


Ask a question about this manual
Ask about setup, troubleshooting, compatibility, parts, safety, or missing instructions. Manuals+ will review the question and use this page’s manual context to help answer it.