
1. Introduction
This manual provides essential instructions for the installation, operation, and maintenance of your Visdia RLC-079 replacement projector lamp. Designed for optimal performance, this lamp ensures high-definition and high-contrast projection for compatible ViewSonic projector models.
Compatible Projector Models:
- VIEWSONIC PJD7820HD
- VIEWSONIC PJD7822HDL
- VIEWSONIC VS14937
2. Safety Information
Always observe the following safety precautions to prevent injury or damage to your projector and the replacement lamp:
- Disconnect Power: Always unplug the projector from the power outlet before attempting any installation or maintenance.
- Allow Cooling: Ensure the projector has cooled down completely (at least 30 minutes) before handling the lamp. Hot lamps can cause severe burns.
- Handle with Care: Projector lamps contain fragile components. Avoid touching the glass bulb directly with bare hands, as oils can reduce lamp life. Use gloves or a clean cloth.
- Proper Disposal: Dispose of old lamps according to local regulations. They may contain mercury or other hazardous materials.
3. Package Contents
Your Visdia RLC-079 replacement projector lamp package should contain the following:
- 1 x Visdia RLC-079 Projector Lamp with Housing
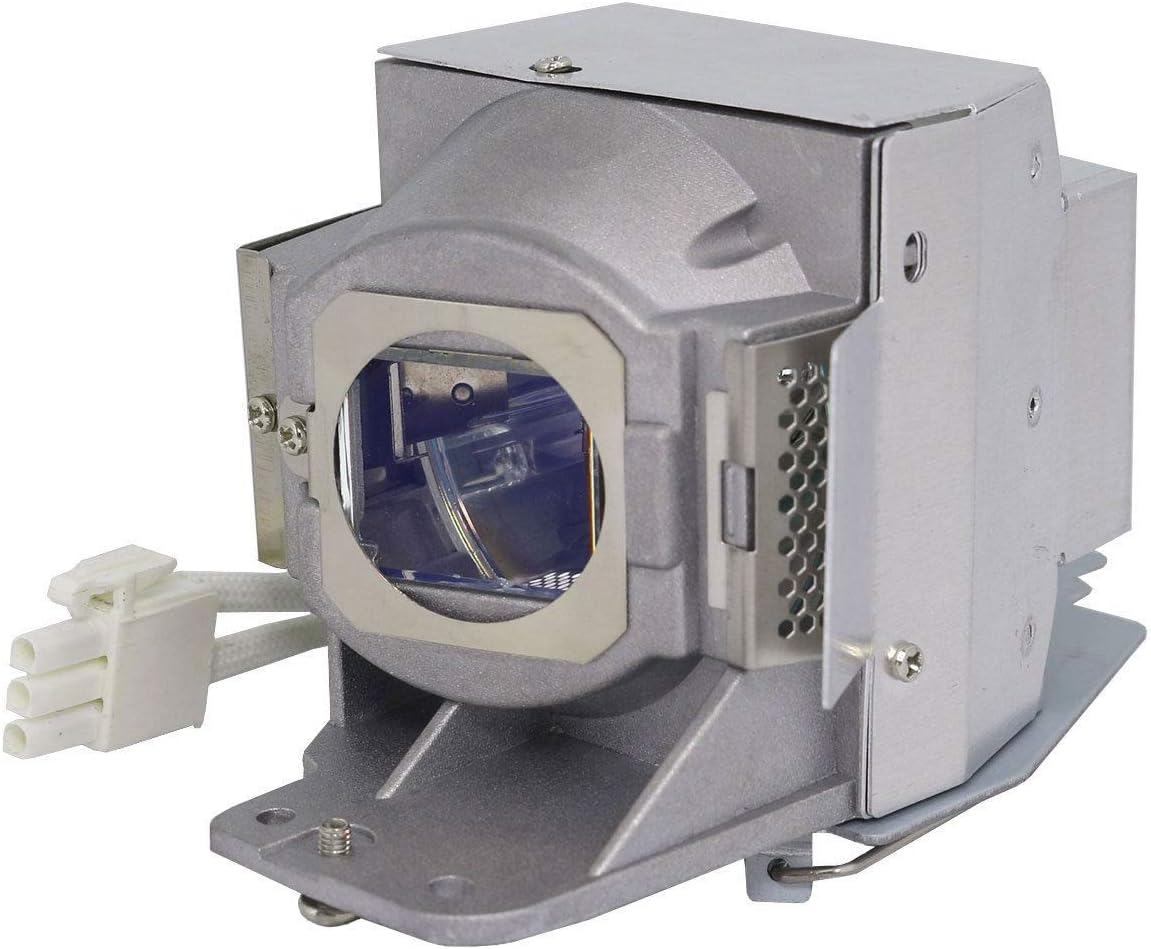
Image 1: Visdia RLC-079 Projector Lamp with Housing. This image shows the complete lamp module, ready for installation, featuring the bulb encased in its metal housing with electrical connectors.

Image 2: Visdia RLC-079 Projector Lamp with 180 Days Warranty. A slightly different angle of the lamp module, highlighting its robust construction and including a visual indicator of the warranty period.
4. Setup & Installation
Follow these steps to safely replace the projector lamp:
- Prepare the Projector: Ensure the projector is turned off and unplugged from the power source. Allow it to cool down completely to avoid burns.
- Locate Lamp Cover: Identify the lamp cover on your projector. Refer to your projector's specific user manual for its exact location.
- Remove Lamp Cover: Use a screwdriver to loosen the screw(s) securing the lamp cover. Carefully remove the cover.
- Remove Old Lamp: Loosen the screw(s) holding the old lamp module in place. Gently pull the handle on the lamp module to slide it out of the projector.
- Install New Lamp: Carefully insert the new Visdia RLC-079 lamp module into the projector, ensuring it is seated firmly and correctly. Secure it with the screw(s) you loosened earlier.
- Replace Lamp Cover: Place the lamp cover back onto the projector and secure it with its screw(s).
- Power On: Plug the projector back into the power source and turn it on.
Installation Video Guide:
Video 1: Projector Lamp Installation Guide. This video demonstrates the step-by-step process of safely replacing a projector lamp, including unplugging the device, opening the lamp compartment, removing the old lamp, installing the new lamp, and securing the cover.
5. Operating Instructions
Resetting the Lamp Life Counter:
After replacing the lamp, it is crucial to manually reset the projector's lamp life counter to zero. This ensures accurate tracking of the new lamp's usage and proper warnings when it approaches its end of life. Refer to your specific projector's user manual for detailed instructions on how to access and reset the lamp hour counter, as this procedure varies by projector model.
6. Maintenance
To maximize the lifespan and performance of your Visdia RLC-079 projector lamp, consider the following maintenance tips:
- Clean Air Filters: Regularly clean or replace your projector's air filters to ensure proper airflow and prevent overheating, which can shorten lamp life.
- Allow Cooling Down: Always allow the projector to complete its cooling cycle after use before unplugging or moving it.
- Avoid Frequent On/Off Cycles: Minimize turning the projector on and off frequently, as this can stress the lamp and reduce its lifespan.
- Operate in a Clean Environment: Dust and smoke can accumulate inside the projector, affecting performance and lamp life.
7. Troubleshooting
If you encounter issues after installing your new lamp, consider these common troubleshooting steps:
- No Light/Dim Image:
- Ensure the lamp is fully seated and secured.
- Verify the lamp cover is correctly closed and secured.
- Check if the lamp life counter was reset.
- Flickering or Color Distortion:
- This can sometimes be related to projector settings, such as the DLP Color Wheel calibration. Consult your projector's manual for advanced settings or factory mode adjustments (e.g., adjusting 'cw delay' if available) to optimize color and stability.
- Ensure all connections are secure.
- Projector Overheating:
- Clean the projector's air filters and ensure adequate ventilation around the unit.
If problems persist, refer to your projector's original user manual or contact Visdia customer support.
8. Specifications
| Feature | Detail |
|---|---|
| Lamp Part Number | RLC-079 |
| Lamp Wattage | P-VIP 210W 0.8 E20.9 |
| Average Life | 3000 hours |
| Light Source Type | Projector lamps (Note: While specifications list 'LED', the wattage 'P-VIP 210W' indicates a UHP/P-VIP lamp, which is standard for these projectors.) |
| White Brightness | 2560 Lumens |
| Item Weight | 9.9 ounces |
| Package Dimensions | 5.24 x 4.45 x 4.41 inches |
9. Warranty Information
To ensure satisfaction on your purchases, all lamps sold by Visdia are entitled to a 180-day warranty and a 30-day free return policy from the date of purchase. Please retain your proof of purchase for warranty claims.
10. Support
For technical assistance, warranty claims, or any questions regarding your Visdia RLC-079 replacement projector lamp, please contact Visdia customer support through the retailer where the product was purchased or refer to the contact information provided on the product packaging.