1. Introduction
This manual provides comprehensive instructions for the Walfront 12V Rain Detection Module, model Wal front42in3gprgx. This device is designed for accurate rain and humidity monitoring, making it suitable for various applications including weather monitoring systems, plant foliage humidity detection, and automated control systems. Please read this manual thoroughly before installation and operation to ensure proper use and optimal performance.
2. Product Overview
The Walfront Raindrops Sensor is a robust and reliable module featuring a rain detection board and a relay control board. It is engineered for durability and precise environmental sensing.
Key Features:
- High Quality Construction: Utilizes FR-04 material with plating for enhanced oxidation resistance and electrical conductivity, ensuring long service life.
- Adjustable Sensitivity: Equipped with a potentiometer to fine-tune detection sensitivity, allowing precise control over relay activation based on rain intensity.
- Wide Application Range: Ideal for monitoring rain and plant leaf humidity in various weather monitoring scenarios.
- Indicator Lights: Features clear indicators for power status and relay switch state, simplifying operation and troubleshooting.
- Convenient Control: The high-power relay module can directly control external loads such as motors.
- Easy Installation: Designed with fixed bolt holes for secure and straightforward mounting.
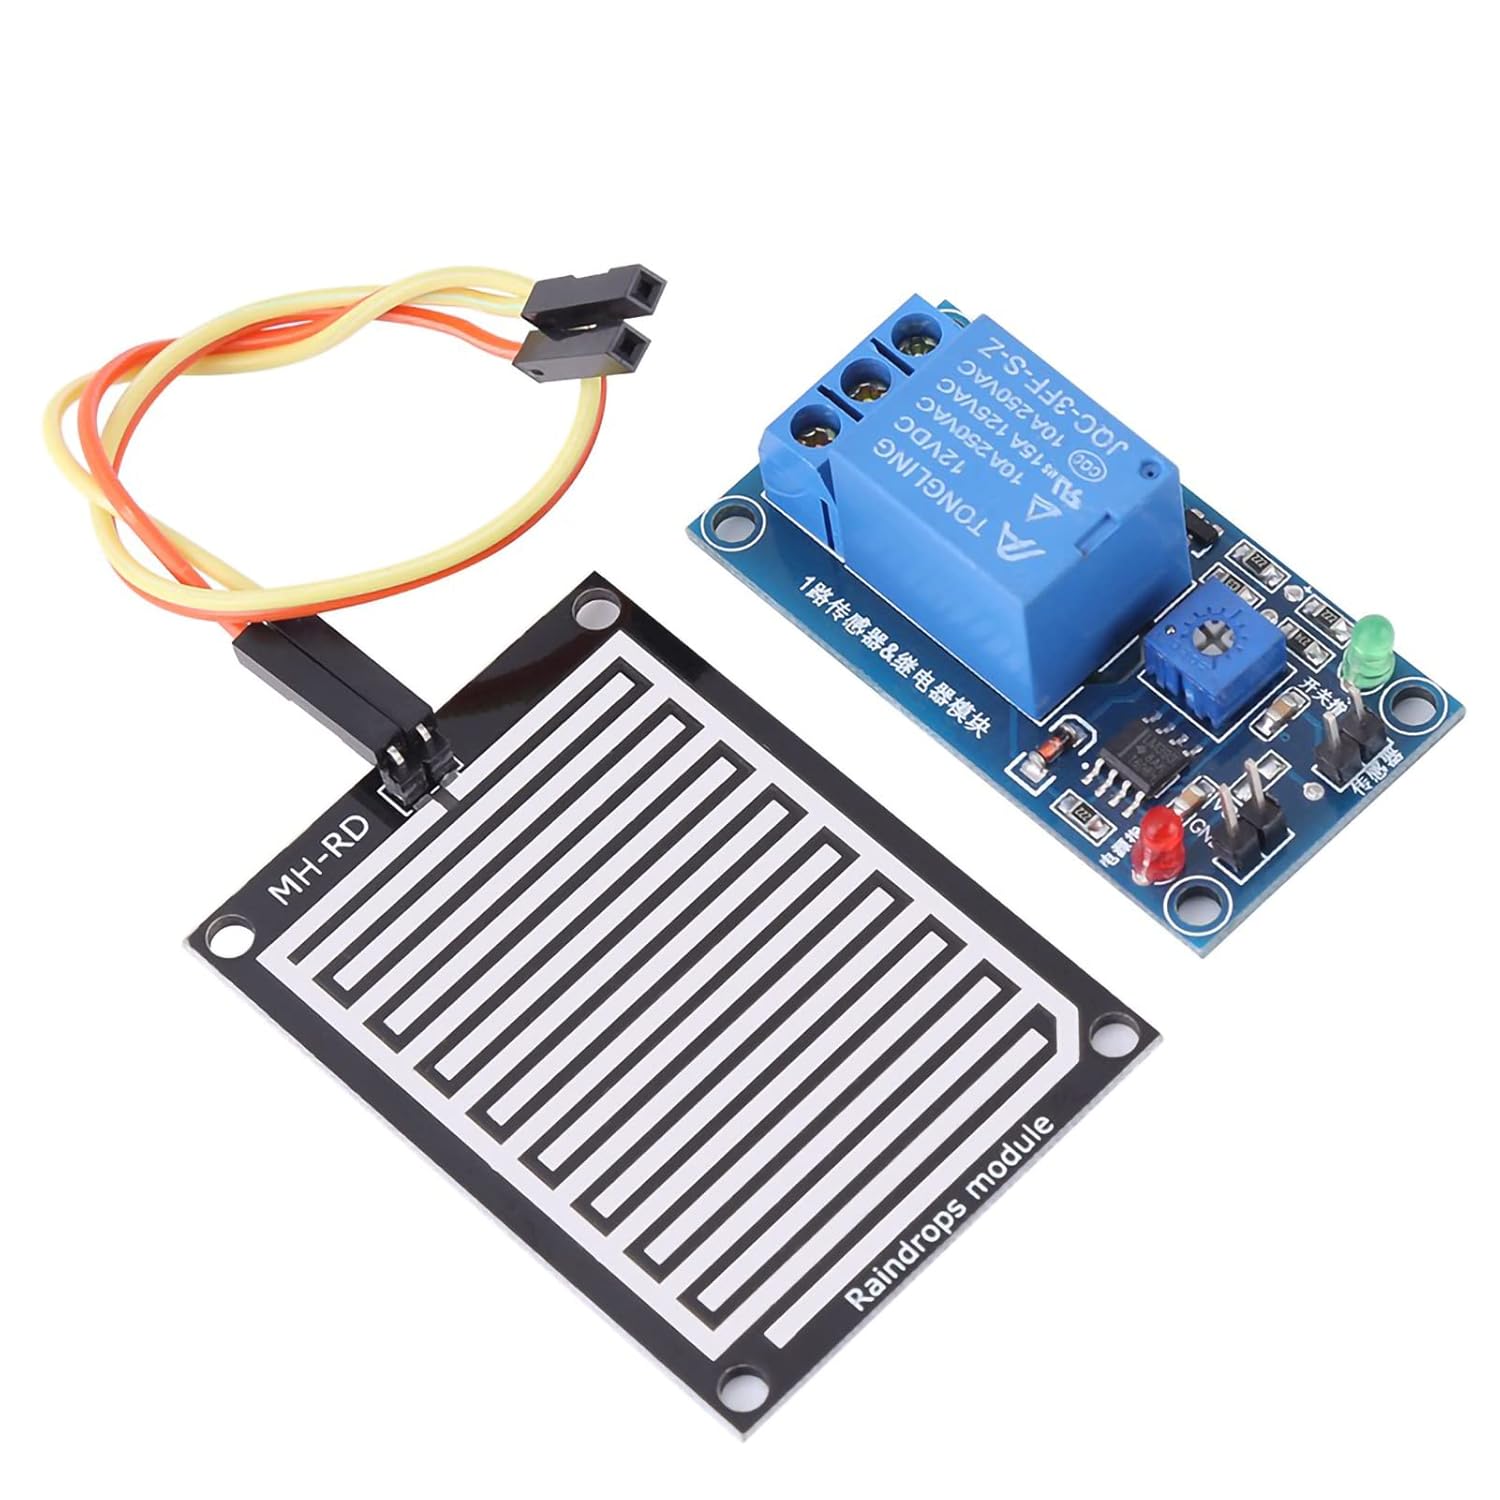
Figure 2.1: Walfront Raindrops Sensor and 12V Relay Module. This image shows the complete assembly of the rain sensor board connected to the relay control module, along with jumper wires for connection.

Figure 2.2: Dimensions of the Raindrops Sensor and Relay Module. The image illustrates the physical dimensions of both the sensor board (5cm x 4cm) and the relay module (5cm x 2.6cm).
3. Specifications
The following table details the technical specifications of the Walfront 12V Rain Detection Module:
| Specification | Value |
|---|---|
| Product Dimensions | 3.54 x 3.15 x 1.18 inches |
| Item Model Number | Wal front42in3gprgx |
| Current Rating | 10 Amps |
| Connector Type | Screw |
| Number Of Contacts | 2 |
| Mounting Type | Surface |
| Material | Metal, Plastic |
| Color | Blue |
| Voltage | 12 Volts |
4. Setup
Follow these steps to properly set up your Raindrops Sensor module:
- Connect the Sensor Board: Connect the rain detection sensor board to the relay control module using the provided jumper wires. Ensure the connection is secure.
- Power Connection: Connect the 12V DC power supply to the VCC (positive) and GND (negative) terminals on the relay module. The power indicator LED (red) should illuminate.
- Load Connection: Connect your external device (load) to the relay terminals (NO, COM, NC) as required by your application.
- NO (Normally Open): The circuit is open when the relay is inactive (no rain detected) and closes when activated (rain detected).
- COM (Common): The common terminal for the relay switch.
- NC (Normally Closed): The circuit is closed when the relay is inactive (no rain detected) and opens when activated (rain detected).
- Positioning: Place the rain detection sensor board in an area where it can directly receive raindrops for accurate monitoring.
- Sensitivity Adjustment: Use the onboard potentiometer (blue square component with a screw slot) to adjust the sensitivity of the rain detection. Turning the potentiometer clockwise generally increases sensitivity, meaning it will detect lighter rain. Turning it counter-clockwise decreases sensitivity, requiring more rain for activation.

Figure 4.1: Wiring Diagram for the 12V Raindrops Controller Module. This diagram illustrates how to connect the sensor, power, and an external load (equipment) to the relay module. It shows connections for both normally open and normally closed relay configurations.
5. Operating Instructions
Once the module is set up and powered, its operation is straightforward:
- Power Indicator: The red LED on the relay module indicates that the module is receiving power.
- Detection Principle: When raindrops fall onto the sensor board, the conductivity between the interleaved traces changes. This change is detected by the module.
- Relay Activation: Upon detecting rain (and exceeding the set sensitivity threshold), the relay on the module will activate. The green LED (switch indicator) will illuminate, and you may hear a faint click from the relay.
- Load Control: When the relay activates, it will switch the connection for the connected load according to whether it's wired to the NO or NC terminals. For example, if connected to NO, the load will turn on when rain is detected.
- Deactivation: When the rain stops and the sensor board dries, the conductivity returns to its original state, causing the relay to deactivate and the green LED to turn off.
6. Maintenance
To ensure the longevity and accurate performance of your Raindrops Sensor, consider the following maintenance tips:
- Regular Cleaning: Periodically inspect the sensor board for dirt, debris, or mineral deposits that may accumulate from rainwater. Gently clean the surface with a soft, damp cloth. Avoid abrasive cleaners or harsh chemicals.
- Sensor Surface Integrity: The sensor board features a plating surface for improved oxidation and electrical conductivity. Avoid scratching or damaging this surface, as it can affect performance.
- Connection Check: Ensure all electrical connections (jumper wires, power, and load connections) remain secure and free from corrosion.
- Environmental Protection: While designed for outdoor use, protecting the module from extreme weather conditions (e.g., direct prolonged sunlight, freezing temperatures, heavy impacts) can extend its lifespan. Consider an appropriate enclosure if exposed to harsh elements.
- Sensitivity Re-calibration: If environmental conditions change significantly or if you notice inconsistent detection, re-adjust the sensitivity potentiometer as needed.
7. Troubleshooting
If you encounter issues with your Raindrops Sensor module, refer to the following troubleshooting guide:
| Problem | Possible Cause | Solution |
|---|---|---|
| No power indicator (red LED off) | No power supply, incorrect voltage, or reversed polarity. | Verify 12V DC power supply is connected correctly to VCC and GND. Check power source. |
| Relay does not activate when rain is present (green LED off) | Sensitivity set too low, sensor board not wet enough, faulty sensor connection, or damaged sensor board. | Adjust potentiometer clockwise to increase sensitivity. Ensure sensor board is adequately exposed to rain. Check jumper wire connections between sensor and module. Inspect sensor board for physical damage. |
| Relay is always active or activates with minimal moisture | Sensitivity set too high, sensor board is dirty/wet, or environmental humidity is too high. | Adjust potentiometer counter-clockwise to decrease sensitivity. Clean and dry the sensor board. Consider relocating the sensor if high ambient humidity is causing false positives. |
| Connected load does not respond to relay activation | Incorrect load wiring (NO/NC/COM), load requires different voltage/current, or faulty load. | Review the wiring diagram (Figure 4.1) and ensure the load is connected to the correct relay terminals. Verify the load's power requirements are within the relay's 10A/12VDC or 10A/250VAC limits. Test the load independently. |
| Intermittent or unreliable detection | Loose connections, sensor board contamination, or fluctuating power supply. | Check all connections for tightness. Clean the sensor board thoroughly. Ensure a stable 12V DC power supply. |
8. Warranty and Support
Walfront products are manufactured to high-quality standards. For specific warranty information, including terms and conditions, please refer to the product packaging or contact Walfront customer support directly. Keep your purchase receipt as proof of purchase.
For technical assistance, troubleshooting beyond this manual, or inquiries regarding your product, please visit the official Walfront website or contact their customer service department. Contact information can typically be found on the product packaging or on the Walfront brand store page on Amazon.
Walfront Store Link: Visit the Walfront Store on Amazon


