
1. Introduction
Welcome to the OSOYOO Robot Car Starter Kit V2.1 for Arduino. This kit is designed to provide an engaging and educational experience in robotics, programming, and electronics. It is suitable for beginners, enthusiasts, and professionals interested in STEM fields. The robot car supports various functionalities including remote control via Android and iOS apps, line tracking, object following, and obstacle avoidance.
This manual will guide you through the assembly, operation, and maintenance of your OSOYOO Robot Car. Please read all instructions carefully before beginning.
2. Product Features
- App Control: Control the robot car using Android and iOS applications via WiFi or Bluetooth.
- Multiple Functions: Supports line tracking, object motion following, obstacle avoidance, and gravity sensing control.
- Programming Education: Fully compatible with the Arduino R3 board, ideal for learning circuit creation, sensor programming, and IoT concepts.
- Comprehensive Kit: Includes essential components such as Arduino R3 board, USB cable, motor driver module, WiFi shield, Bluetooth module, ultrasonic sensor, servo motor, line tracking modules, obstacle sensors, buzzer, IR remote, battery box, motors, wheels, and various jumper wires.
- Detailed Tutorials: Comes with a basic tutorial CD including videos, pictures, sample project code, and step-by-step instructions for easy assembly and programming.
3. What's in the Box
The OSOYOO Robot Car Starter Kit V2.1 includes the following components:
- Basic Board for Arduino R3
- USB Cable
- Model X Motor Driver Module
- WiFi Shield for UNO
- Bluetooth Module
- Ultrasonic Sensor & Holder
- Servo Motor
- 5 Line Tracking Modules
- 2 Obstacle Sensors
- Buzzer Sensor Module
- Infrared (IR) Remote, Receiver, & Transmitter
- Battery Box (Note: Batteries are not included)
- 9V Battery Case
- Voltage Meter
- 2 Piece Acrylic Car Chassis
- 4 Motors & Metal Motor Holders
- 4 Wheels
- 2 x 8-Pin Female to Female Jumper Wires (20 cm)
- 2 x 20-Pin Male to Female Jumpers (20 cm)
- 1 Male to 5 Female Jumper Wire
- 3-Pin Female to Female Jumper
- 6 Pin Male to Female Jumper
- Screws & Nuts for Sensor and Module Assembly
- Philips Screwdriver
- Basic Tutorial CD with Video, Pictures, Sample Project Code, & Step-by-Step Instructions

4. Setup and Assembly
Follow these general steps to assemble your OSOYOO Robot Car. Refer to the detailed tutorial CD for specific, step-by-step instructions, diagrams, and video guides.
- Chassis Assembly: Begin by assembling the two-piece acrylic car chassis. Secure the motor holders to the chassis using the provided screws and nuts.

Figure 4.1: Diagram of the acrylic chassis components. - Motor Installation: Attach the four motors to the motor holders on the chassis. Ensure they are securely fastened.

Figure 4.2: Detail of motor and metal gear holder attachment. - Wheel Attachment: Mount the four wheels onto the motor shafts. Use the provided screwdriver to tighten any retaining screws.
Figure 4.3: Attaching the wheels to the robot car chassis. - Sensor and Module Installation: Install the ultrasonic sensor, line tracking modules, obstacle sensors, and other modules onto the chassis as indicated in the tutorial.

Figure 4.4: Placement of the ultrasonic sensor and other electronic modules. - Wiring Connections: Connect all components (motors, sensors, Arduino board, motor driver, WiFi/Bluetooth modules) using the provided jumper wires. Pay close attention to polarity and pin assignments as detailed in the tutorial.

Figure 4.5: Assortment of jumper wires for connecting components. - Battery Installation: Insert the required batteries into the battery box. Ensure correct polarity. The kit requires 18650 3.7V batteries (not included).

Figure 4.6: Battery compartment and 9V battery case details. - Initial Power-Up: After assembly, connect the Arduino board to your computer via the USB cable to upload the initial code. Follow the programming instructions provided in the tutorial.

Figure 4.7: Connecting the robot car to a computer for programming.
5. Operating Instructions
The OSOYOO Robot Car V2.1 offers multiple operating modes and control methods. Ensure the appropriate code is uploaded to the Arduino board for the desired functionality.
5.1. Remote Control via App (WiFi/Bluetooth)
Download the OSOYOO robot car control app from your device's app store. Connect your smartphone or tablet to the robot car via WiFi or Bluetooth, depending on the module installed and code uploaded. Use the on-screen controls to drive the car, activate sensors, and switch modes.
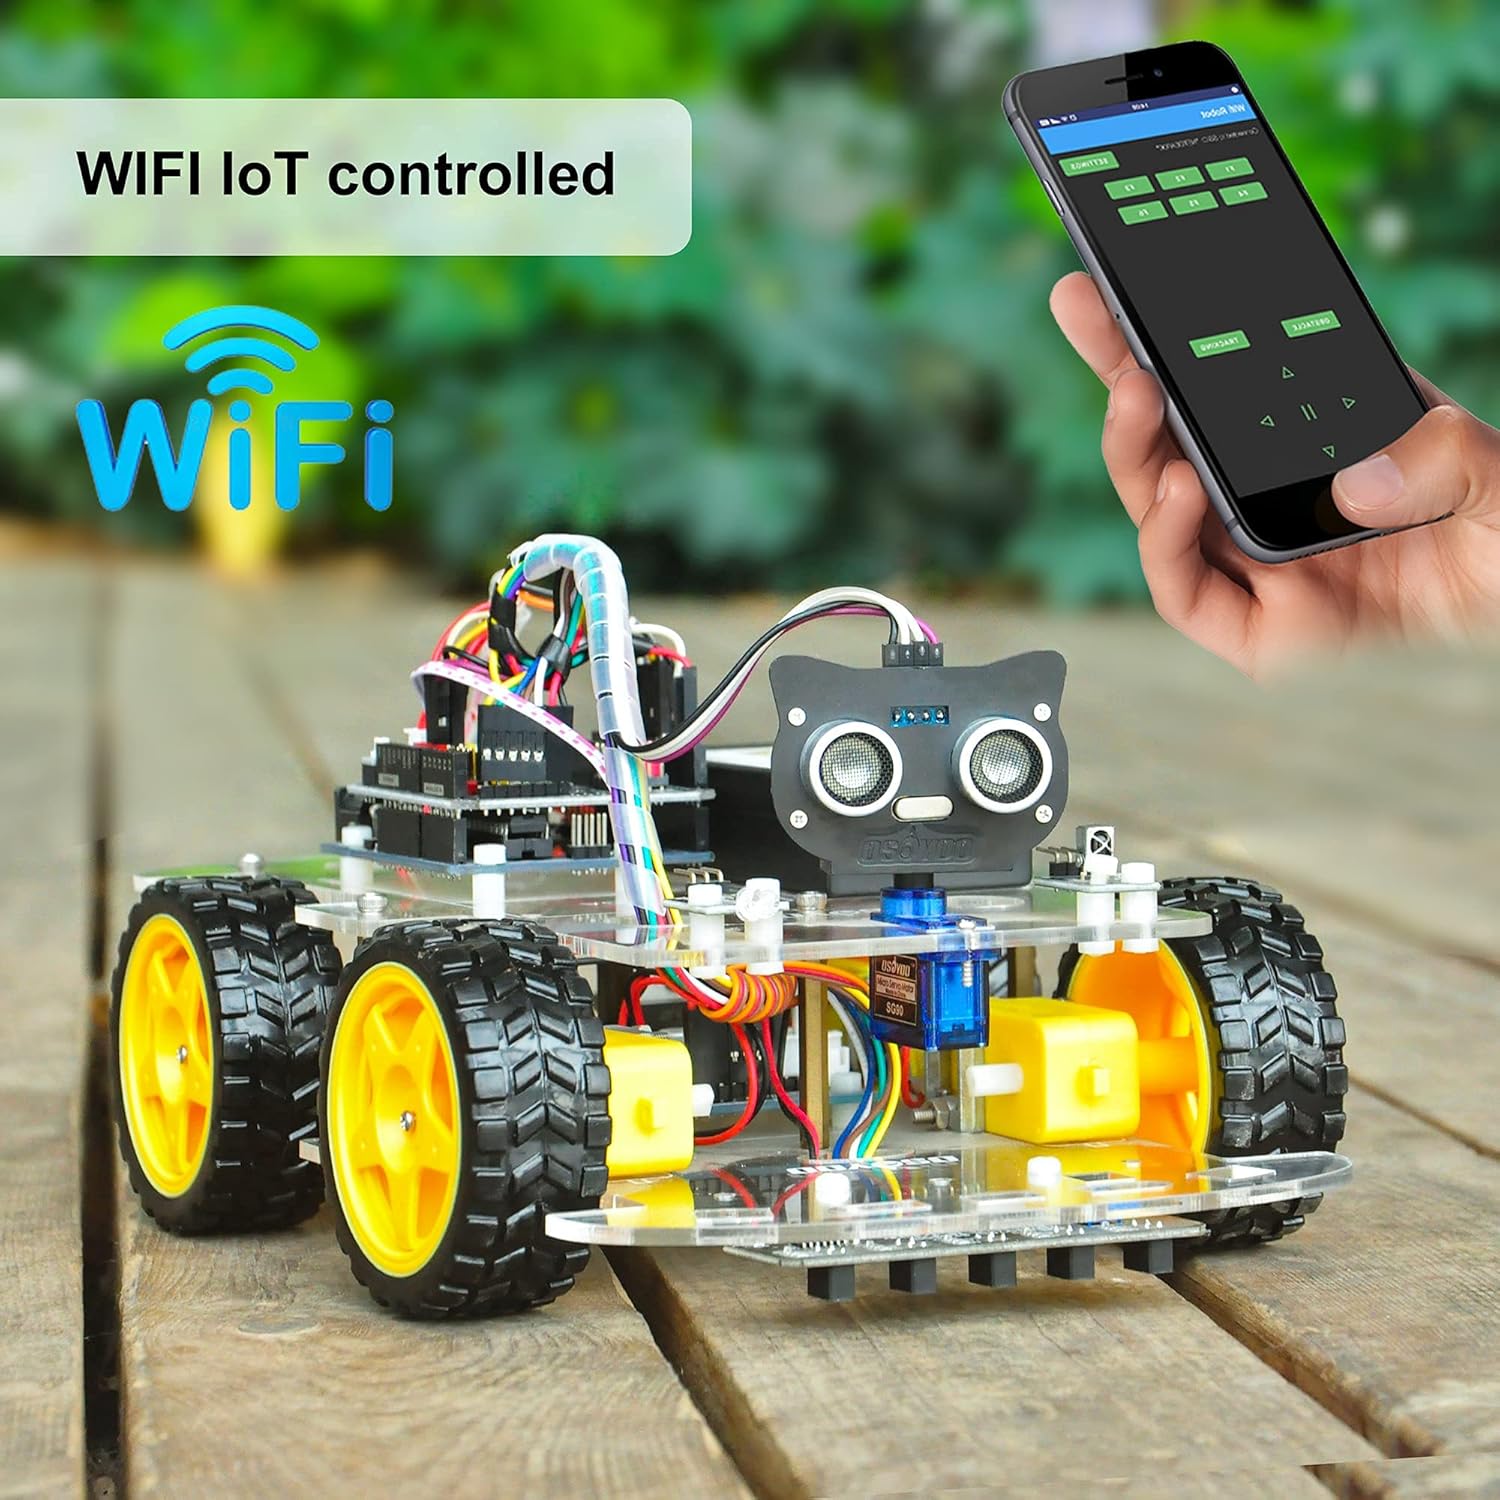


5.2. Infrared (IR) Remote Control
Use the included IR remote control to operate the robot car. Point the remote at the IR receiver on the car and press the directional buttons to move it.


5.3. Line Tracking Mode
In line tracking mode, the robot car uses its line tracking sensors to follow a black line on a light-colored surface. Ensure the sensors are calibrated correctly according to the tutorial.


5.4. Obstacle Avoidance Mode
When programmed for obstacle avoidance, the robot car uses its ultrasonic sensor to detect objects in its path and automatically navigate around them.

5.5. Object Following Mode
In object following mode, the robot car can be programmed to follow a moving object, such as a hand, using its sensors.


5.6. Robot Laser Tag (Battle Bots)
If you have two or more OSOYOO Robot Car kits, you can program them for battle bot mode, engaging in robot laser tag. This mode requires specific programming and setup as detailed in the advanced tutorials.

5.7. Official Product Video
Watch the official product video for a visual demonstration of the OSOYOO Robot Car's features and capabilities.
6. Maintenance
- Cleaning: Use a soft, dry cloth to clean the robot car. Avoid using liquids or harsh chemicals, especially near electronic components.
- Battery Care: Remove batteries if the robot car will not be used for an extended period. Ensure batteries are charged correctly and dispose of old batteries responsibly.
- Component Check: Periodically inspect all connections and components for looseness or damage. Tighten screws and re-seat wires as needed.
- Software Updates: Check the OSOYOO website or tutorial resources for any available software or firmware updates for the Arduino board or control app.
7. Troubleshooting
If you encounter issues with your OSOYOO Robot Car, refer to the following common troubleshooting steps. For more detailed solutions, consult the provided tutorial CD or the OSOYOO support website.
- Car Not Moving:
- Check battery levels and ensure they are correctly installed.
- Verify all motor connections are secure.
- Confirm the correct code is uploaded to the Arduino board and that the motor driver is functioning.
- Connectivity Issues (WiFi/Bluetooth):
- Ensure the WiFi or Bluetooth module is correctly connected and powered.
- Restart both the robot car and your control device (smartphone/tablet).
- Verify the app settings and network configuration match the robot car's setup.
- Sensors Not Responding:
- Check all sensor wiring for loose connections or incorrect pin assignments.
- Ensure the sensors are clean and unobstructed.
- Verify the sensor code in the Arduino program is correct and uploaded.
- Erratic Movement:
- Recheck all wiring connections, especially for motors and motor drivers.
- Ensure the chassis is assembled correctly and wheels are securely attached.
- Review the uploaded code for any logical errors or incorrect speed/direction settings.
8. Specifications
| Feature | Detail |
|---|---|
| Brand | OSOYOO |
| Model Number | V2.1 |
| Age Range Description | Over 15 years old |
| Educational Objective | Coding Skills, Construction Skills, Creative Skills, Logical Thinking, Motor Skills, Problem Solving Skills, Programming Skills, STEM |
| Material Type | Acrylic |
| Assembly Required | Yes |
| Item Dimensions (L x W x H) | 10 x 7 x 5 inches |
| Item Weight | 1.24 Kilograms |
| Included Components | Tracking sensor, ultrasonic sensor, Model X motor shield |
9. Warranty and Support
OSOYOO is committed to providing high-quality products and customer satisfaction. This product comes with a hassle-free warranty. For specific warranty details, please refer to the documentation included with your kit or visit the official OSOYOO website.
For technical support, assembly assistance, or any questions regarding your OSOYOO Robot Car Starter Kit, please contact OSOYOO customer support. Our team is ready to provide responsive assistance.
You can find additional resources, tutorials, and FAQs on the OSOYOO website: OSOYOO Official Store.