1. Introduction
This manual provides detailed instructions for the installation, operation, and maintenance of your Yasorn eMylo Smart Wireless RF Motor Controller Switch. This device is designed to control the forward, reverse, and stop functions of various motors using a 433Mhz RF remote control. Please read this manual thoroughly before installation and use to ensure proper function and safety.

Image 1.1: Two eMylo Smart Wireless RF Motor Controller Switches with accompanying remote controls.
2. Safety Information
Warning: Electrical installation should only be performed by qualified personnel. Always disconnect power before installing or servicing this device. Failure to follow these instructions may result in electric shock, fire, or serious injury.
- Ensure the power supply voltage matches the specifications of the controller (90V-250V AC).
- Do not expose the device to moisture or extreme temperatures.
- Keep the device away from children.
- Do not attempt to disassemble or modify the controller.
3. Product Features
- Motor RF Wireless Remote Control: Specifically designed for motor control, enabling forward, reverse, and stop functions via remote.
- Excellent Stability: The relay module offers high signal sensitivity and resistance to interference.
- Strong Signal: RF signals can penetrate walls, floors, and doors, allowing control from a reliable distance (20-50 meters).
- Easy Installation: Pre-welded wires simplify installation, eliminating the need for opening the casing or using screwdrivers for wire connections.
- Wide Application: Utilizes non-directional wireless encoding for independent control, suitable for rolling doors, electric curtains, electric door locks, water pumps, and other motor-driven machinery.

Image 3.1: Key features of the eMylo Smart Wireless RF Motor Controller Switch.

Image 3.2: Illustration of the remote control's effective range (20-50 meters).

Image 3.3: Examples of applications for the eMylo motor controller.
4. Specifications
| Attribute | Detail |
|---|---|
| Model Number | YSE115A2 |
| Input Voltage | 90V-250V AC |
| RF Frequency | 433Mhz |
| Material | ABS |
| Item Weight | 6.4 ounces |
| Package Dimensions | 6 x 2.4 x 2 inches |
| Batteries Included | No |
| Batteries Required | No |
5. Installation
The eMylo motor controller is designed for straightforward installation with pre-wired input and output lines. This eliminates the need to open the device casing for wiring.
Wiring Diagram:

Image 5.1: Simplified wiring diagram for the eMylo motor controller.
- Disconnect Power: Before starting any wiring, ensure the main power supply to the circuit is completely disconnected.
- Connect Power Input: Connect the AC 90-250V power supply to the input wires of the controller. Typically, the black wire is the Live line and the red wire is the Null line. Refer to local electrical codes for proper identification.
- Connect Motor Load: Connect your motor's power input to the output wires of the controller. The blue wire is typically for one direction (e.g., forward), and the red wire for the other (e.g., reverse). The black wire is the common/neutral for the motor.
- Secure Connections: Ensure all wire connections are secure and properly insulated.
- Restore Power: Once all connections are verified, restore power to the circuit.
6. Operation
The eMylo motor controller operates using the provided RF remote control. The remote typically features buttons for controlling motor direction and stopping.
Basic Remote Control Functions:
- Up Arrow Button: Activates the motor in one direction (e.g., forward/up).
- Down Arrow Button: Activates the motor in the opposite direction (e.g., reverse/down).
- Middle Button: Stops the motor.
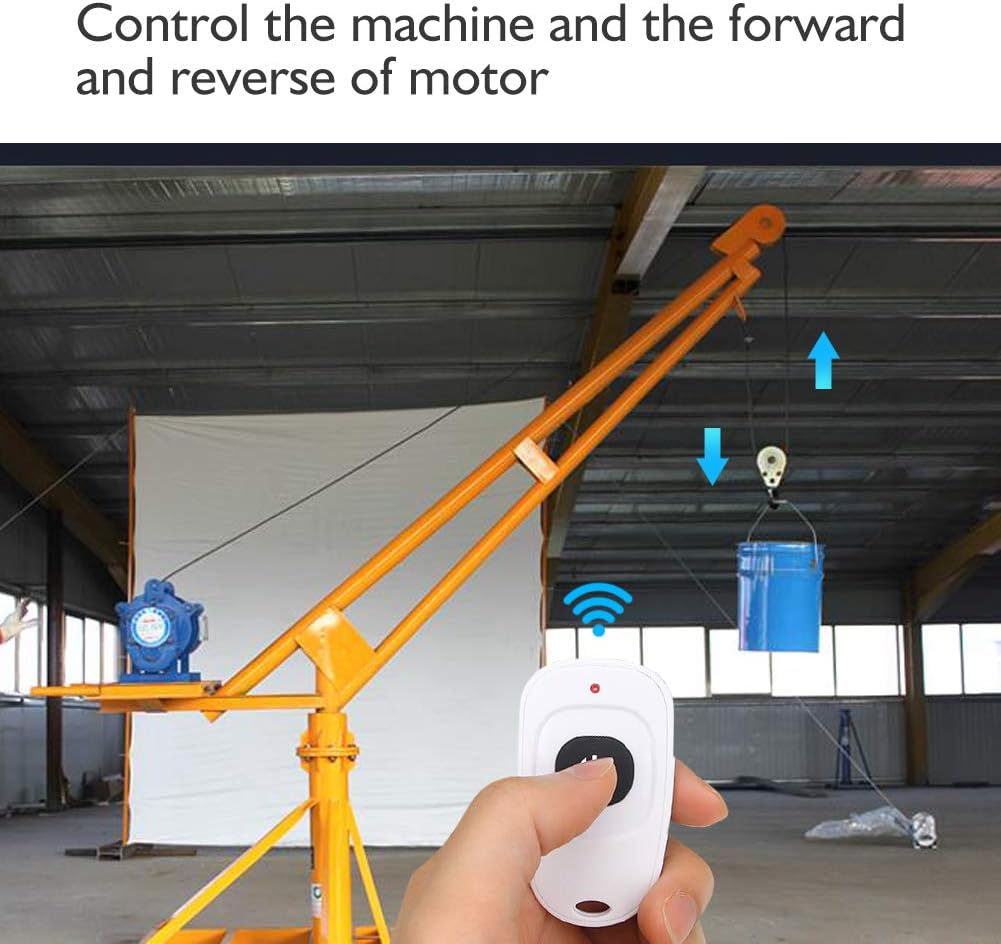
Image 6.1: Demonstrating remote control of a motor's forward and reverse movement.
Operational Modes:
The controller typically supports different operational modes, such as Latching (motor runs until stopped) or Momentary (motor runs only while button is pressed). The default mode is usually Latching. Refer to the pairing section for instructions on how to change modes.
7. Pairing and Mode Setting
The remote controls are usually pre-paired with the receiver. If re-pairing is needed or if you wish to change the operational mode, follow these steps. The small button on the receiver unit is referred to as the 'learning button' or 'motor button' in some documentation.
Pairing a Remote Control:
- Press the learning button on the receiver module once. The indicator light on the module will illuminate.
- Press any button on the remote control you wish to pair. The indicator light on the module will flash, confirming successful pairing.
- Repeat for any additional remote controls.
Changing Operational Mode (Latching/Momentary):
The process for changing modes often involves specific sequences of pressing the learning button. Due to variations, it is recommended to consult the video demonstration for precise steps.
- For Latching Mode (Default): Typically, a single press of the learning button followed by a remote button press sets the latching mode. In this mode, one press turns the motor on, and another press turns it off.
- For Momentary Mode: This mode usually requires pressing the learning button multiple times (e.g., two or three times) before pressing a remote button. In momentary mode, the motor runs only as long as the remote button is held down.
Note: If you encounter issues, try clearing all paired remotes first by pressing and holding the learning button for approximately 8 seconds until the indicator light flashes rapidly and then turns off. Then, re-pair your remotes in the desired mode.
Video 7.1: Demonstration of pairing the remote control and operating the motor. This video illustrates the process of linking the remote to the receiver and controlling motor direction.
8. Troubleshooting
- Motor not responding:
- Check all wiring connections to ensure they are secure and correct.
- Verify that the power supply to the controller is active.
- Ensure the remote control batteries are functional.
- Re-pair the remote control with the receiver as described in Section 7.
- Remote control range is poor:
- Ensure there are no significant obstructions (e.g., thick metal walls) between the remote and the receiver.
- Check for sources of RF interference in the vicinity.
- Replace remote control batteries if they are low.
- Motor runs continuously or only while button is pressed (unexpected behavior):
- This indicates the operational mode (Latching or Momentary) may be incorrectly set. Refer to Section 7 to adjust the mode.
9. Care and Maintenance
- Keep the controller and remote controls clean and dry.
- Avoid dropping the devices or subjecting them to strong impacts.
- Periodically check wiring connections for any signs of wear or looseness.
- Replace remote control batteries as needed.
10. Support and Warranty
For technical assistance or inquiries regarding your eMylo Smart Wireless RF Motor Controller Switch, please contact Yasorn customer support. While specific warranty details are not provided in this document, Yasorn is committed to providing quality products and services. Please retain your proof of purchase for any support claims.
You can find more information and contact details by visiting the Yasorn Store on Amazon.