
1. Introduction
This manual provides essential information for the proper installation, function, and maintenance of your Dorman 902-5116 Engine Coolant Thermostat Housing. To ensure optimal performance and safety, please read these instructions thoroughly before attempting any installation or service. This replacement part is engineered to match the fit and durability of the original equipment on specified vehicles.
2. Product Overview
The Dorman 902-5116 is an engine coolant thermostat housing designed to replace the original component in compatible vehicles. Its primary function is to house the engine's thermostat, which regulates the flow of coolant to maintain optimal engine operating temperature. This housing is constructed to withstand extreme temperature changes and resist common issues such as cracking and leaking, ensuring long-term reliability.
Included Components:
- 1 x Dorman 902-5116 Engine Coolant Thermostat Housing

Figure 2.1: Front view of the Dorman 902-5116 Engine Coolant Thermostat Housing, showing the main coolant inlet/outlet and mounting points.

Figure 2.2: Angled view of the thermostat housing, highlighting its various ports and threaded connections.
3. Compatibility
This Dorman 902-5116 Engine Coolant Thermostat Housing is compatible with the following vehicle models:
- Acura NSX: 1991, 1992, 1993, 1994, 1995, 1996, 1997, 1998, 1999, 2000, 2001, 2002, 2003, 2004, 2005
It is crucial to verify compatibility with your specific vehicle's make, model, and trim level before installation. Consult your vehicle's service manual or a qualified automotive professional for precise fitment information.
4. Safety Information
Automotive repairs can be hazardous. Always prioritize safety by following these guidelines:
- Ensure the engine is completely cool before beginning any work on the cooling system. Hot coolant and engine components can cause severe burns.
- Wear appropriate personal protective equipment, including safety glasses and gloves, to protect against splashes and sharp edges.
- Coolant is toxic. Handle with care and dispose of it responsibly according to local regulations. Do not ingest.
- Work in a well-ventilated area.
- Use proper tools and equipment for the task.
- If you are unsure about any step, consult a qualified automotive technician.
Proposition 65 Warning: This product may contain chemicals known to the State of California to cause cancer and birth defects or other reproductive harm.
5. Installation
The following steps provide a general guide for replacing an engine coolant thermostat housing. Specific procedures may vary depending on your vehicle's exact configuration. Always refer to your vehicle's official service manual for detailed, model-specific instructions.
Tools and Materials Required:
- Socket/Wrench Set
- Screwdrivers
- Drain Pan
- New Engine Coolant (compatible with your vehicle)
- Gasket Scraper or Wire Brush
- Clean Rags
- New Thermostat (recommended, not included)
- New Gasket/O-ring (recommended, not included)
Installation Steps:
- Prepare the Vehicle: Park the vehicle on a level surface and allow the engine to cool completely. Disconnect the negative terminal of the battery.
- Drain Coolant: Place a suitable drain pan under the radiator. Open the radiator drain cock or remove the lower radiator hose to drain the engine coolant. Collect all coolant for proper disposal.
- Locate Thermostat Housing: Identify the existing thermostat housing, typically located at the engine end of the upper radiator hose.
- Remove Hoses and Sensors: Carefully disconnect any coolant hoses attached to the housing and any electrical connectors for sensors (e.g., coolant temperature sensor). Use appropriate tools to avoid damage.
- Remove Old Housing: Unbolt the old thermostat housing from the engine block or intake manifold. Keep track of all fasteners.
- Clean Mounting Surface: Thoroughly clean the engine's mounting surface where the new housing will sit. Remove all traces of old gasket material, corrosion, or debris using a gasket scraper or wire brush. A clean surface is critical for a leak-free seal.
- Install New Thermostat (Optional but Recommended): If replacing the thermostat, ensure it is correctly oriented within the new Dorman housing according to the manufacturer's specifications.
- Install New Housing: Place a new gasket or O-ring onto the clean mounting surface or the new housing. Position the Dorman 902-5116 thermostat housing and hand-tighten the bolts. Then, tighten the bolts evenly to the torque specifications provided in your vehicle's service manual. Overtightening can cause damage.
- Reconnect Hoses and Sensors: Reattach all coolant hoses and electrical connectors securely. Ensure hose clamps are tight.
- Refill Coolant: Close the radiator drain cock or reattach the lower radiator hose. Refill the cooling system with the recommended type and amount of new engine coolant.
- Bleed Air from System: Start the engine and allow it to reach operating temperature with the heater on full. Monitor the coolant level and add more as needed. Follow your vehicle's specific procedure for bleeding air from the cooling system to prevent air pockets.
- Inspect for Leaks: After the engine has reached operating temperature and the cooling system has been bled, carefully inspect the new thermostat housing and all connections for any signs of coolant leaks.
- Reconnect Battery: Reconnect the negative battery terminal.

Figure 5.1: Bottom view of the thermostat housing, illustrating the internal cavity where the thermostat is seated and the gasket surface.
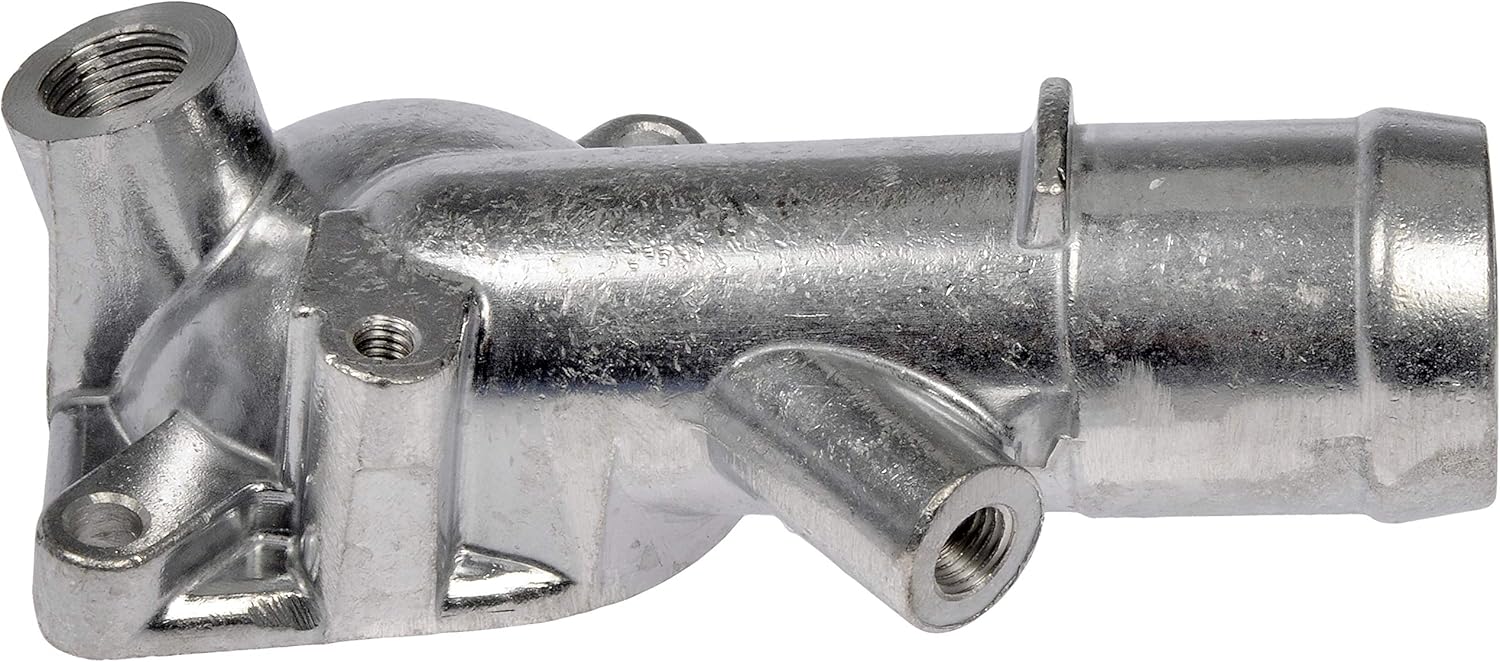
Figure 5.2: Side view of the thermostat housing, showing the various hose connections and mounting points from a different angle.
6. Operation
The Dorman 902-5116 Engine Coolant Thermostat Housing itself does not have user-operable controls. Its function is passive, serving as a critical component within the engine's cooling system. It provides a secure enclosure for the thermostat, which is responsible for regulating the engine's operating temperature by controlling the flow of coolant between the engine and the radiator. When the engine is cold, the thermostat remains closed, allowing the engine to warm up quickly. As the engine reaches its optimal temperature, the thermostat opens, permitting coolant to circulate through the radiator for cooling. This continuous regulation ensures efficient engine performance and prevents overheating or overcooling.
7. Maintenance
Proper maintenance of your vehicle's cooling system is essential for the longevity of the Dorman 902-5116 Thermostat Housing and overall engine health.
- Regular Coolant Checks: Periodically check your coolant level and condition. Ensure it is at the recommended level and free from contaminants.
- Inspect for Leaks: Regularly inspect the thermostat housing and surrounding hoses for any signs of coolant leaks, such as drips, stains, or a sweet odor. Address any leaks promptly.
- Coolant Flush: Follow your vehicle manufacturer's recommendations for coolant flush and replacement intervals. Using fresh, clean coolant helps prevent corrosion and maintains system efficiency.
- Hose Inspection: Check coolant hoses for cracks, bulges, or softness, and replace them as needed.
8. Troubleshooting
If you experience issues related to your vehicle's cooling system after installing the thermostat housing, consider the following:
- Coolant Leaks: If leaks are present around the housing, re-check bolt torque, ensure the gasket/O-ring is properly seated, and inspect the housing for any damage.
- Engine Overheating: This could indicate a stuck-closed thermostat (if replaced), air in the cooling system, low coolant level, or other cooling system issues. Ensure the system is properly bled of air.
- Engine Running Cold: This might suggest a stuck-open thermostat (if replaced).
- Warning Lights: If a check engine light or temperature warning light illuminates, consult your vehicle's diagnostic system for trouble codes.
For persistent or complex issues, it is recommended to seek assistance from a certified automotive technician.
9. Specifications
| Specification | Detail |
|---|---|
| Brand | Dorman |
| Model Name | Dorman 902-5116: Engine Coolant Thermostat Housing |
| Item Model Number | 902-5116 |
| Manufacturer Part Number | 902-5116 |
| OEM Part Number | 815618; 85308; CH5308; 19311PR7A00 |
| Included Components | 1 Thermostat Housing |
| Item Weight | 7.5 ounces |
| Package Dimensions | 5.8 x 4.8 x 3.5 inches |
| UPC | 885484677449 |
10. Warranty and Support
Dorman products are designed for quality and durability. For specific warranty information regarding the Dorman 902-5116 Engine Coolant Thermostat Housing, please refer to the warranty documentation provided with your purchase or contact Dorman customer support directly. Dorman is committed to providing reliable replacement solutions for the automotive aftermarket.
For further assistance or technical inquiries, please visit the official Dorman website or contact their customer service department.
