
1. Introduction
This manual provides detailed instructions for the safe and efficient installation, operation, and maintenance of your BSOD LED Panel Light 9W Cool White. Please read this manual thoroughly before installation and retain it for future reference. This product is designed for indoor use in various residential and commercial settings.
2. Safety Information
WARNING: Risk of electric shock. Installation should be performed by a qualified electrician or a person with electrical knowledge to avoid electric shock or fire hazard.
- Ensure power is turned off at the circuit breaker before installation, maintenance, or cleaning.
- Do not attempt to modify the product. Any modifications may void the warranty and create safety hazards.
- This product is designed for indoor use only. Do not expose to moisture or outdoor elements.
- Verify that the supply voltage is compatible with the product's operating voltage (AC 85-265V).
- Ensure proper grounding according to local electrical codes.
3. Package Contents
Carefully unpack the box and ensure all items are present and undamaged. If any items are missing or damaged, contact your retailer.
- 1 x BSOD LED Panel Light (9W Cool White)
- 1 x LED Driver
- 2 x Mounting Springs

Image: The BSOD LED Panel Light, showing the main light panel, the connected LED driver, and the two mounting springs.
4. Specifications
| Brand | BSOD |
| Model | LED Panel Light 9W |
| Power Consumption | 9W |
| Light Color | Cool White (6000-6500K) |
| Lumen Output | 720-810 LM |
| Voltage | AC 85-265V (Universal) |
| Lifespan | >20,000 hours |
| Dimmable | No (Standard model) |
| Material | Acrylic + Aluminum |
| Product Dimensions | 6"L x 6"W x 0.5"H (Approximate) |
| Installation Type | Recessed |

Image: Illustration of the Cool White light output (6000-6500K) from the LED panel.
5. Installation Instructions
Follow these steps carefully for proper installation. Professional installation is recommended.
- Prepare the Ceiling: Turn off the main power supply at the circuit breaker. Mark and cut a circular hole in the ceiling for the recessed light. Ensure the hole size is appropriate for the fixture (refer to product dimensions for cutout size).
- Attach Springs: Securely attach the two provided mounting springs to the designated slots on the back of the LED panel light.
- Electrical Connection: Connect the LED driver to your AC 85-265V power supply wires. The driver typically has two input wires (live and neutral) and two output wires that connect to the LED panel. Ensure all connections are secure and insulated according to local electrical codes.
- Insert Fixture: Gently push the LED panel light into the prepared ceiling hole. The mounting springs will retract and then expand to hold the fixture firmly in place against the ceiling.
- Final Check: Ensure the light is flush with the ceiling and securely installed.
- Restore Power: Turn the main power supply back on at the circuit breaker.

Image: Visual guide illustrating the steps for installing the recessed LED panel light, including preparing the ceiling, connecting wires, and securing the fixture with springs.

Image: Rear view of the LED panel light, showing the heat sink and the attachment points for the mounting springs.
6. Operating Instructions
The BSOD LED Panel Light is designed for simple operation.
- Once installed and connected to a power source, the light can be controlled via a standard wall switch connected to the circuit.
- Flip the switch to the 'ON' position to illuminate the light.
- Flip the switch to the 'OFF' position to turn off the light.
- This model is not dimmable. Do not connect to a dimmer switch unless a compatible dimmable driver is installed separately.
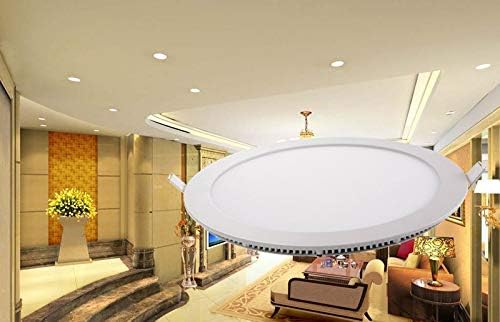
Image: Example of BSOD LED panel lights installed in a ceiling, providing illumination to a modern room.
7. Maintenance
Regular maintenance ensures optimal performance and longevity of your LED panel light.
- Cleaning: Ensure the power is off before cleaning. Use a soft, dry, or slightly damp cloth to wipe the surface of the light. Do not use abrasive cleaners, solvents, or harsh chemicals, as these can damage the finish or electrical components.
- Inspection: Periodically inspect the light for any signs of damage or loose connections. If any issues are found, turn off the power and consult a qualified electrician.
- Replacement: LED lights have a long lifespan and typically do not require bulb replacement. If the fixture stops working, it may indicate an issue with the LED driver or the panel itself, requiring replacement of the entire unit.
8. Troubleshooting
If you encounter issues with your LED panel light, refer to the following common problems and solutions:
| Problem | Possible Cause | Solution |
|---|---|---|
| Light does not turn on. | No power supply. Loose wiring connection. Faulty LED driver. Damaged LED panel. | Check circuit breaker and wall switch. Turn off power and check all wire connections. Replace the LED driver. Replace the entire fixture. |
| Light flickers. | Unstable power supply. Loose wiring. Incompatible dimmer switch (if used). Faulty LED driver. | Ensure stable power. Consult electrician. Turn off power and check connections. Remove dimmer or replace with compatible one. Replace the LED driver. |
| Light is dim. | Incorrect voltage. Aging LED driver. | Verify correct voltage (AC 85-265V). Replace the LED driver. |
If the problem persists after attempting these solutions, please contact customer support or a qualified electrician.
9. Warranty and Support
This BSOD LED Panel Light comes with a limited warranty. Please refer to the product packaging or your purchase documentation for specific warranty terms and conditions. For technical support, replacement parts, or warranty claims, please contact your retailer or the manufacturer directly.
Manufacturer: BOSENDA
UPC: 703064787107