Introduction
This manual provides detailed instructions for the Walfront DC 12V Electric Motor RS-550. This high-speed micro motor is designed for various applications, including electric hand drills, electric screwdrivers, audio and video equipment, office automation, computer peripherals, and industrial automation equipment. Please read this manual thoroughly before installation and operation to ensure safe and efficient use of the product.
Safety Information
- Electrical Safety: Ensure the power supply matches the motor's rated voltage (12V DC). Incorrect voltage can damage the motor or pose a safety risk.
- Proper Handling: Handle the motor with care. Avoid dropping or subjecting it to excessive force.
- Ventilation: Ensure adequate ventilation around the motor during operation to prevent overheating.
- Installation: Always disconnect power before installing or performing maintenance on the motor.
- Moving Parts: Keep hands and loose clothing away from moving parts during operation.
- Environment: Do not operate the motor in wet or excessively dusty environments.
Product Overview
Features:
- High Quality Construction: Made from durable materials, designed for wear resistance and longevity. Features precision machining, magnetic material treatment, and insulation treatment for high efficiency and quick response.
- Powerful Performance: Rated speed up to 22000 RPM with a rated torque of 0.02 NM. CE certified for safety and quality.
- Easy Installation: Compact and lightweight design facilitates straightforward installation. Operates with low noise for a quieter working environment.
- Versatile Applications: Suitable for a wide range of uses including hand drills, electric screwdrivers, audio/video equipment (e.g., VCRs), office automation, computer peripherals, CNC machines, and robots.
Components:
The Walfront RS-550 motor consists of a cylindrical metal casing, a rotating shaft, and electrical terminals. The shaft extends from one end, and the electrical terminals are located at the opposite end for power connection.

Image 1: Walfront DC 12V Electric Motor RS-550, showing its cylindrical body and shaft.
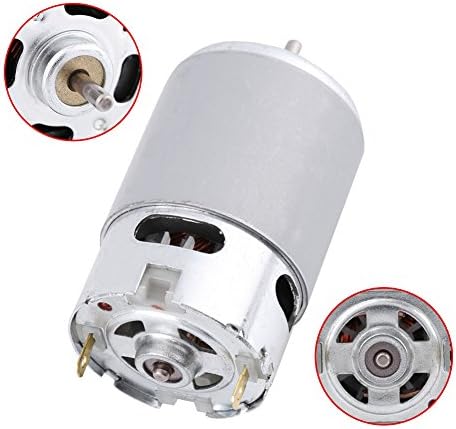
Image 2: Detailed view of the motor, highlighting the shaft and electrical terminals.
Specifications
| Specification | Value |
|---|---|
| Model | RS-550 |
| Rated Power | 0.07 W |
| Product Type | Brush DC Motor |
| Rated Voltage | 12 V |
| Rated Current | 4.5 A |
| Rated Speed | 22000 RPM (Note: Product specifications also list 5800 RPM) |
| Rated Torque | 0.02 NM |
| Dimensions | 57 mm (Length) x 35.8 mm (Diameter) |
| Material | Metal |
| Item Weight | 7.4 ounces |
Setup and Installation
1. Attaching a Gear (if applicable)
If your application requires a gear, carefully attach it to the motor shaft. Ensure the gear is aligned properly and secured firmly. For press-fit gears, use appropriate tools to avoid damaging the motor shaft or bearings.
Video 1: Demonstrates the process of installing a gear onto the motor shaft. It shows padding a piece of metal under the motor, holding the middle shaft against it, and tapping the gear down parallel to the shaft using a hammer.
2. Integrating into a Gearbox (if applicable)
For applications requiring a gearbox, install the motor into the designated slot within the gearbox housing. Align the motor's mounting holes with the corresponding screw holes in the gearbox and secure it with appropriate fasteners.
Video 2: Illustrates installing the motor into a gearbox, aligning it with the screw holes.
3. Electrical Connection
Connect the motor's terminals to your power supply or motor controller. Ensure correct polarity (positive to positive, negative to negative) to avoid damage. The motor typically has two terminals for power input.
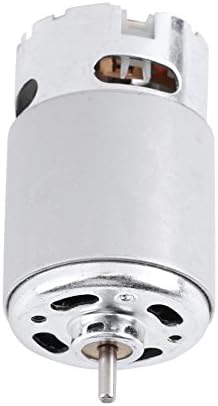
Image 3: Close-up view of the motor's electrical terminals for power connection.
Operating Instructions
1. Basic Operation
Once the motor is securely installed and wired, apply the rated DC voltage (12V) to the terminals. The motor should begin to rotate. Observe the direction of rotation; if it's incorrect for your application, reverse the polarity of the power connection.
Video 3: Shows a mini DC motor connected to a power adapter with adjustable voltage, demonstrating its operation and speed control.
2. Speed Control (with compatible controller)
If using a compatible DC motor speed controller (PWM controller), connect it between your power supply and the motor. Adjust the potentiometer on the controller to vary the motor's speed. Ensure the controller's voltage and current ratings are suitable for the RS-550 motor.
Video 4: Demonstrates connecting a DC motor to a power supply and a PWM motor controller, showing how to adjust the motor speed using the controller's knob.
Maintenance
- Cleaning: Periodically clean the motor exterior to prevent dust and debris buildup, which can affect cooling and performance. Use a soft, dry cloth.
- Inspection: Regularly inspect the motor for any signs of wear, damage, or loose connections. Check the shaft for smooth rotation.
- Lubrication: DC motors typically have sealed bearings that do not require external lubrication. If the motor develops unusual noise or resistance, it may indicate bearing wear, and professional service might be needed.
- Storage: Store the motor in a dry, clean environment when not in use.
Troubleshooting
| Problem | Possible Cause | Solution |
|---|---|---|
| Motor does not start | No power, incorrect wiring, faulty power supply, motor damage. | Check power connections, ensure correct voltage and polarity, test power supply, inspect motor for visible damage. |
| Motor runs slowly or with low power | Insufficient voltage/current, excessive load, worn brushes/bearings. | Verify power supply output, reduce mechanical load, consider motor replacement if internal components are worn. |
| Motor overheats | Excessive load, poor ventilation, prolonged operation at high current. | Reduce load, ensure proper airflow, operate within specified duty cycles. |
| Unusual noise or vibration | Loose mounting, worn bearings, foreign objects. | Check mounting screws, inspect for obstructions, consider professional inspection for internal wear. |
Warranty and Support
For warranty information or technical support, please refer to the product packaging or contact Walfront customer service directly. Keep your purchase receipt as proof of purchase.


