
Carbest 156912352
Contents
Carbest LED TV 18.5" User Manual
Model: Carbest LED TV 18,5" DVB-T2 HDMI (156912352)
1. Introduction
Thank you for choosing the Carbest LED TV 18.5". This television is specifically designed for use in recreational vehicles, offering robust performance against temperature fluctuations and condensation. It features a comprehensive set of functionalities including a built-in DVD player, Triple Tuner (DVB-T2, S2, C), HDMI, and USB connectivity, with flexible 12V and 220V power options.
This manual provides detailed instructions for setup, operation, maintenance, and troubleshooting to ensure you get the most out of your Carbest LED TV.
2. Safety Information
Please read all safety instructions carefully before operating the device. Keep this manual for future reference.
- Power Supply: Use only the provided power adapter or a compatible 12V DC source. Ensure the correct voltage is applied to prevent damage.
- Ventilation: Do not block ventilation openings. Ensure adequate airflow around the TV to prevent overheating.
- Moisture: Do not expose the TV to rain or excessive moisture. While designed for vehicle environments, direct water contact should be avoided.
- Cleaning: Disconnect power before cleaning. Use a soft, dry cloth. Do not use liquid cleaners or aerosol sprays.
- Placement: Place the TV on a stable surface or mount it securely. Avoid placing it in direct sunlight or near heat sources.
- Servicing: Do not attempt to service this product yourself. Refer all servicing to qualified personnel.
3. Package Contents
Please check that all items are present in the package:
- Carbest LED TV 18.5"
- Remote Control
- 12V Power Adapter (for vehicle use)
- 220V AC Power Adapter (for mains use)
- Indoor DVB-T Rod Antenna
- AV Cables (RCA to 3.5mm jack)
- User Manual (this document)

Image: Included accessories for the Carbest LED TV, showing the 12V and 220V power adapters, the indoor DVB-T antenna, and AV cables.
4. Setup
4.1 Unpacking and Placement
Carefully remove the TV and all accessories from the packaging. Place the TV on a stable, flat surface using its integrated stand, or prepare for wall mounting if desired (mounting hardware not included).

Image: Front view of the Carbest LED TV, showcasing its display and stand.
4.2 Connecting Power
The Carbest LED TV supports both 12V DC and 220V AC power inputs.
- For 12V Operation (e.g., in a vehicle): Connect the 12V power adapter cable to the DC IN port on the TV and the other end to your vehicle's 12V power outlet.
- For 220V Operation (mains power): Connect the 220V AC power adapter to the DC IN port on the TV, then plug the adapter into a standard 220V wall socket.
Ensure the power switch on the device (located near the side controls) is in the 'On' position after connecting power.

Image: Close-up of the side panel controls on the Carbest LED TV, including volume, channel, input, menu, and power buttons.

Image: Close-up view of the main power switch located on the side of the Carbest LED TV.
4.3 Connecting Antennas and External Devices
The TV features multiple input ports on the rear panel.
- DVB-T/T2 Antenna: Connect the included indoor DVB-T rod antenna to the 'TV1 (RF)' input for terrestrial digital TV reception.
- Satellite Antenna (DVB-S2): Connect your satellite dish cable to the 'TV2 (F)' input for satellite TV reception.
- Cable TV (DVB-C): Connect your cable TV signal to the 'TV1 (RF)' input.
- HDMI Devices: Connect HDMI cables from devices like Blu-ray players, game consoles, or laptops to the HDMI port.
- USB Devices: Insert USB drives into the USB port for media playback.
- SCART Devices: Connect older devices using a SCART cable to the SCART port.
- VGA Devices: Connect a computer via the VGA port and the PC Audio input.
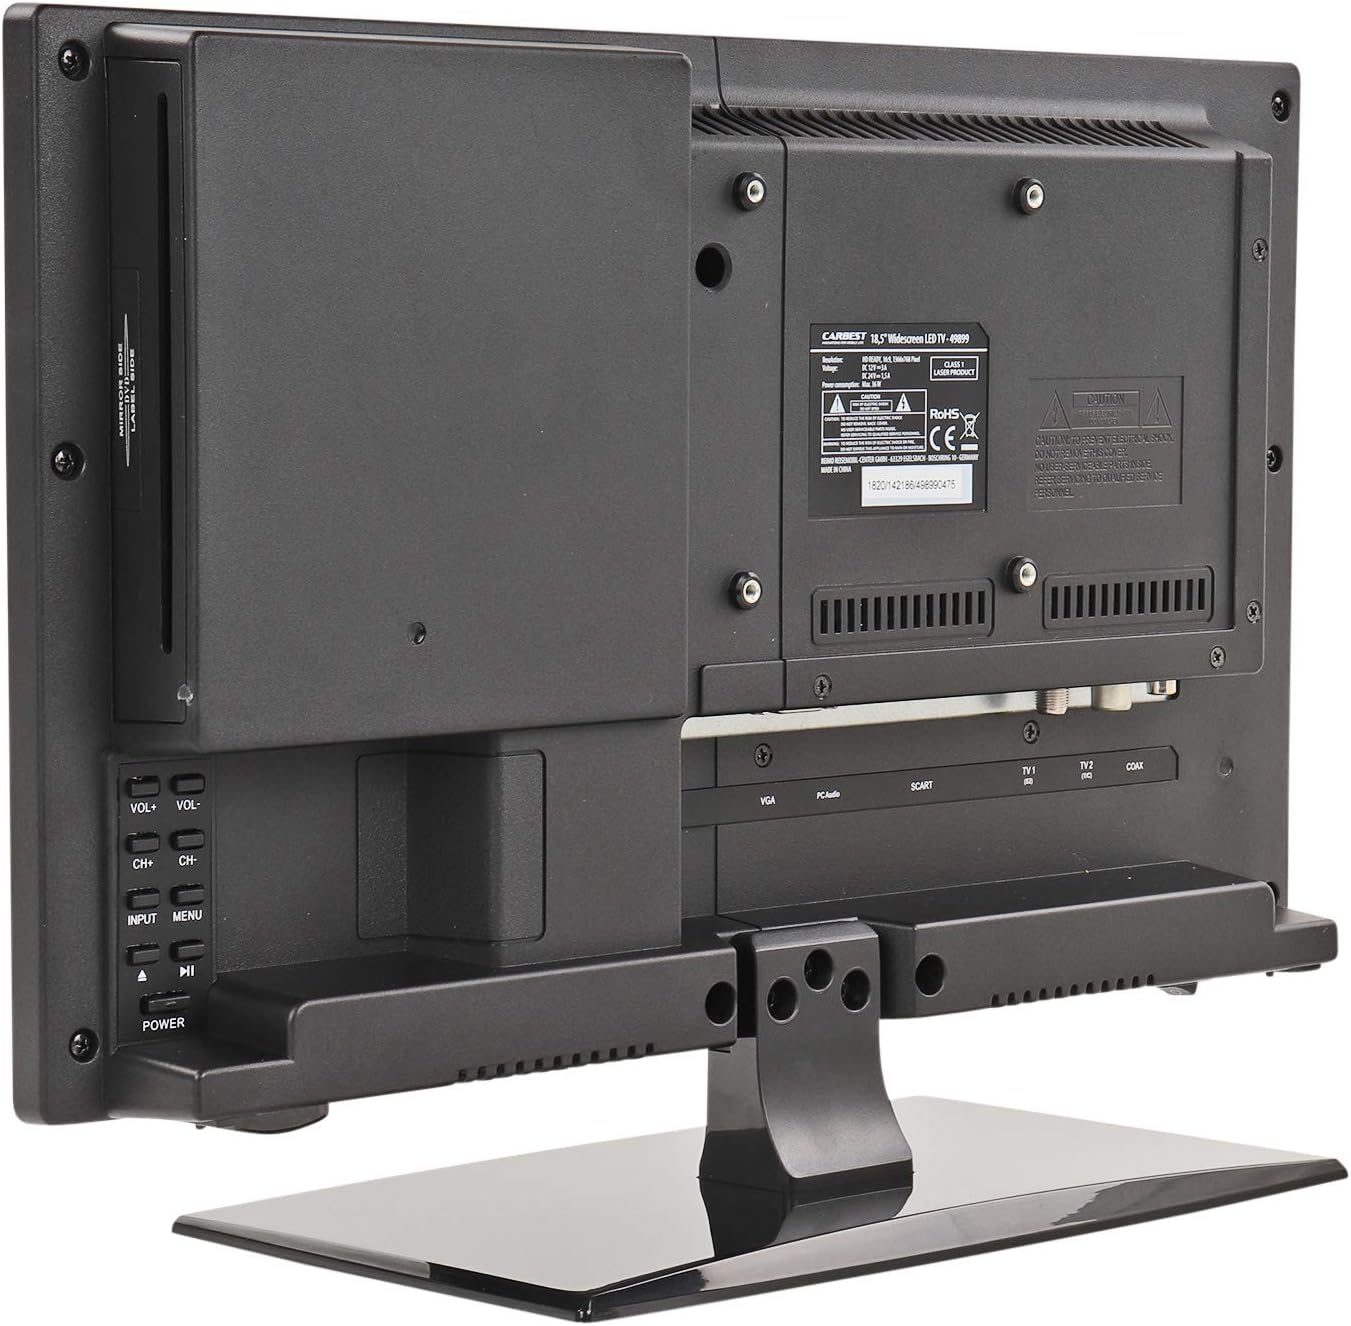
Image: Rear view of the Carbest LED TV, highlighting the various input ports including VGA, SCART, TV1 (RF), TV2 (F), and Coax.
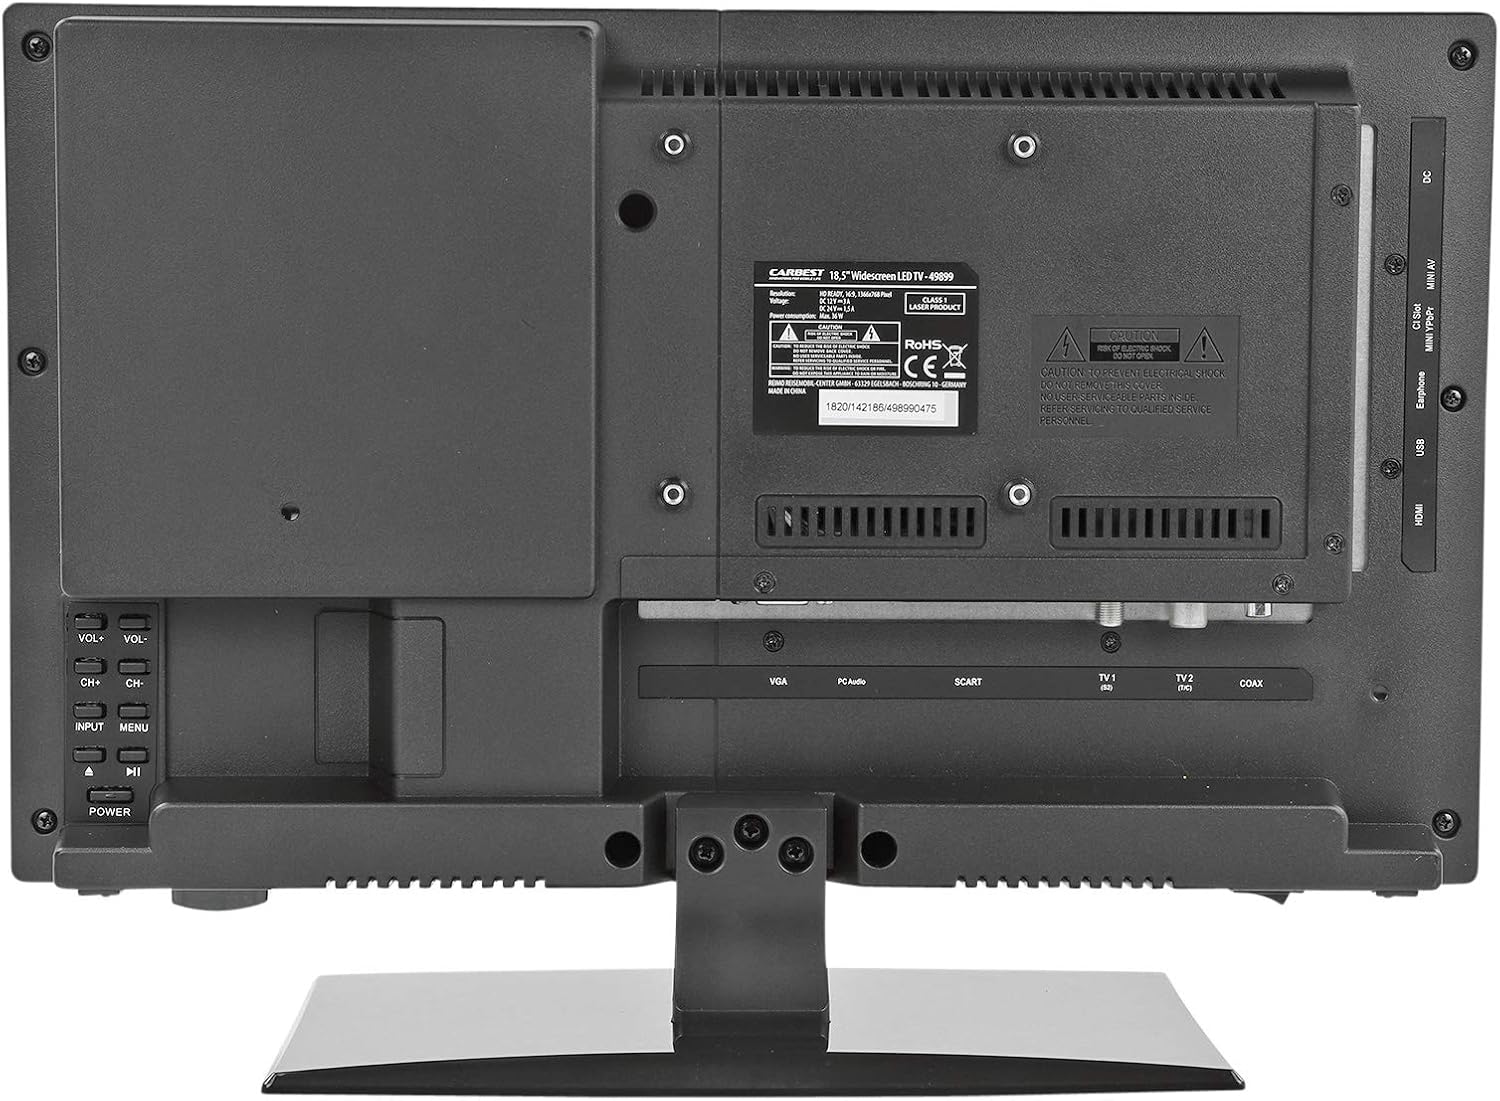
Image: Another rear view of the Carbest LED TV, providing a clearer look at the input ports such as VGA, PC Audio, SCART, TV1 (RF), TV2 (F), Coax, DC IN, Mini AV, CI Slot, Earphone, USB, and HDMI.

Image: Side-rear view of the Carbest LED TV, showing the integrated DVD player slot and the array of input ports on the right side.
4.4 Initial Setup and Channel Scan
After connecting power and antenna:
- Turn on the TV using the power button on the remote or the side panel.
- The first-time setup wizard will guide you through language selection and country.
- Select your desired tuner type (DVB-T2, DVB-S2, or DVB-C) and initiate an automatic channel scan. The TV is pre-programmed for 8 satellites for easy reception in major European holiday countries.
- Wait for the scan to complete. This may take several minutes.
5. Operating Instructions
5.1 Remote Control Overview
The remote control provides full functionality for your TV. Familiarize yourself with the button layout.

Image: The Carbest LED TV displayed with its accompanying remote control, showing the overall product appearance.
5.2 Basic TV Functions
- Power On/Off: Press the POWER button on the remote.
- Volume Control: Use VOL+ and VOL- buttons.
- Channel Change: Use CH+ and CH- buttons.
- Input Source: Press the INPUT button to cycle through available sources (TV, HDMI, AV, USB, VGA, SCART).
- Menu: Press the MENU button to access TV settings. Use arrow keys to navigate and OK to confirm.
- Video-Text: The TV supports Video-Text functionality.
5.3 Using the Integrated DVD Player
The TV features an integrated DVD player on the side.
- Gently insert a DVD or CD into the disc slot with the label facing up.
- The TV should automatically switch to DVD mode. If not, press the INPUT button and select 'DVD'.
- Use the remote control's playback buttons (Play, Pause, Stop, Skip) to control the DVD.
5.4 USB Media Playback
You can play various media files (MPEG4 video, photos, music) from a USB storage device.
- Insert your USB drive into the USB port on the TV.
- The TV should prompt you to open the media browser. If not, press the INPUT button and select 'USB'.
- Navigate through your files and select the media you wish to play.
6. Maintenance
6.1 Cleaning
- Always unplug the TV from the power source before cleaning.
- Use a soft, lint-free cloth to gently wipe the screen and cabinet.
- For stubborn marks, slightly dampen the cloth with water. Do not use harsh chemicals, abrasive cleaners, or solvents.
6.2 Storage
If storing the TV for an extended period, ensure it is clean, dry, and stored in a cool, well-ventilated area, away from direct sunlight and extreme temperatures.
7. Troubleshooting
Before contacting support, please refer to the following common issues and solutions:
| Problem | Possible Cause | Solution |
|---|---|---|
| No power | Power cable not connected; Power switch off; No power from outlet. | Check power connections; Ensure the side power switch is ON; Test outlet with another device. |
| No signal / Blank screen | Incorrect input source selected; Antenna/cable not connected; No channels scanned. | Press INPUT to select correct source; Check antenna/cable connections; Perform a channel scan. |
| No sound | Volume too low/muted; External device sound issue. | Increase volume; Check if muted; Check audio settings on external device. |
| Remote control not working | Batteries depleted/incorrectly inserted; Obstruction between remote and TV. | Replace batteries; Ensure clear line of sight to TV's IR receiver. |
| DVD not playing | Disc inserted incorrectly; Disc damaged/dirty; Incorrect input source. | Re-insert disc correctly; Clean disc; Select 'DVD' input source. |
| USB media not recognized | USB drive not formatted correctly (e.g., not FAT32); Unsupported file format. | Ensure USB drive is FAT32; Check supported file formats in manual (MPEG4 is supported). |
8. Specifications
| Feature | Detail |
|---|---|
| Model Name | Carbest LED TV 18,5" DVB-T2 HDMI |
| Manufacturer Part Number | 156912352 |
| Screen Size | 18.5 inches (47 cm diagonal) |
| Aspect Ratio | 16:9 Widescreen |
| Resolution | 1366 x 768 pixels (768p) |
| Contrast Ratio | 1000:1 |
| Tuner Types | DVB-T2, DVB-S2, DVB-C (Triple Tuner) |
| Integrated Features | DVD Player, Video-Text |
| Connectivity | HDMI, USB 2.0, SCART, VGA, CI-Slot, Mini AV, Earphone, Coax |
| Power Supply | 12V DC, 220V AC (via included adapter) |
| Power Consumption | 16 kWh/1000h |
| Energy Efficiency Class | F |
| Product Dimensions (W x H x D) | 435 x 310 x 45 mm (with foot: T180 mm) |
| Item Weight | 2.6 kg |
Image: Energy efficiency label for the Carbest LED TV, showing class F and 16 kWh/1000h consumption.
9. Warranty and Support
Carbest products are manufactured to high-quality standards. For information regarding warranty terms and conditions, please refer to the warranty card included with your product or visit the official Carbest website.
For technical support, troubleshooting assistance beyond this manual, or spare parts, please contact Carbest customer service. Contact details can typically be found on the Carbest website or on your purchase documentation.
Please have your model number (156912352) and purchase date ready when contacting support.
Documents and downloads
Ask a question about this manual
Ask about setup, troubleshooting, compatibility, parts, safety, or missing instructions. Manuals+ will review the question and use this page’s manual context to help answer it.