
RovyVon A8 6500K 365nm/White
Contents
RovyVon G4 Aurora A8 USB-C LED Keychain Flashlight Instruction Manual
Model: A8 6500K 365nm/White
Brand: RovyVon
1. Product Overview
The RovyVon G4 Aurora A8 is a compact and versatile LED keychain flashlight designed for everyday carry (EDC). It features a durable polycarbonate body, USB-C rechargeable battery, and multiple lighting modes, including a main white light, a 365nm UV side light, and a white side light. Its small size and robust features make it an ideal tool for various daily tasks and emergency situations.

Figure 1: RovyVon Aurora A8 Flashlight with internal components and accessory views.

Figure 2: Key features of the Aurora A8 Transparent series, including Momentary On, USB-C charging, Lock Mode, and Magnetic capabilities.
2. Setup
2.1 Unboxing and Initial Inspection
Upon opening the package, ensure all components are present:
- RovyVon Aurora A8 Flashlight
- Magnetic clip
- Magnetic detachable base
- User Instruction Manual
- Warranty Card
- USB-C Cover (replacement)
- Key Ring (x2)

Figure 3: Included accessories with the Aurora A8 flashlight.
2.2 Initial Charging
The flashlight comes with a pre-installed 330mAh lithium polymer battery. For optimal performance, fully charge the device before first use. The USB-C charging port is located at the top of the flashlight. A USB-C cable is not included.
- Locate the USB-C port cover and gently open it.
- Connect a USB-C charging cable (not included) to the port.
- Connect the other end of the cable to a compatible USB power source.
- The charging indicator light will illuminate (typically blue) during charging.
- Charging is complete when the indicator light changes or turns off (refer to specific light behavior in operating section). A full charge takes approximately 60 minutes.

Figure 4: Charging the Aurora A8 via USB-C.
2.3 Unlocking the Flashlight
Before first use, or if the flashlight is in lock mode, it must be unlocked. The flashlight is designed with a lock mode to prevent accidental activation and conserve battery life.
- To unlock: Rapidly click the button five (5) times. The front LED will flash 3 times to indicate it is unlocked.
- Alternatively, connecting the flashlight to a charger will instantly unlock it.

Figure 5: Lockout feature explanation for the Aurora A8.
3. Operating Instructions
3.1 Main Light Operation (Front LED)
- Momentary On: Press and hold the button for maximum output. Release to turn off.
- Constant On: Double-click the button quickly to turn on the main light.
- Mode Cycling: While the main light is on, single-click the button to cycle through brightness levels (Low, Medium, High, Turbo).
- Turn Off: Press and hold the button for 0.5 seconds to turn off the main light from any mode.
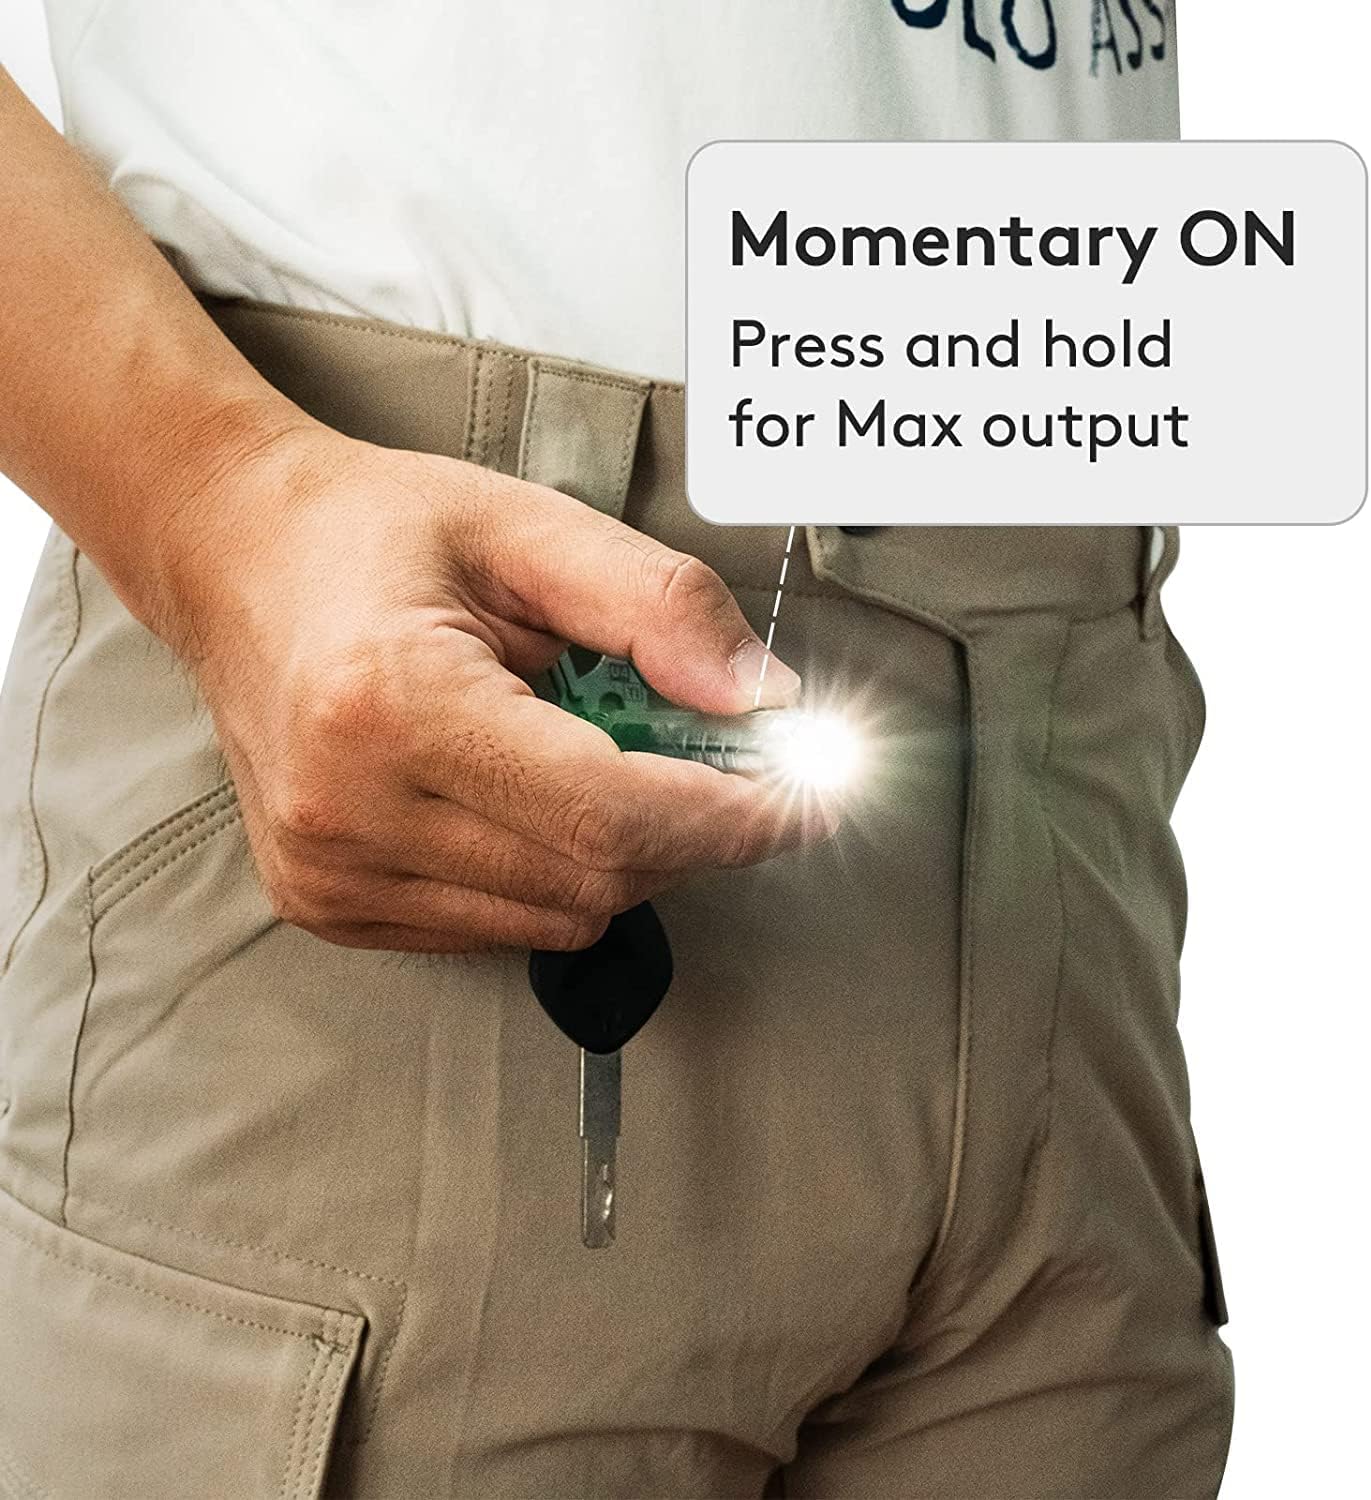
Figure 6: Demonstrating the Momentary On function.
3.2 Side Light Operation (UV and White)
The A8 features two side LEDs: a 365nm UV light and a white light with multiple modes.
- Activate Side Lights: Triple-click the button quickly to turn on the side lights.
- Mode Cycling: While side lights are on, single-click the button to cycle through modes:
- 365nm UV Light
- White (Low)
- White (High)
- White (Flash) - useful as a warning or indicator light.
- Turn Off: Press and hold the button for 0.5 seconds to turn off the side lights from any mode.

Figure 7: Usage of the white side light for illumination and the 365nm UV light for currency verification.
3.3 Lock Mode Activation
To prevent accidental activation, especially when carrying the flashlight in a pocket or bag:
- To Lock: Rapidly click the button five (5) times. The front LED will flash twice to indicate it is locked.
- To unlock, refer to Section 2.3.
4. Maintenance
4.1 Charging
Regular charging is recommended to maintain battery health. The 330mAh lithium polymer battery provides up to 8 hours of runtime on low mode. Recharge when the light output diminishes or the indicator light signals low battery (refer to specific light behavior in operating section).
4.2 Cleaning
Wipe the flashlight body with a soft, damp cloth as needed. Avoid using harsh chemicals or abrasive materials that could damage the polycarbonate finish.
4.3 Water Resistance
The RovyVon Aurora A8 is water resistant. While it can withstand splashes and light rain, it is not designed for submersion. Ensure the USB-C port cover is securely closed to maintain water resistance.
5. Troubleshooting
- Flashlight not turning on:
- Ensure the battery is charged. Connect to a USB-C charger.
- Check if the flashlight is in lock mode (front LED flashes twice when attempting to turn on). Rapidly click the button five times to unlock.
- Light output is dim:
- The battery may be low. Recharge the flashlight.
- Ensure you are in the desired brightness mode. Cycle through modes by single-clicking the button.
- Flashlight not charging:
- Verify the USB-C cable is properly connected to both the flashlight and the power source.
- Try a different USB-C cable or power adapter.
- Ensure the charging port is clean and free of debris.
- Accidental activation:
- Utilize the lock mode feature by rapidly clicking the button five times.
6. Specifications
| Feature | Detail |
|---|---|
| Model | A8 6500K 365nm/White |
| Brand | RovyVon |
| Light Source Type | LED |
| Brightness (Main Light) | Max 650 Lumens (Cool White 6500K) |
| Side Lights | 365nm UV, White (Low, High, Flash) |
| Battery Type | 330mAh Lithium Polymer (Included) |
| Charging Port | USB-C |
| Charging Time | Approx. 60 minutes |
| Runtime (Low Mode) | Up to 8 hours |
| Material | Polycarbonate |
| Product Dimensions | 2.38"D x 0.62"W x 0.62"H |
| Item Weight | 0.35 Ounces |
| Water Resistance Level | Water Resistant |

Figure 8: The compact size and light weight of the Aurora A8, comparable to a standard key.
7. Warranty and Support
RovyVon products are manufactured with high standards of quality. Please refer to the included Warranty Card for detailed information regarding your product's warranty period and terms. For technical support, troubleshooting assistance, or warranty claims, please contact RovyVon customer service through their official website or the retailer where the product was purchased.
Keep your purchase receipt and warranty card in a safe place as proof of purchase may be required for warranty service.
Documents and downloads
Ask a question about this manual
Ask about setup, troubleshooting, compatibility, parts, safety, or missing instructions. Manuals+ will review the question and use this page’s manual context to help answer it.