Introduction
This manual provides comprehensive instructions for the safe and efficient operation, maintenance, and troubleshooting of your Nespresso VertuoPlus Coffee and Espresso Machine Bundle with Aeroccino Milk Frother. Please read this manual thoroughly before first use and keep it for future reference.
Important Safety Information
- Always ensure the machine is placed on a stable, flat, heat-resistant surface.
- Do not immerse the machine, power cord, or plug in water or other liquids.
- Keep out of reach of children.
- Unplug the machine from the power outlet when not in use and before cleaning.
- Do not operate any appliance with a damaged cord or plug, or after the appliance malfunctions or has been damaged in any manner.
- Use only Nespresso Vertuo capsules with this machine.
- The Aeroccino milk frother is designed for milk frothing only. Do not use it for other liquids.
What's Included
Your Nespresso VertuoPlus bundle includes the following components:
- Nespresso VertuoPlus Coffee and Espresso Machine
- Aeroccino3 Milk Frother
- Removable Water Tank (40 oz capacity)
- Drip Tray and Cup Support
- Used Capsule Container
- Nespresso Vertuoline Variety Pack Coffees (30 capsules: 10 Stormio, 10 Odacio, 10 Melozio)

Figure 1: Nespresso VertuoPlus Machine Bundle Contents
Setup
- Unpacking: Carefully remove all components from the packaging. Retain packaging for future transport or storage.
- Placement: Place the machine on a clean, stable, and level surface. Ensure adequate space around the machine for ventilation and access to the water tank. The water tank can be adjusted to different positions for optimal countertop size.
- Water Tank Filling: Remove the water tank and rinse it with fresh drinking water. Fill the tank with fresh drinking water up to the 'MAX' level indicator. Place the water tank back onto the machine.
- Power Connection: Plug the power cord into a grounded electrical outlet. The machine will automatically turn on. The brew button will illuminate.
- First Use / Rinsing: Before brewing your first coffee, perform a rinsing cycle. Place a container (at least 14 oz) under the coffee outlet. Close the machine head (if open) and press the brew button three times within two seconds. The machine will start a rinsing cycle, dispensing hot water. Repeat this process for the Aeroccino3 milk frother as per its separate instructions.

Figure 2a: Adjustable Water Tank Placement (Side View)

Figure 2b: Adjustable Water Tank Placement (Top-Down View)

Figure 3: Water Tank and Machine Top View
Operating Instructions
Brewing Coffee or Espresso
The VertuoPlus machine uses barcode technology to automatically adjust brewing parameters for each capsule, ensuring optimal coffee size, temperature, pressure, and brewing time.

Figure 4: Blend Specific Brewing Technology
- Turn On: Ensure the machine is plugged in and the brew button is illuminated.
- Open Head: Gently push the lever up to open the machine head. The head will automatically open.
- Insert Capsule: Insert a Nespresso Vertuo capsule into the machine, dome side down.
- Close Head: Push the lever down to close the machine head. The head will automatically close and lock.
- Place Cup: Place a cup of appropriate size under the coffee outlet. The machine brews various cup sizes, from single espresso to 14 oz coffee.
- Start Brewing: Press the brew button once. The machine will read the barcode on the capsule and begin brewing.
- Enjoy: Once brewing is complete, the machine will automatically eject the used capsule into the internal container.

Figure 5: Machine Head Open for Capsule Insertion
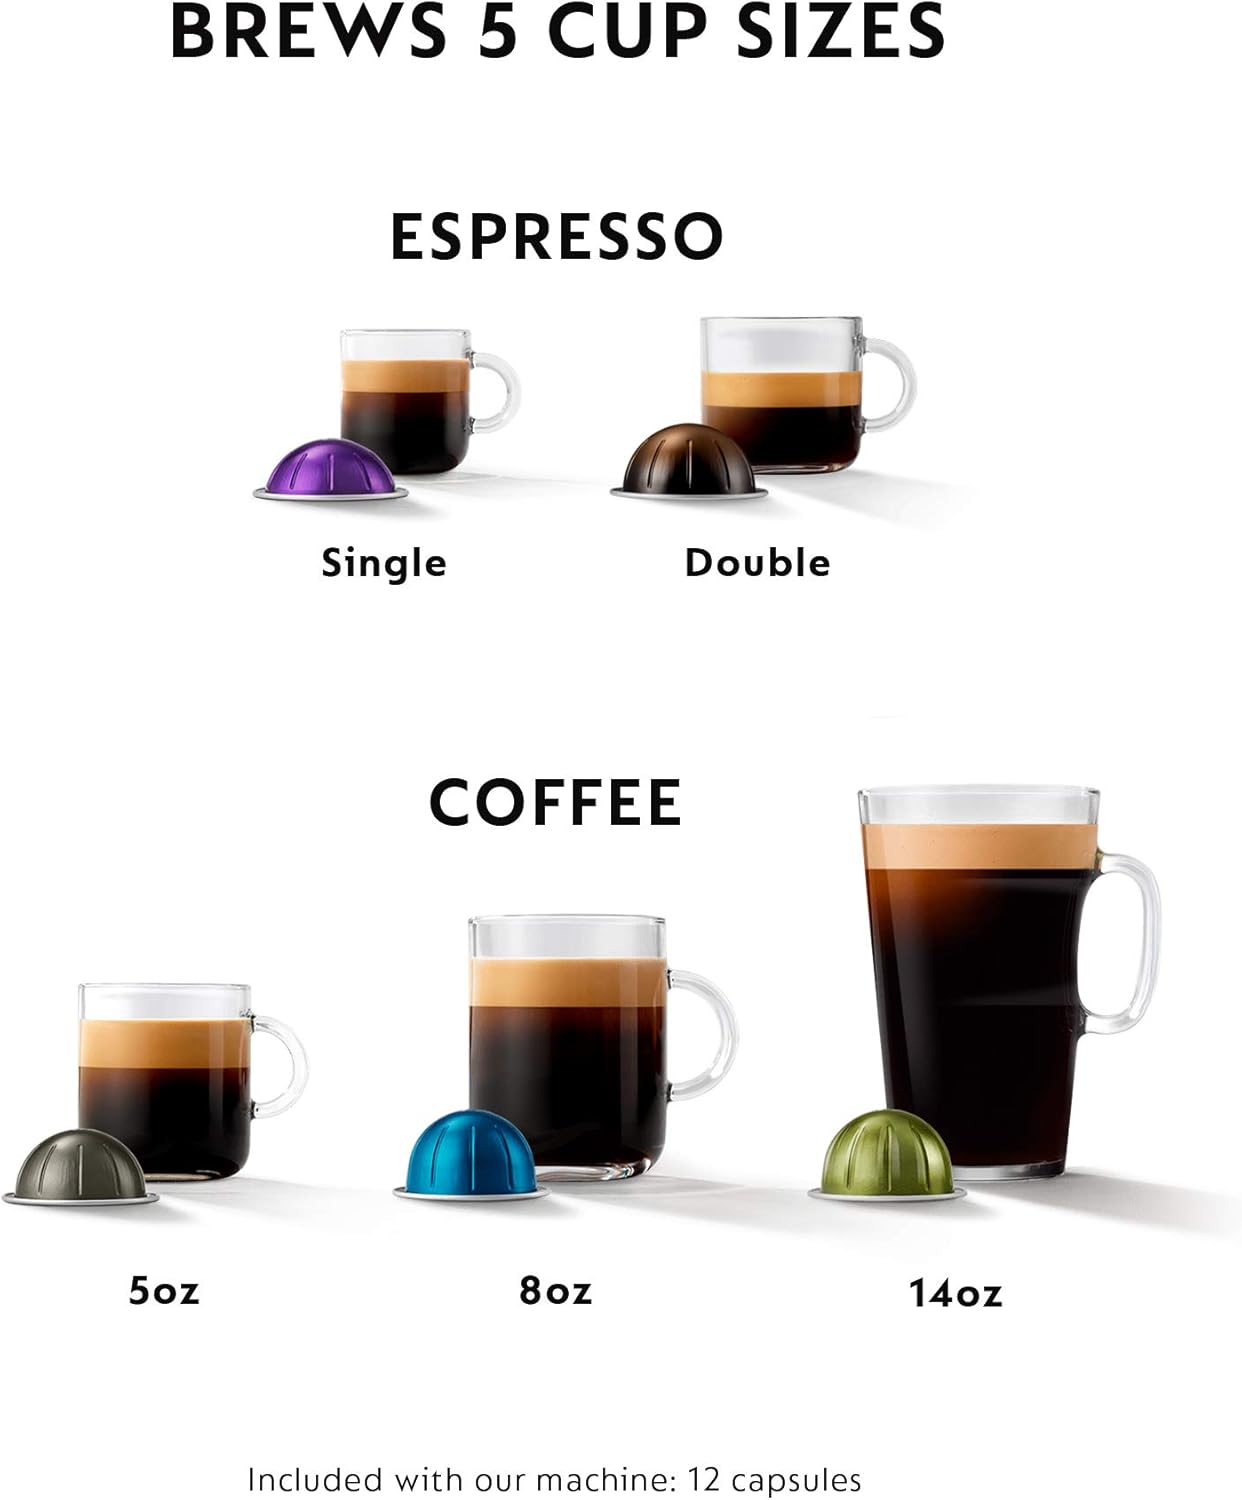
Figure 6: Available Brew Sizes
Using the Aeroccino3 Milk Frother
The Aeroccino3 frother allows for hot or cold milk froth preparation for various coffee recipes.
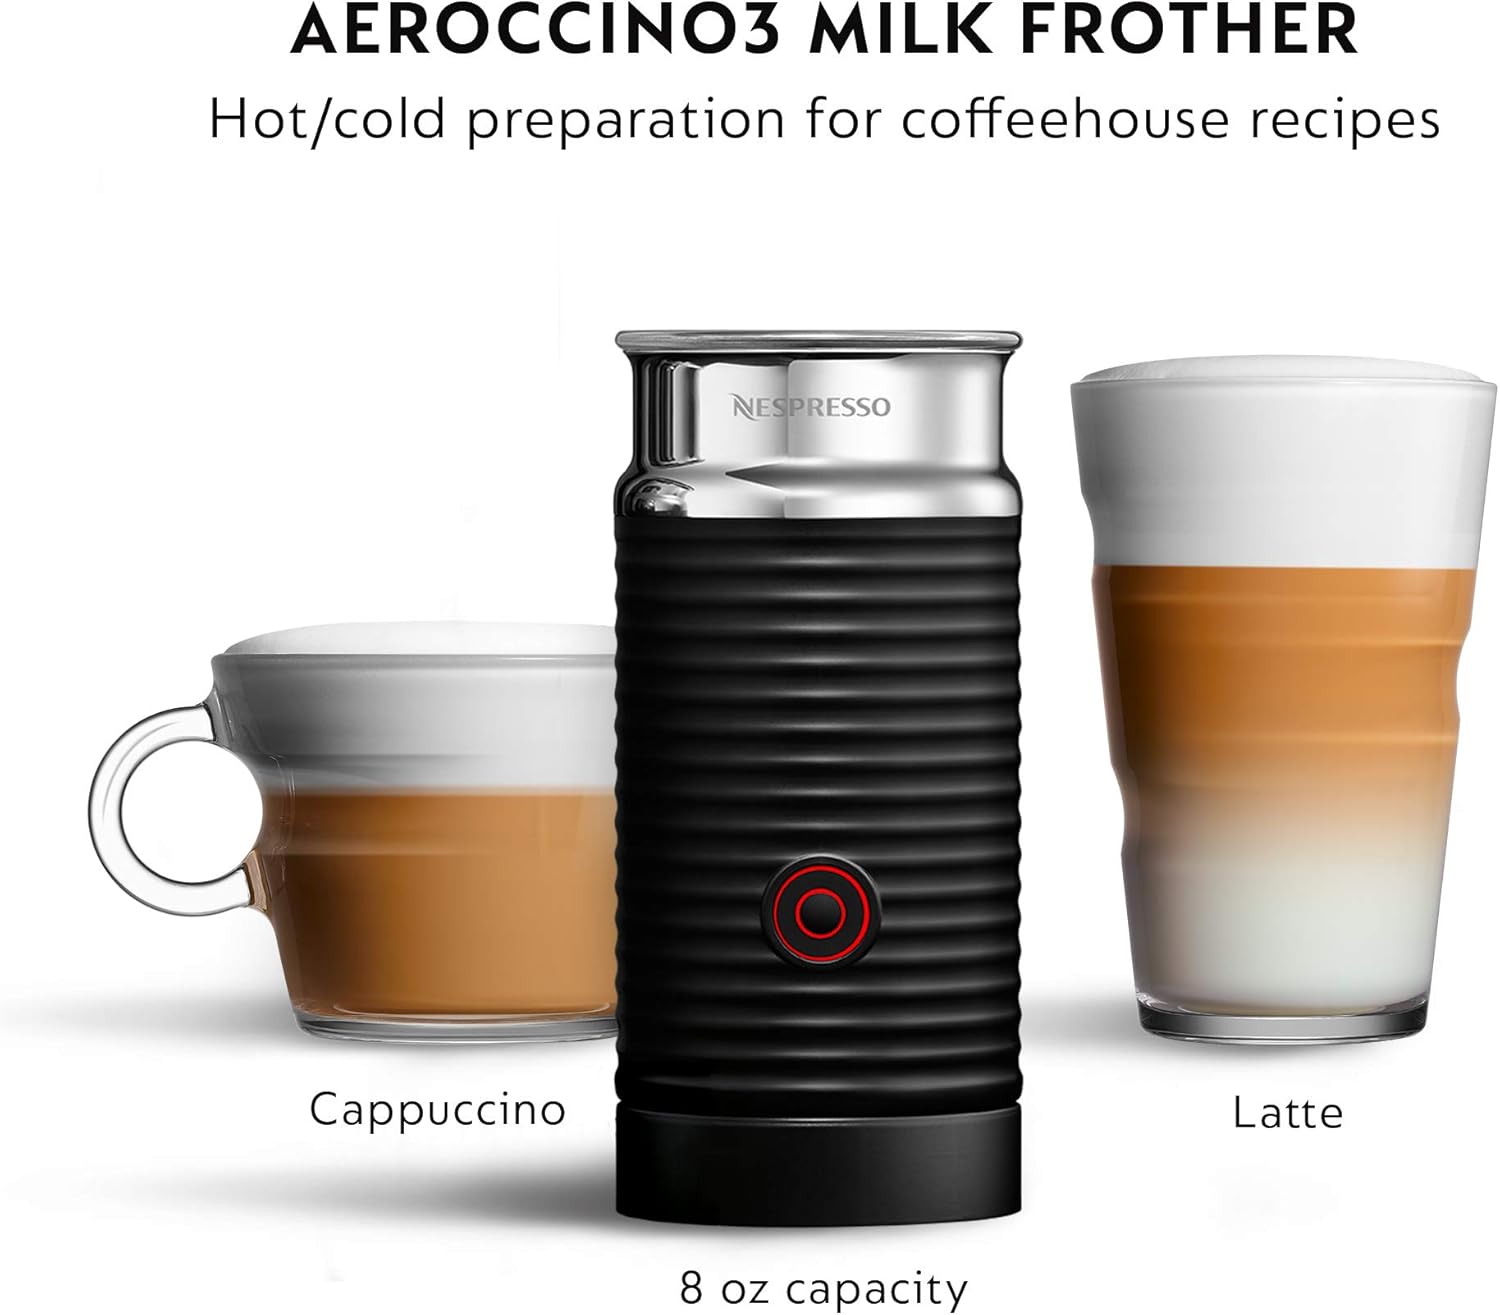
Figure 7: Aeroccino3 Milk Frother in Use
- Preparation: Ensure the frother is clean and the whisk is correctly inserted.
- Add Milk: Pour fresh, cold milk into the frother. Do not exceed the 'MAX' level indicators for milk or froth.
- Hot Froth: Press the button once for hot milk froth. The button will illuminate red.
- Cold Froth: Press and hold the button for approximately 2 seconds for cold milk froth. The button will illuminate blue.
- Serving: Once the frother stops, pour the frothed milk into your coffee.
Maintenance
Daily Cleaning
- Drip Tray & Used Capsule Container: Empty and rinse daily with warm water. Dry thoroughly.
- Water Tank: Rinse daily with fresh drinking water.
- Machine Exterior: Wipe with a damp cloth. Do not use abrasive cleaning agents or immerse the machine.
- Aeroccino3: After each use, clean the inside of the frother and the whisk with warm water and a non-abrasive cloth. Do not immerse the base in water.
Descaling
Descaling is essential to maintain the machine's performance and ensure optimal coffee temperature. The machine will indicate when descaling is required (often by a specific light pattern on the brew button).
- Refer to the official Nespresso descaling kit instructions for detailed steps.
- Always use Nespresso descaling solution.
- Perform descaling approximately every 3 months or as indicated by the machine.
Troubleshooting
| Problem | Possible Cause | Solution |
|---|---|---|
| No coffee flow / Machine not starting | Water tank empty; Machine not turned on; Machine head not properly closed; Descaling needed. | Fill water tank; Press brew button; Ensure machine head is fully closed and locked; Perform descaling. |
| Coffee is cold | Machine needs descaling; Cup not pre-heated. | Perform descaling; Rinse cup with hot water before brewing. |
| Leaking from machine | Water tank not correctly positioned; Drip tray full. | Ensure water tank is securely in place; Empty and clean drip tray. |
| Aeroccino not frothing milk | Incorrect milk type/temperature; Whisk not inserted; Frother dirty. | Use fresh, cold milk (dairy or plant-based suitable for frothing); Ensure whisk is correctly placed; Clean frother thoroughly. |
Specifications
| Feature | Detail |
|---|---|
| Brand | De'Longhi |
| Model Number | ENV150GYAE-Parent |
| Coffee Maker Type | Espresso Machine (Single-Serve Brewer) |
| Water Tank Capacity | 40 oz |
| Operation Mode | Fully Automatic |
| Special Features | Aeroccino3 Milk Frother, Barcode Reading Technology, Automatic Capsule Ejection |
| Brew Sizes | Espresso (Single, Double), Coffee (5oz, 8oz, 14oz) |
| Color | Graphite Metal (Grey) |
| First Available Date | March 22, 2019 |
Warranty and Support
For detailed warranty information and customer support, please refer to the official Nespresso website or the full user manual provided with your product.
A digital copy of the user manual can be found here: Nespresso VertuoPlus User Manual (PDF)