
Introduction
This manual provides essential information for the proper installation, operation, and maintenance of your JVC KS-DR1004D 400 Watt 4-Channel Bridgeable Amplifier. Please read this manual thoroughly before using the product to ensure optimal performance and safety.
The JVC KS-DR1004D is a compact, high-performance Class-D amplifier designed for versatile applications, including car, marine, RZR, ATV, UTV, and other motorsports environments. Its robust construction and advanced features ensure reliable and high-quality audio output.
Key Features
- Versatile Application: Designed for use in various environments, including marine and motor sports, with a compact size for flexible installation.
- Durable Construction: Features conformal coated main PCBs (printed circuit boards) to protect against moisture and chemical contaminants, preventing corrosion.
- Advanced Circuitry: Separated circuit boards for the Pre-amp and Power-amp sections reduce radiation noise, contributing to clearer sound.
- High-Quality Sound: Incorporates a large Low Pass Filter (LPF) coil for stable, high-quality sound without distortion, even at high volumes.
- Variable HPF & LPF: Rotary type High Pass Filter (HPF) and Low Pass Filter (LPF) allow for precise sound adjustment, offering more control than fixed-type switching.
- Powerful Output: Delivers 45 watts RMS x 4 channels at 2 to 4 ohms, or 90 watts RMS x 2 channels when bridged at 4 ohms.
- Class-D Technology: Efficient Class-D amplifier technology, CTA-2006 compliant.
- High Level Input Auto Power Control: Automatically turns on the amplifier when a signal is detected from the high-level input.
Safety Information
Always observe the following safety precautions to prevent injury or damage to the product and vehicle:
- Disconnect the vehicle's negative battery terminal before installation to prevent electrical shorts.
- Ensure proper grounding. Connect the ground wire securely to a clean, unpainted metal surface of the vehicle chassis.
- Use appropriate gauge wiring for power, ground, and speaker connections as specified in the installation section.
- Avoid installing the amplifier in locations exposed to direct sunlight, excessive heat, moisture, or dust.
- Do not open the amplifier casing. There are no user-serviceable parts inside. Refer servicing to qualified personnel.
- Securely mount the amplifier to prevent it from shifting during vehicle operation.
- Do not operate the amplifier if it is damaged or malfunctioning.
Setup and Installation
Proper installation is crucial for optimal performance and safety. If you are unsure about any part of the installation process, consult a qualified professional.
1. Unpacking and Inspection
Carefully unpack the amplifier and all accessories. Inspect for any signs of damage during transit. If any damage is found, contact your dealer immediately.

Image Description: This image displays the contents of the JVC KS-DR1004D amplifier packaging. It includes the compact black amplifier unit, various wiring harnesses (power, ground, speaker), RCA cables for audio input, and the user manual. Several zip ties are also visible for cable management.
2. Mounting Location
Choose a mounting location that is:
- Secure and free from vibrations.
- Well-ventilated to prevent overheating.
- Protected from direct sunlight, moisture, and excessive dust.
- Accessible for wiring and adjustments.
The compact size of the KS-DR1004D allows for versatile installation in tight spaces, common in marine and motorsports vehicles.
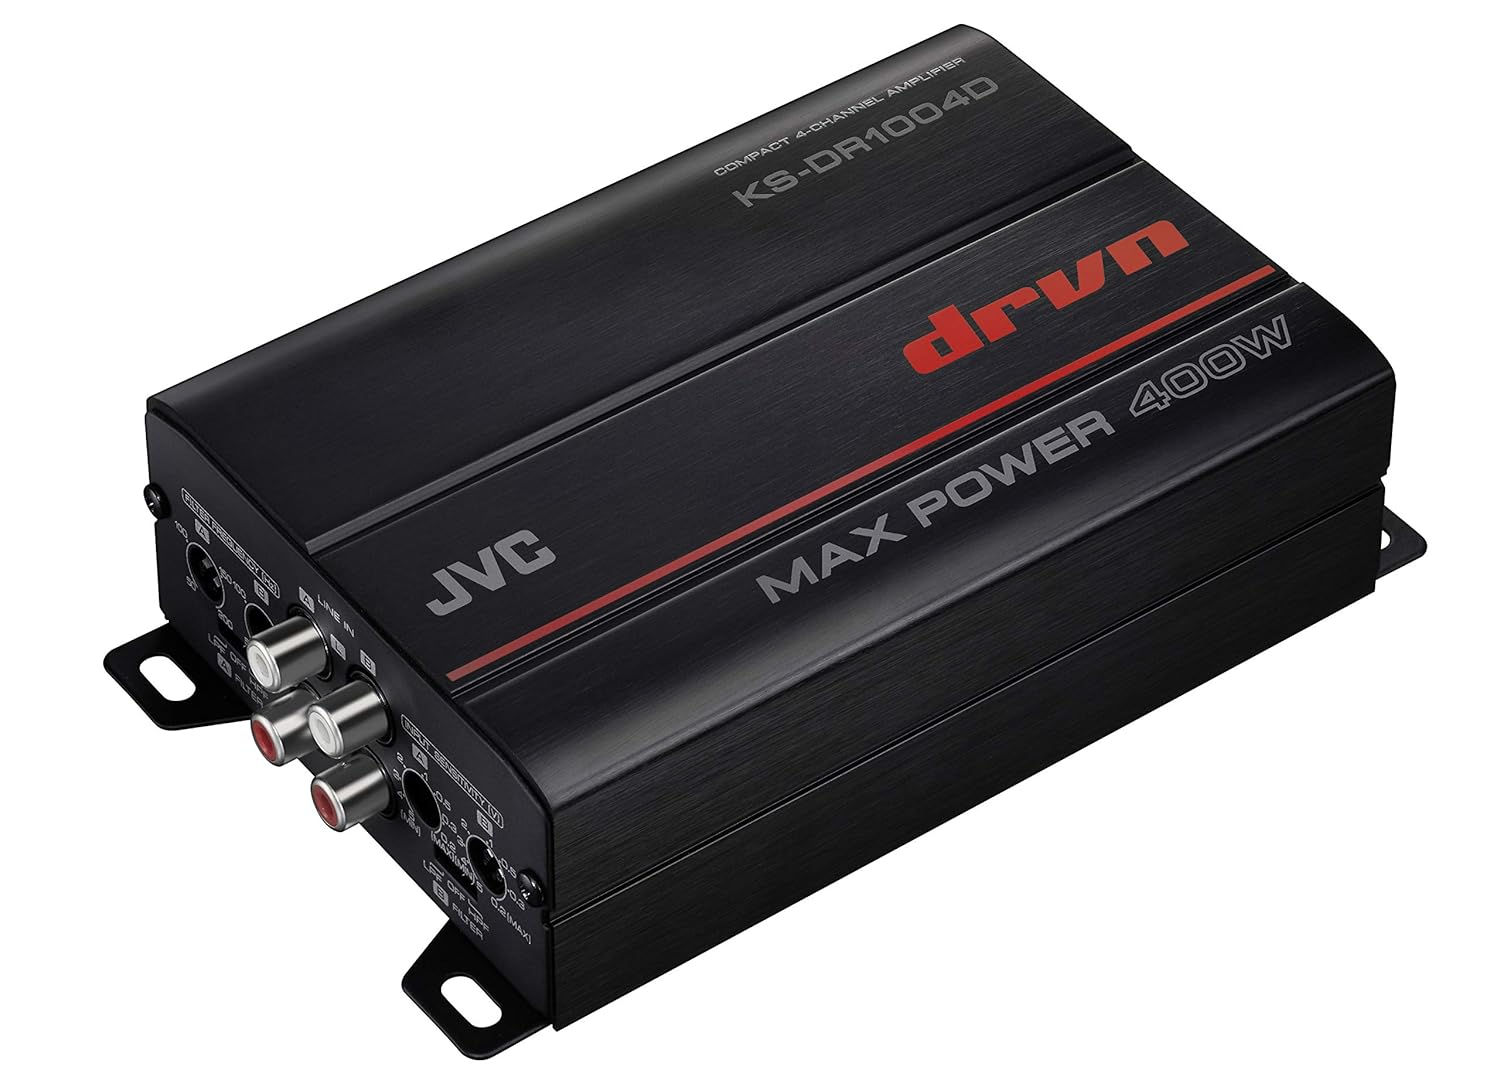
Image Description: A top-down, slightly angled view of the JVC KS-DR1004D amplifier. The unit is black with a brushed metal finish, featuring the JVC logo and "drvn MAX POWER 400W" text in red and white. Input and output terminals are visible on one side, indicating its compact design suitable for various installations.

Image Description: This image shows the JVC KS-DR1004D amplifier with its physical dimensions clearly labeled. The length is 145mm (5-11/16"), height is 45mm (1-3/4"), and width is 99mm (3-7/8"). This highlights the amplifier's compact form factor, making it suitable for installations where space is limited.
3. Wiring Connections
Follow these steps for wiring the amplifier:
- Power Connection: Connect the power cable (typically 12-gauge or thicker, depending on total power draw) from the vehicle's positive battery terminal to the amplifier's +12V terminal. Install an inline fuse (not supplied) within 18 inches of the battery.
- Ground Connection: Connect the ground cable (same gauge as power) from the amplifier's GND terminal to a clean, unpainted metal surface on the vehicle chassis. Ensure a solid, low-resistance connection.
- Remote Turn-On: Connect the remote turn-on wire from your head unit's remote output to the amplifier's REM terminal. If using high-level inputs, the amplifier's auto power control feature may eliminate the need for a separate remote wire.
- Audio Input (RCA): Connect RCA cables from your head unit's pre-amp outputs to the amplifier's RCA input jacks (Ach L/R, Bch L/R).
- Audio Input (High-Level): If your head unit does not have RCA outputs, use the high-level input (speaker level input) feature. Connect the speaker wires from your head unit directly to the amplifier's high-level input terminals. The amplifier will automatically detect the signal and turn on.
- Speaker Connections: Connect your speakers to the amplifier's speaker output terminals. Ensure correct polarity (+ to + and - to -). The amplifier supports 2-8 ohm load impedance. For bridged operation, refer to the diagram on the amplifier or included documentation for specific wiring.
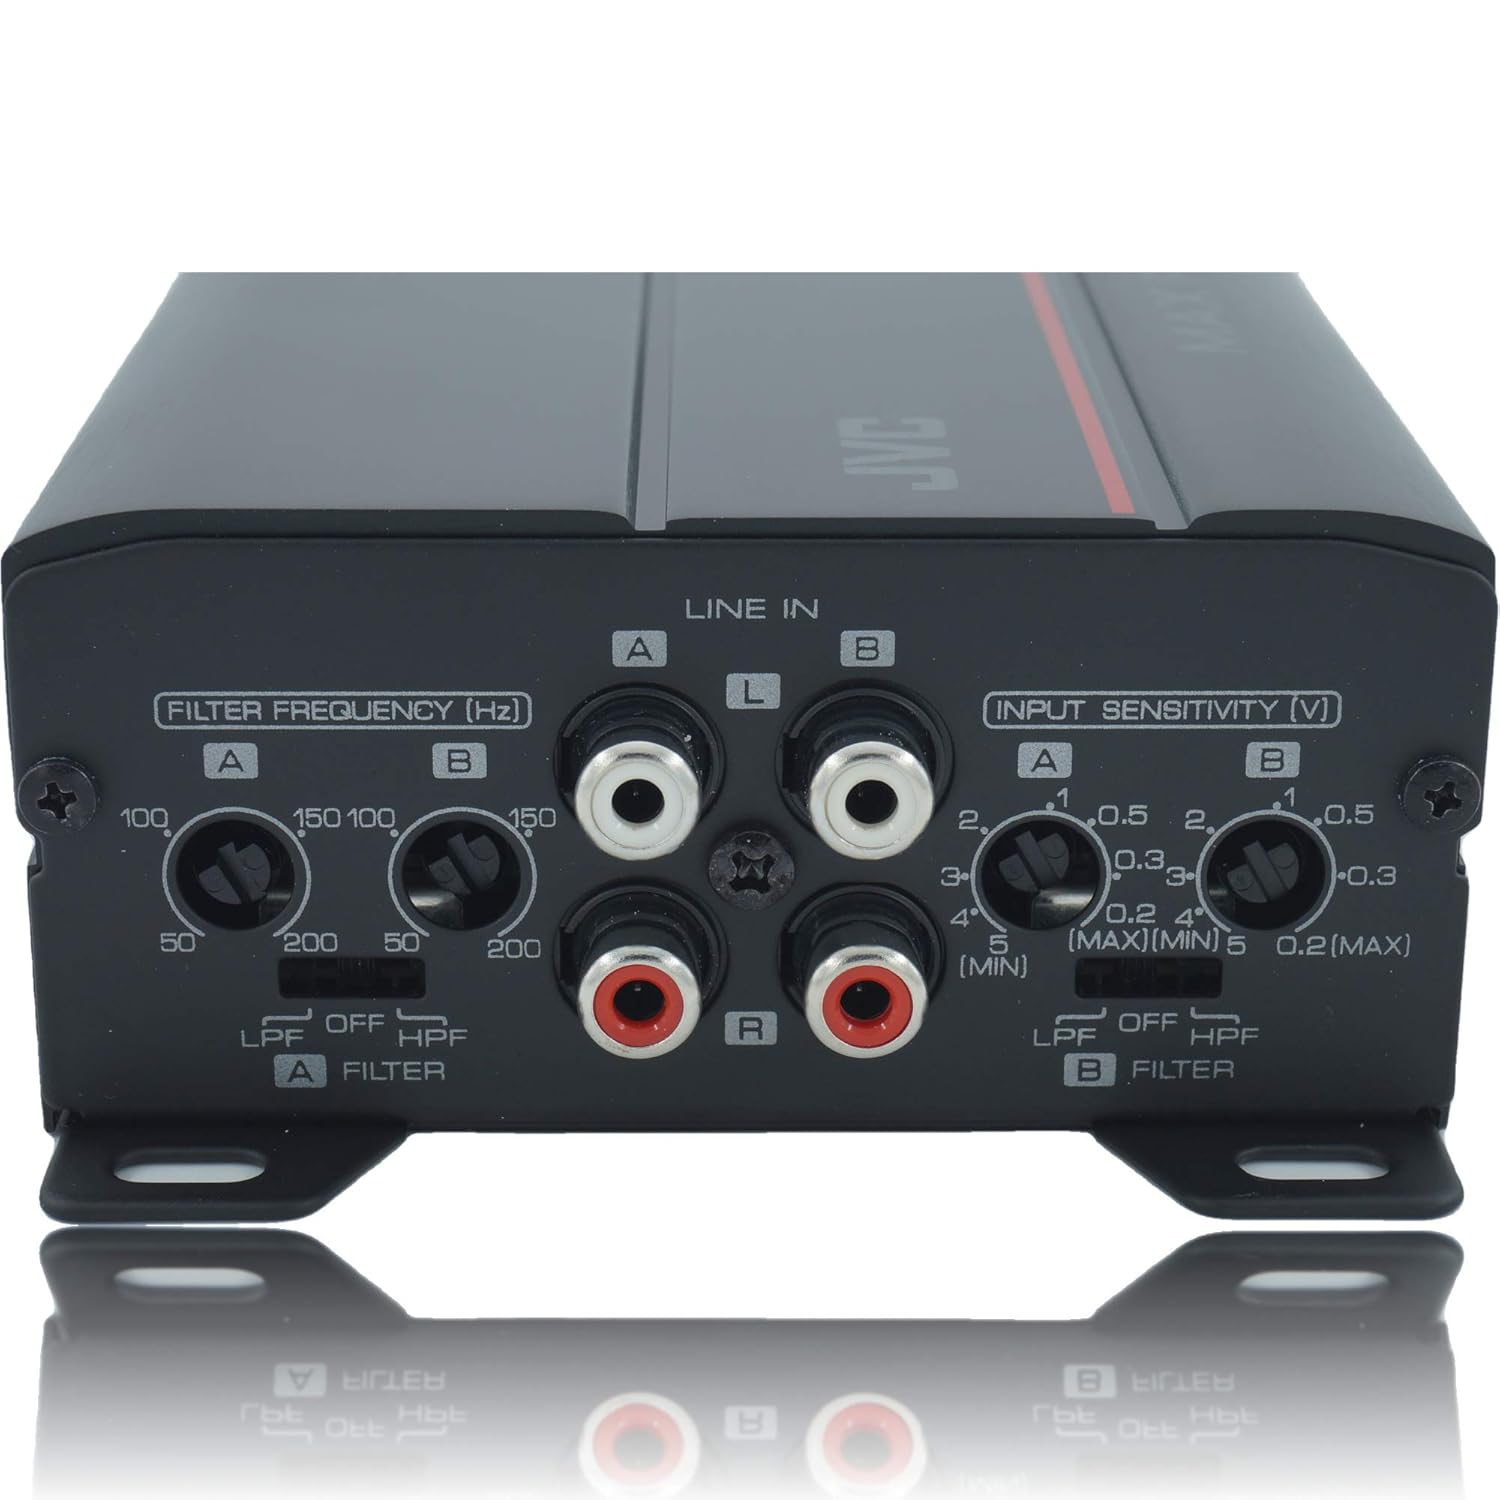
Image Description: This detailed image focuses on the input and control panel of the JVC KS-DR1004D amplifier. It clearly shows the "LINE IN" RCA inputs (A and B channels), "FILTER FREQUENCY [Hz]" rotary dials for LPF (Low Pass Filter) and HPF (High Pass Filter) with ranges from 50Hz to 200Hz, and "INPUT SENSITIVITY [V]" adjustments for both channels. Switches for LPF/OFF/HPF are also visible, allowing precise audio tuning.
Operating Instructions
Once the amplifier is correctly installed and wired, follow these steps for initial setup and operation:
- Initial Power-Up: Reconnect the vehicle's negative battery terminal. Turn on your head unit. The amplifier should power on automatically (if remote wire is connected or high-level auto power control is active).
- Input Sensitivity (Gain) Adjustment:
- Set the amplifier's input sensitivity (gain) to its minimum setting.
- Play a familiar piece of music through your head unit at about 75% of its maximum volume.
- Slowly increase the amplifier's gain control until you hear distortion, then back it off slightly until the sound is clear. This ensures the amplifier is receiving an optimal signal without clipping.
- Filter Adjustments (HPF/LPF):
- High Pass Filter (HPF): If you are using full-range speakers, set the HPF to filter out low frequencies that your speakers cannot reproduce effectively (e.g., 80Hz-120Hz). This protects your speakers and improves overall sound clarity.
- Low Pass Filter (LPF): If you are using a subwoofer with this amplifier (in bridged mode), set the LPF to allow only low frequencies to pass through to the subwoofer (e.g., 80Hz-120Hz).
- Adjust these filters to blend seamlessly with your other audio components. The variable rotary controls allow for precise tuning.
- Listening Test: Listen to various types of music to fine-tune the gain and filter settings for your preferred sound.
Maintenance
The JVC KS-DR1004D amplifier is designed for durability and requires minimal maintenance due to its conformal coated PCBs.
- Cleaning: Periodically wipe the exterior of the amplifier with a soft, dry cloth to remove dust and dirt. Do not use harsh chemicals or abrasive cleaners.
- Ventilation: Ensure that the amplifier's ventilation areas are not obstructed to prevent overheating.
- Connections: Periodically check all wiring connections to ensure they are secure and free from corrosion.
- Environmental Protection: While the amplifier is designed for harsh environments, avoid prolonged exposure to extreme conditions beyond its intended use.
Troubleshooting
If you experience issues with your amplifier, refer to the following common problems and solutions:
| Problem | Possible Cause | Solution |
|---|---|---|
| No Power / Amplifier does not turn on |
|
|
| No Sound Output |
|
|
| Distorted Sound |
|
|
| Amplifier Overheating |
|
|
Specifications
| Feature | Specification |
|---|---|
| Model Number | KS-DR1004D |
| Amplifier Class | Class-D |
| Maximum Power Output | 400W |
| RMS Power Output (4 ohm, 1% THD, 14.4V) | 45W x 4 (20 - 20,000Hz) |
| RMS Power Output (2 ohm, 1% THD, 14.4V) | 45W x 4 (1,000Hz) |
| RMS Power Output (Bridged 4 ohm, 1% THD, 14.4V) | 90W x 2 (1,000Hz) |
| Signal-to-Noise Ratio (CEA-2006 Compliant) | > 82dB (reference: 1W into 4 ohms) |
| Load Impedance Allowance | 2 - 8 ohms |
| High Pass Filter (HPF) | 50Hz - 200Hz (-12dB/oct) |
| Low Pass Filter (LPF) | 50Hz - 200Hz (-12dB/oct) |
| RCA Input | Ach L/R, Bch L/R |
| High Level Input (Speaker Level Input) | Yes |
| High Level Input Auto Power Control | Yes (Signal Sensing Turn On) |
| Input Sensitivity | 0.2 - 5V |
| Dimensions (W x H x D) | 145 x 45 x 99 mm (5-11/16" x 1-3/4" x 3-7/8") |
| Weight | 0.7kg (1.5lbs) |
| Voltage | 14.4 Volts (Nominal) |
| Mounting Type | Boat Mount (Versatile for other applications) |
Warranty Information
JVC products are manufactured to high-quality standards. For specific warranty terms and conditions, please refer to the warranty card included with your product or visit the official JVC website. Keep your proof of purchase for warranty claims.
Typically, warranty coverage addresses manufacturing defects under normal use. Damage resulting from improper installation, abuse, or unauthorized modifications is generally not covered.
Support and Contact
For technical assistance, troubleshooting beyond this manual, or service inquiries, please contact JVC customer support or visit their official website:
- JVC Official Website: www.jvc.com
- Refer to the contact information provided in your product's packaging or on the official website for regional support details.


