1. Introduction
Thank you for choosing the Dancover ProShed® Metal Garden Shed. This manual provides essential information for the safe assembly, operation, and maintenance of your new garden shed. Please read all instructions carefully before beginning assembly and retain this manual for future reference.

Figure 1: Front view of the Dancover ProShed® Metal Garden Shed.
The ProShed® is designed to provide a durable and secure storage solution for your garden tools and equipment. Its robust galvanized steel construction ensures longevity and resistance to weather conditions.
2. Safety Information
- Assembly Safety: Assembly requires at least two people. Wear appropriate safety gear, including gloves and eye protection, to prevent injuries from sharp edges or falling components.
- Site Preparation: Ensure the assembly area is clear of obstructions and level. The shed must be anchored securely to the ground to prevent wind damage.
- Structural Integrity: Do not modify the shed's structure. Any alterations may compromise its stability and void the warranty.
- Ventilation: The shed features perforated panels for ventilation. Do not block these vents.
- Snow Load: Be aware of the shed's snow load capacity (80 kg/m²). In areas with heavy snowfall, regularly clear snow from the roof to prevent structural damage.
- Children and Pets: Keep children and pets away from the assembly area. Do not allow them to play inside or around the shed unsupervised.
3. Package Contents
Before beginning assembly, unpack all components and verify that all parts are present and undamaged. Refer to the detailed parts list provided in your separate assembly manual. Typical components include:
- Wall panels (side, front, rear)
- Roof panels
- Door panels and handles
- Frame components (beams, supports, corner brackets)
- Fasteners (screws, nuts, washers)
- Anchor fixings
- Assembly manual
If any parts are missing or damaged, please contact Dancover customer support immediately.
4. Setup and Assembly
The assembly of your Dancover ProShed® requires careful attention to detail. It is highly recommended to have at least two adults for the assembly process.
4.1 Site Preparation
Choose a firm and level surface for your shed. Ideal surfaces include concrete, paving slabs, or a sturdy wooden base. If placing on a lawn, a prepared foundation is strongly recommended to ensure stability and prevent moisture issues. The minimum recommended base dimensions are 2.05m x 1.19m.
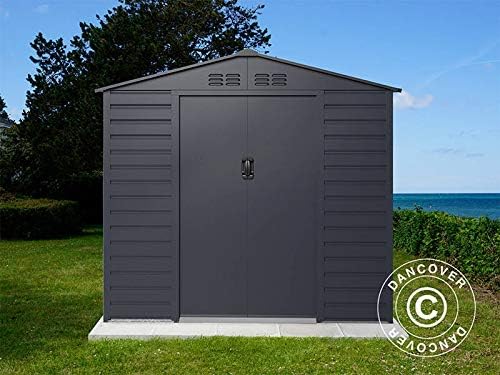
Figure 2: ProShed® installed on a prepared, level base.
4.2 Assembly Steps
Follow the step-by-step instructions provided in the dedicated assembly manual included with your product. Key steps typically involve:
- Base Frame Assembly: Construct the base frame on your prepared surface. Ensure it is square and level.
- Wall Panel Installation: Attach the side, front, and rear wall panels to the base frame, securing them according to the manual.
- Roof Frame and Panel Installation: Assemble the roof frame and then attach the roof panels. Pay close attention to proper alignment for water tightness.
- Door Installation: Install the sliding doors and handles. Ensure smooth operation.
- Anchoring: Securely anchor the shed to your foundation using the provided anchor fixings. This is crucial for stability, especially in windy conditions.


Figure 3: Examples of interior frame and roof panel assembly details.
Ensure all screws and fasteners are tightened securely, but do not overtighten, which could damage the panels.
5. Operating Instructions
5.1 Door Operation
The Dancover ProShed® features smooth-gliding sliding doors. To open, gently slide the door panels along their tracks. To close, slide them back until they meet. The doors are equipped with holes in the handles, designed to accommodate a padlock (not included) for added security.

Figure 4: Detail of the door handle and upper ventilation grilles.
5.2 Ventilation
The shed incorporates perforated panel designs (high gables) for natural ventilation, helping to reduce condensation and maintain air circulation inside. Ensure these vents remain unobstructed.
6. Maintenance
- Cleaning: Clean the shed periodically with mild soap and water. Avoid abrasive cleaners or harsh chemicals that could damage the galvanized steel finish. Rinse thoroughly with clean water.
- Inspection: Regularly inspect the shed for any loose fasteners, signs of corrosion, or damage. Tighten any loose screws and address any issues promptly to maintain the shed's integrity.
- Snow Removal: In regions with heavy snowfall, remove accumulated snow from the roof to prevent exceeding the 80 kg/m² snow load capacity.
- Door Tracks: Keep the sliding door tracks clean and free of debris to ensure smooth operation.
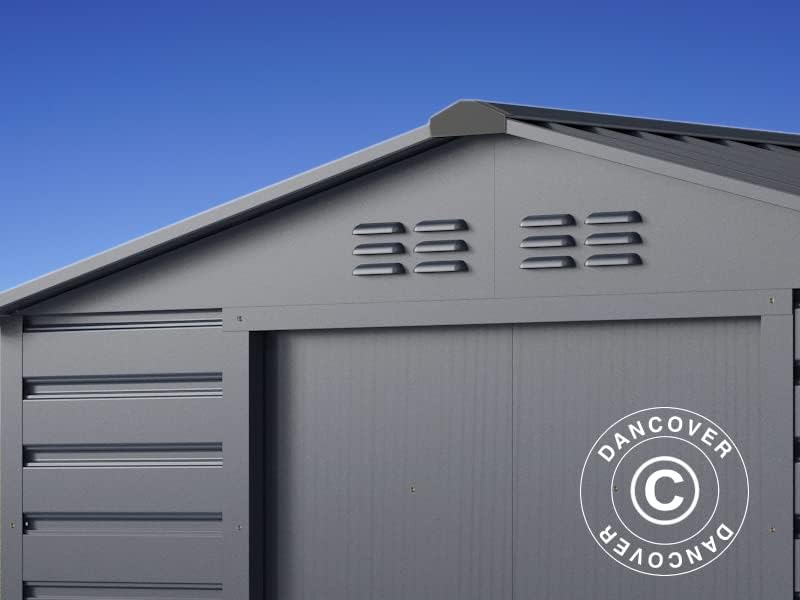
Figure 5: The shed is designed to be 100% waterproof.
7. Troubleshooting
| Problem | Possible Cause | Solution |
|---|---|---|
| Difficulty assembling panels/holes not aligning | Base not perfectly level or square; slight manufacturing tolerances. | Ensure the base frame is perfectly level and square before attaching panels. Loosen adjacent fasteners slightly to allow for adjustment, then retighten. Minor adjustments may be needed. |
| Doors do not slide smoothly | Debris in tracks; misaligned doors; damaged rollers. | Clean door tracks thoroughly. Check door alignment and adjust if necessary. Inspect rollers for damage. |
| Water leakage | Improperly sealed seams; damaged panels; inadequate foundation. | Inspect all seams and panel overlaps. Apply silicone sealant if necessary. Ensure the shed is on a proper, elevated foundation to prevent water ingress from below. |
| Shed feels unstable | Not properly anchored; loose fasteners. | Ensure the shed is securely anchored to the ground using all provided anchor fixings. Check and tighten all fasteners. |
8. Specifications
| Feature | Detail |
|---|---|
| Brand | Dancover |
| Model | ProShed® Anthracite |
| Material | Galvanized Steel |
| Color | Anthracite |
| External Dimensions (W x L x H) | 2.13 m x 1.27 m x 1.90 m |
| Side Height | 1.63 m |
| Ridge Height | 1.90 m |
| Door Opening (W x H) | 0.96 m x 1.60 m |
| Inner Dimensions (W x L) | 2.02 m x 1.16 m |
| Ground Area | 2.38 m² |
| External Area (incl. eaves) | 2.71 m² |
| Roof Panel Thickness | 0.25 mm |
| Side Panel Thickness | 0.25 mm |
| Waterproof Rating | 100% Waterproof |
| Snow Load Capacity | 80 kg/m² |
| Weight | 57 kg |
| Features | Perforated panel design for ventilation, sliding doors with padlock holes, includes anchor fixings. |
9. Warranty and Support
Dancover offers a 10-year anti-corrosion perforation warranty on this ProShed® Metal Garden Shed. This warranty covers perforation due to rust under normal use and maintenance conditions.
For warranty claims, missing parts, or technical assistance, please contact Dancover customer support. Have your product model number (B07PXB6218) and purchase details ready when contacting support.

Figure 6: Contact Dancover customer support for assistance.
Additional accessories, such as shelving and flooring solutions, are available separately from Dancover to enhance your shed's functionality.


