1. Introduction
Thank you for choosing the ECOCONUT Tailgate Handle Backup Camera. This product is designed to enhance your vehicle's safety by providing a clear rear view, assisting with parking and reversing maneuvers. This manual provides detailed instructions for installation, operation, maintenance, and troubleshooting to ensure optimal performance and longevity of your camera system.
2. Product Features
- Good Quality Backup Camera: Features a waterproof design and a wide-angle lens for comprehensive rear visibility.
- Enhanced Night Vision: Provides improved performance in low-light conditions.
- Adjustable Parking Lines: Includes a switch to turn parking lines "ON" or "OFF" according to user preference.
- Integrated Tailgate Handle: Designed as a direct replacement for the original tailgate handle, maintaining the vehicle's aesthetic and original trunk switch function.
- Safety Enhancement: Offers valuable assistance for safer driving and parking.
3. Vehicle Compatibility
This Tailgate Handle Backup Camera is specifically designed to fit the following vehicle models and years:
- Chevy Chevrolet Silverado (2007, 2008, 2009, 2010, 2011, 2012, 2013)
- GMC Sierra (2007, 2008, 2009, 2010, 2011, 2012, 2013)
Note: This camera system is intended for use with an aftermarket display. A monitor or navigation unit is not included. Additional adapters or interfaces may be required to connect to a factory radio, which are not supplied with this product.
4. Package Contents
Please verify that all items listed below are included in your package:
- Tailgate Handle with Integrated Backup Camera
- Video Extension Cable (RCA connector)
- Power Cable

Image: The complete ECOCONUT tailgate handle backup camera unit, including the integrated camera and coiled wiring harness.

Image: A detailed view of the coiled video and power cables, showing the RCA connector and exposed power wires for connection.
5. Safety Information
Please read and understand all safety instructions before installing or operating this product. Failure to do so may result in injury or damage to your vehicle.
- Always disconnect the vehicle's battery before beginning any electrical installation.
- Ensure all wiring is properly insulated and secured to prevent short circuits or damage.
- Route cables away from hot engine parts, sharp edges, and moving components.
- This backup camera is an aid and should not replace careful driving and direct observation of surroundings.
- Consult a professional if you are unsure about any part of the installation process.
6. Installation Guide
6.1 Overview of Product and Connections
Video: A brief demonstration of the tailgate handle camera, showing its physical appearance and how the wiring connects to a display unit.
6.2 Step-by-Step Installation
The installation involves replacing your existing tailgate handle with the new camera-integrated handle and connecting the wiring to your aftermarket display.
- Prepare the Vehicle: Ensure the vehicle is turned off and the parking brake is engaged. Disconnect the negative terminal of the vehicle's battery.
- Remove Original Tailgate Handle: Access the inside of the tailgate. Carefully unbolt and remove the existing tailgate handle. Disconnect any existing wiring or linkages.
- Install New Tailgate Handle: Insert the ECOCONUT tailgate handle with the integrated camera into the opening. Secure it with the original or provided fasteners. Ensure the camera is facing outwards and the handle operates correctly.
- Route Wiring: Carefully route the camera's video and power cables through the tailgate, along the vehicle's chassis, and into the cabin towards your aftermarket display unit. Ensure cables are secured with zip ties and protected from heat, sharp edges, and moving parts. Leave sufficient slack near the tailgate for opening and closing, and for potential future removal.
- Connect Power: Connect the red wire of the camera's power cable to a 12V power source that is active when the vehicle is in reverse (e.g., reverse light wire). Connect the black wire to a reliable ground point on the vehicle chassis.
- Connect Video: Connect the yellow RCA connector from the camera cable to the video input (usually labeled "CAM IN" or "REVERSE VIDEO") on your aftermarket display unit.
- Parking Line Switch: Locate the small green wire on the camera cable labeled "Parking line". If you wish to disable the parking guidelines on your display, cut this wire. If you want the guidelines to appear, leave it intact.
- Test the System: Reconnect the vehicle's battery. Turn on the vehicle and shift into reverse. The camera image should appear on your display. Verify the clarity and angle of the view.
- Final Securement: Once confirmed operational, ensure all cables are neatly tucked away and secured, and all panels are reinstalled.
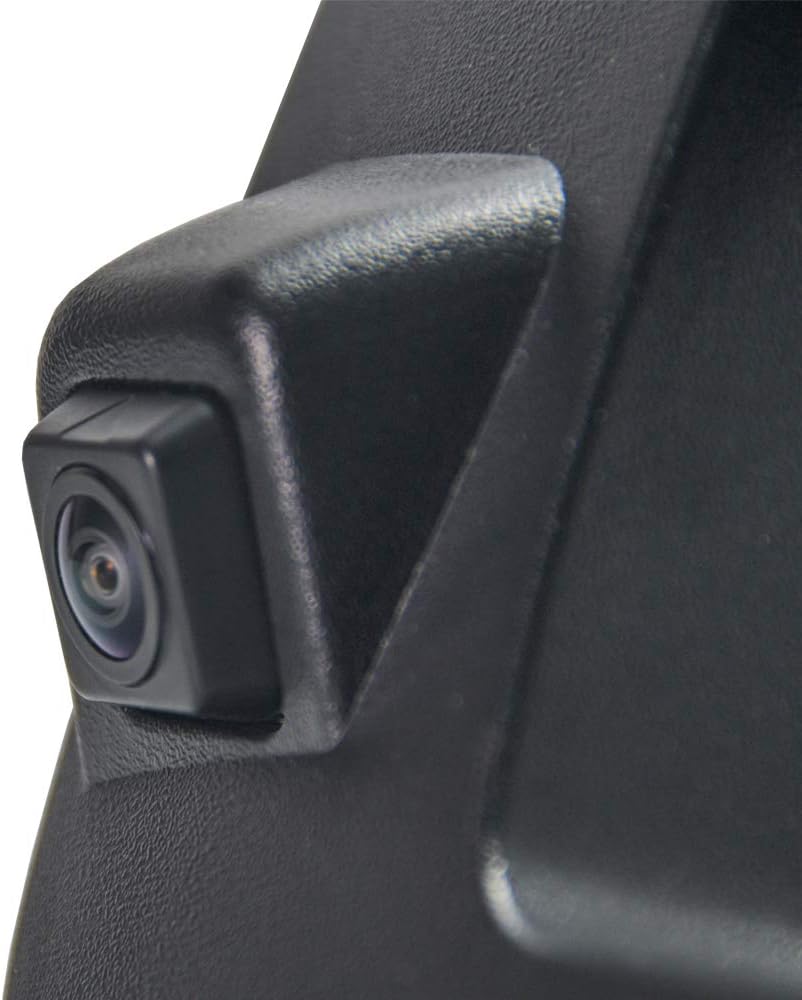
Image: A close-up view of the camera lens, highlighting its integration into the tailgate handle for a factory-like appearance.

Image: A detailed shot of the small green wire with a "Parking line" label, indicating the switch for enabling or disabling parking guidelines.
Video: An installation guide demonstrating the process of replacing the tailgate handle and connecting the backup camera for Chevrolet and GMC Sierra models 2007-2013.
7. Operating Instructions
The ECOCONUT Tailgate Handle Backup Camera operates automatically when your vehicle is shifted into reverse, provided it is correctly connected to a compatible aftermarket display.
- Automatic Activation: When the vehicle is put into reverse gear, the display connected to the camera will automatically switch to show the rear view.
- Parking Guidelines: If the parking line switch wire was left intact during installation, dynamic or static parking guidelines will appear on the screen to assist with parking. These lines indicate the projected path of the vehicle and distance markers.
- Deactivation: When the vehicle is shifted out of reverse gear, the display will return to its previous function (e.g., radio, navigation).
8. Maintenance
To ensure the longevity and optimal performance of your backup camera, follow these simple maintenance tips:
- Clean the Lens: Regularly clean the camera lens with a soft, damp cloth to remove dirt, dust, and water spots that can obstruct the view. Avoid abrasive cleaners.
- Check Wiring: Periodically inspect all visible wiring for any signs of wear, fraying, or loose connections. Secure any loose cables.
- Weather Protection: While the camera is waterproof, extreme weather conditions (e.g., heavy snow, ice) can temporarily affect performance. Ensure the lens is clear of obstructions before use.
9. Troubleshooting
If you encounter any issues with your ECOCONUT Tailgate Handle Backup Camera, refer to the following table for common problems and solutions:
| Problem | Possible Cause | Solution |
|---|---|---|
| No image on display when in reverse. | Loose video cable connection; incorrect power connection; faulty camera. | Check RCA video cable connection at both the camera and display. Verify power and ground connections. Ensure the display is set to the correct video input. |
| Image is blurry or distorted. | Dirty camera lens; damaged video cable; incompatible display resolution. | Clean the camera lens. Inspect the video cable for damage. Ensure your display supports the camera's resolution. |
| Parking lines are not visible. | Parking line switch wire was cut; display settings. | If you desire parking lines, ensure the green "Parking line" wire is intact. Check your display's settings for parking guideline options. |
| Camera stops working after some time. | Water ingress; wiring issue; component failure. | Inspect for signs of water damage. Check all wiring connections. If the issue persists, contact customer support. |
| Camera angle is too high/low (e.g., cannot see hitch). | Fixed camera angle. | The camera has a fixed angle. Some users have modified the mounting plate to adjust the angle, but this is not officially supported and may void the warranty. |
10. Product Specifications
| Specification | Detail |
|---|---|
| Model Number | 8542134610 |
| Product Dimensions | 4.9 x 1.65 x 0.39 inches |
| Item Weight | 1.08 pounds |
| Display Technology | LCD (requires external display) |
| Other Display Features | Wireless (refers to general category, actual connection is wired) |
| Compatible Devices | Trucks with aftermarket display |
| Installation Type | Surface Mount (tailgate handle replacement) |
| Voltage | 12 Volts (DC) |
| Optical Sensor Technology | CMOS |
| Lens Type | Wide Angle |
| Real Angle of View | 170 Degrees |
| Connector Type | RCA |
11. Warranty and Support
ECOCONUT is committed to providing high-quality products and customer satisfaction. For any warranty claims, technical support, or inquiries regarding your Tailgate Handle Backup Camera, please contact the seller or ECOCONUT customer service directly.
Please retain your proof of purchase for warranty purposes. Specific warranty terms and conditions may apply.