1. Introduction
This manual provides detailed instructions for the installation, operation, and maintenance of your HOMELY LC-5 5-Band EQ Guitar Preamp with Tuner and Microphone. Please read this manual thoroughly before using the product to ensure proper function and longevity.
2. Product Features
- 5-Band Equalizer: Adjust Bass, Midd1, Midd2, Treble, and Presence for precise tone shaping.
- Integrated Digital Tuner: Convenient LCD display tuner for accurate guitar tuning.
- Microphone Pickup: Enhances sound capture, especially for acoustic nuances.
- Volume Control: Master volume adjustment.
- Low Battery Indicator: Alerts when battery replacement is needed.
- Blend Control: Mixes the signal from the piezo pickup and the microphone.

Figure 2.1: The HOMELY LC-5 preamp unit highlighting the LCD display and 5-band equalizer controls.
3. Setup and Installation
Proper installation is crucial for optimal performance. If you are unfamiliar with guitar electronics, professional installation is recommended.
3.1 Components Overview
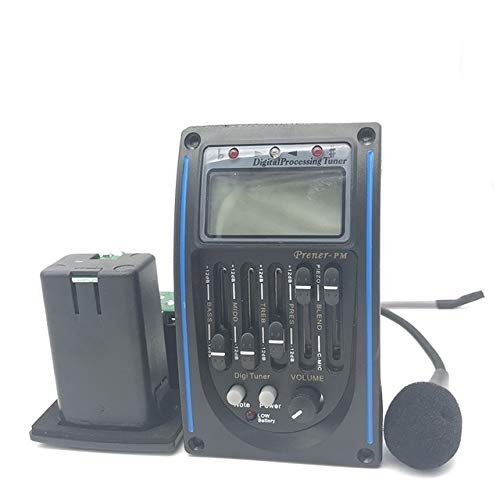
Figure 3.1: Overview of the LC-5 preamp unit, including the main control panel, separate battery compartment, and attached microphone.
3.2 Installation Steps
- Prepare the Guitar: Carefully cut the necessary openings in your guitar body for the preamp unit and the endpin jack. Ensure precise measurements to avoid damage.
- Install the Preamp Unit: Secure the main preamp control panel into its designated opening.
- Install the Endpin Jack: Mount the endpin jack assembly, which includes the output jack and battery compartment, at the bottom of the guitar.
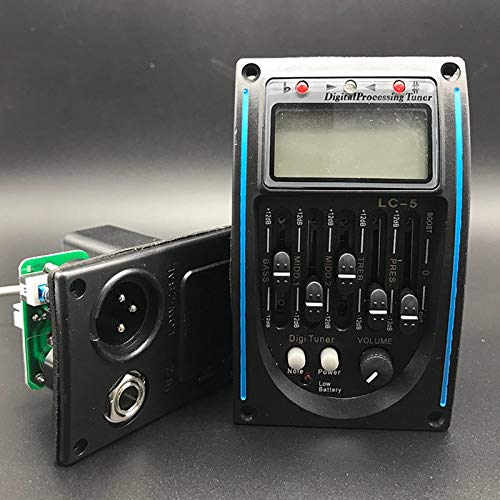
Figure 3.2: Side view of the LC-5 preamp unit, illustrating the output jacks (XLR and 1/4-inch) and the integrated battery compartment.
- Connect the Piezo Pickup: Route the piezo pickup wire from the bridge saddle to the preamp unit and connect it to the designated input.
- Connect the Microphone: Ensure the attached microphone is positioned correctly inside the guitar body for optimal sound capture.
- Install Battery: Open the battery compartment (usually located within the endpin jack assembly) and insert a 9V battery, observing correct polarity.
- Test Connections: Before fully securing, connect the guitar to an amplifier and test all functions to ensure proper wiring and operation.
4. Operating Instructions
Familiarize yourself with the controls for effective sound management.
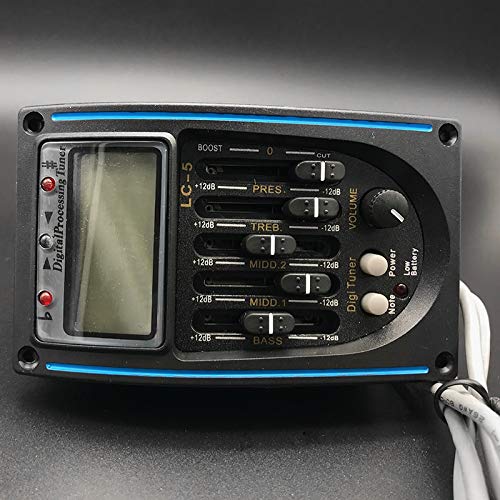
Figure 4.1: Detailed view of the LC-5 preamp's control panel, showing the 5-band EQ sliders, volume knob, digital tuner display, and control buttons.
4.1 Power On/Off
The preamp typically powers on automatically when a guitar cable is plugged into the endpin jack. Disconnect the cable to power off and conserve battery life.
4.2 Volume Control
- VOLUME Knob: Rotate to adjust the overall output level of your guitar. Start with a low setting and gradually increase to avoid sudden loud sounds.
4.3 5-Band Equalizer
Use the five slider controls to shape your guitar's tone:
- BASS: Adjusts low-frequency response (0-80 Hz). Boost for a fuller, warmer sound; cut for clarity.
- MIDD 1 & MIDD 2: Adjusts mid-range frequencies (250 Hz - 2 kHz). These are crucial for the guitar's presence and projection. Experiment to find your desired tone.
- TREB: Adjusts high-frequency response (2 kHz - 20 kHz). Boost for brightness and sparkle; cut to reduce harshness.
- PRES (Presence): Adjusts upper mid-range frequencies (around 3-5 kHz) for added clarity and attack.
4.4 Digital Tuner
- DIGI TUNER Button: Press this button to activate the built-in digital tuner. The LCD display will show the note being played.
- Tuning: Pluck each string individually. The display will indicate if the note is flat, sharp, or in tune. Adjust your guitar's tuning pegs until the display shows the correct note and indicates it is in tune.
- Note Button: Some models may have a 'Note' button to cycle through different tuning modes (e.g., chromatic, guitar). Refer to the display for current mode.
- Power Button (Tuner): This button typically controls the tuner's power, separate from the main preamp power.
4.5 Blend Control (if applicable)
The "BLEND" slider allows you to mix the signal from the piezo pickup and the internal microphone. Slide towards "PIEZO" for a direct, punchy sound, or towards "MIC" for a more natural, ambient acoustic tone. Adjust to find the desired balance.
4.6 Low Battery Indicator
A "LOW BATTERY" LED or indicator on the LCD will illuminate when the 9V battery needs replacement. Replace the battery promptly to ensure consistent performance.
5. Maintenance
5.1 Battery Replacement
When the low battery indicator activates, replace the 9V battery. Open the battery compartment, remove the old battery, and insert a new one, ensuring correct polarity. Always use a fresh alkaline 9V battery.
5.2 Cleaning
Wipe the preamp's control panel with a soft, dry cloth. Avoid using abrasive cleaners or solvents, as they may damage the finish or electronic components.
5.3 Storage
When not in use for extended periods, disconnect the guitar cable from the output jack to prevent battery drain. Store the guitar in a stable environment, away from extreme temperatures and humidity.
6. Troubleshooting
- No Sound Output:
- Check if the guitar cable is fully inserted into both the guitar's output jack and the amplifier.
- Ensure the amplifier is powered on and its volume is up.
- Verify the preamp's volume knob is not set to minimum.
- Check the battery. Replace if the low battery indicator is on or if the battery is old.
- Inspect all internal wiring connections (professional inspection recommended).
- Poor Sound Quality / Buzzing / Hum:
- Check for loose connections inside the guitar.
- Ensure the piezo pickup is correctly seated under the bridge saddle.
- Adjust EQ settings; extreme boosts can introduce unwanted noise.
- Test with a different guitar cable and amplifier to rule out external issues.
- Ensure the microphone is not touching any vibrating parts of the guitar body that could cause feedback.
- Tuner Not Working:
- Ensure the tuner is activated by pressing the "DIGI TUNER" button.
- Check battery level.
- Pluck strings firmly and clearly.
- Low Battery Indicator Always On:
- Replace the 9V battery with a new one.
- If the issue persists with a new battery, there might be an internal circuit issue requiring professional service.
7. Specifications
| Model | LC-5 |
| Brand | HOMELY |
| Equalizer Bands | 5-Band (Bass, Midd1, Midd2, Treble, Presence) |
| Display | LCD Digital Tuner |
| Power Supply | 9V Battery (not included) |
| Pickup Type | Piezo and Microphone |
8. Warranty and Support
For warranty information or technical support, please contact HOMELY customer service through their official channels. Keep your purchase receipt as proof of purchase.
Manufacturer: Homely
Date First Available: 26 March 2019


