1. Introduction
This user manual provides essential information for the safe and efficient operation of your Renogy 2000W Pure Sine Wave Inverter Charger. This versatile device is designed to convert 12V DC battery power into 120V AC household electricity, making it ideal for off-grid solar systems, RVs, boats, and home backup power solutions. It also features an integrated 4-stage battery charger and an automatic transfer switch for seamless power management.
2. Safety Information
WARNING: Improper installation or operation of this inverter charger can result in serious injury or death. Always follow all safety precautions and instructions provided in this manual.
- Ensure the inverter charger is turned OFF before making any electrical connections.
- Always connect the battery cables with correct polarity (positive to positive, negative to negative). Reverse polarity can cause severe damage to the unit and connected equipment.
- Install the unit in a well-ventilated area, away from flammable materials and moisture.
- Do not disassemble or attempt to repair the inverter charger yourself. Refer all servicing to qualified personnel.
- This unit provides comprehensive protection against under-voltage, overvoltage, overload, overheating, and short circuits. However, proper system design and installation are crucial for optimal safety.
3. Product Overview
The Renogy 2000W Pure Sine Wave Inverter Charger combines an inverter, a 4-stage battery charger, and an automatic transfer switch into a single compact unit. It delivers high-quality AC power, suitable for sensitive electronics, and efficiently charges various battery types.

Figure 3.1: Renogy 2000W Pure Sine Wave Inverter Charger
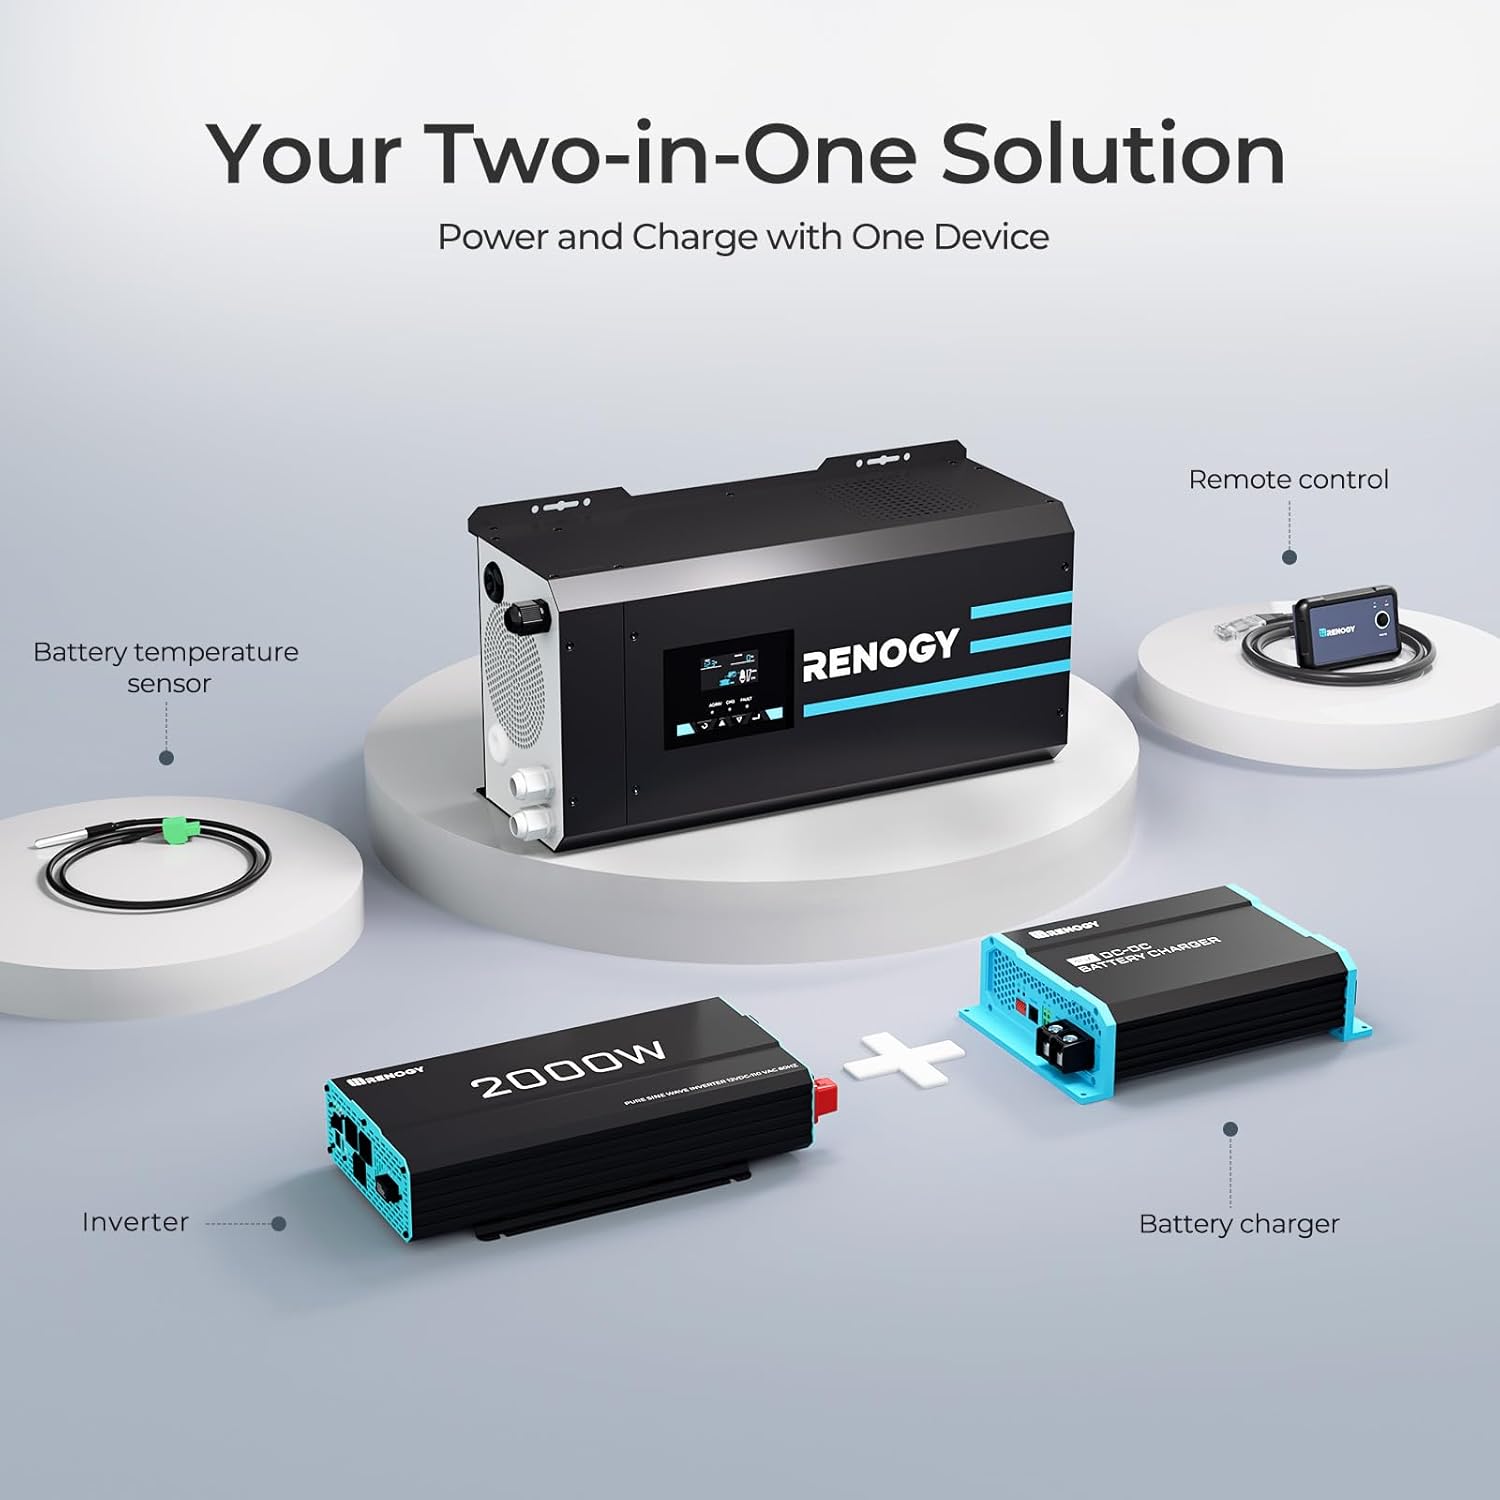
Figure 3.2: Two-in-One Solution: Inverter and Charger

Figure 3.3: Powerful Output and High Efficiency
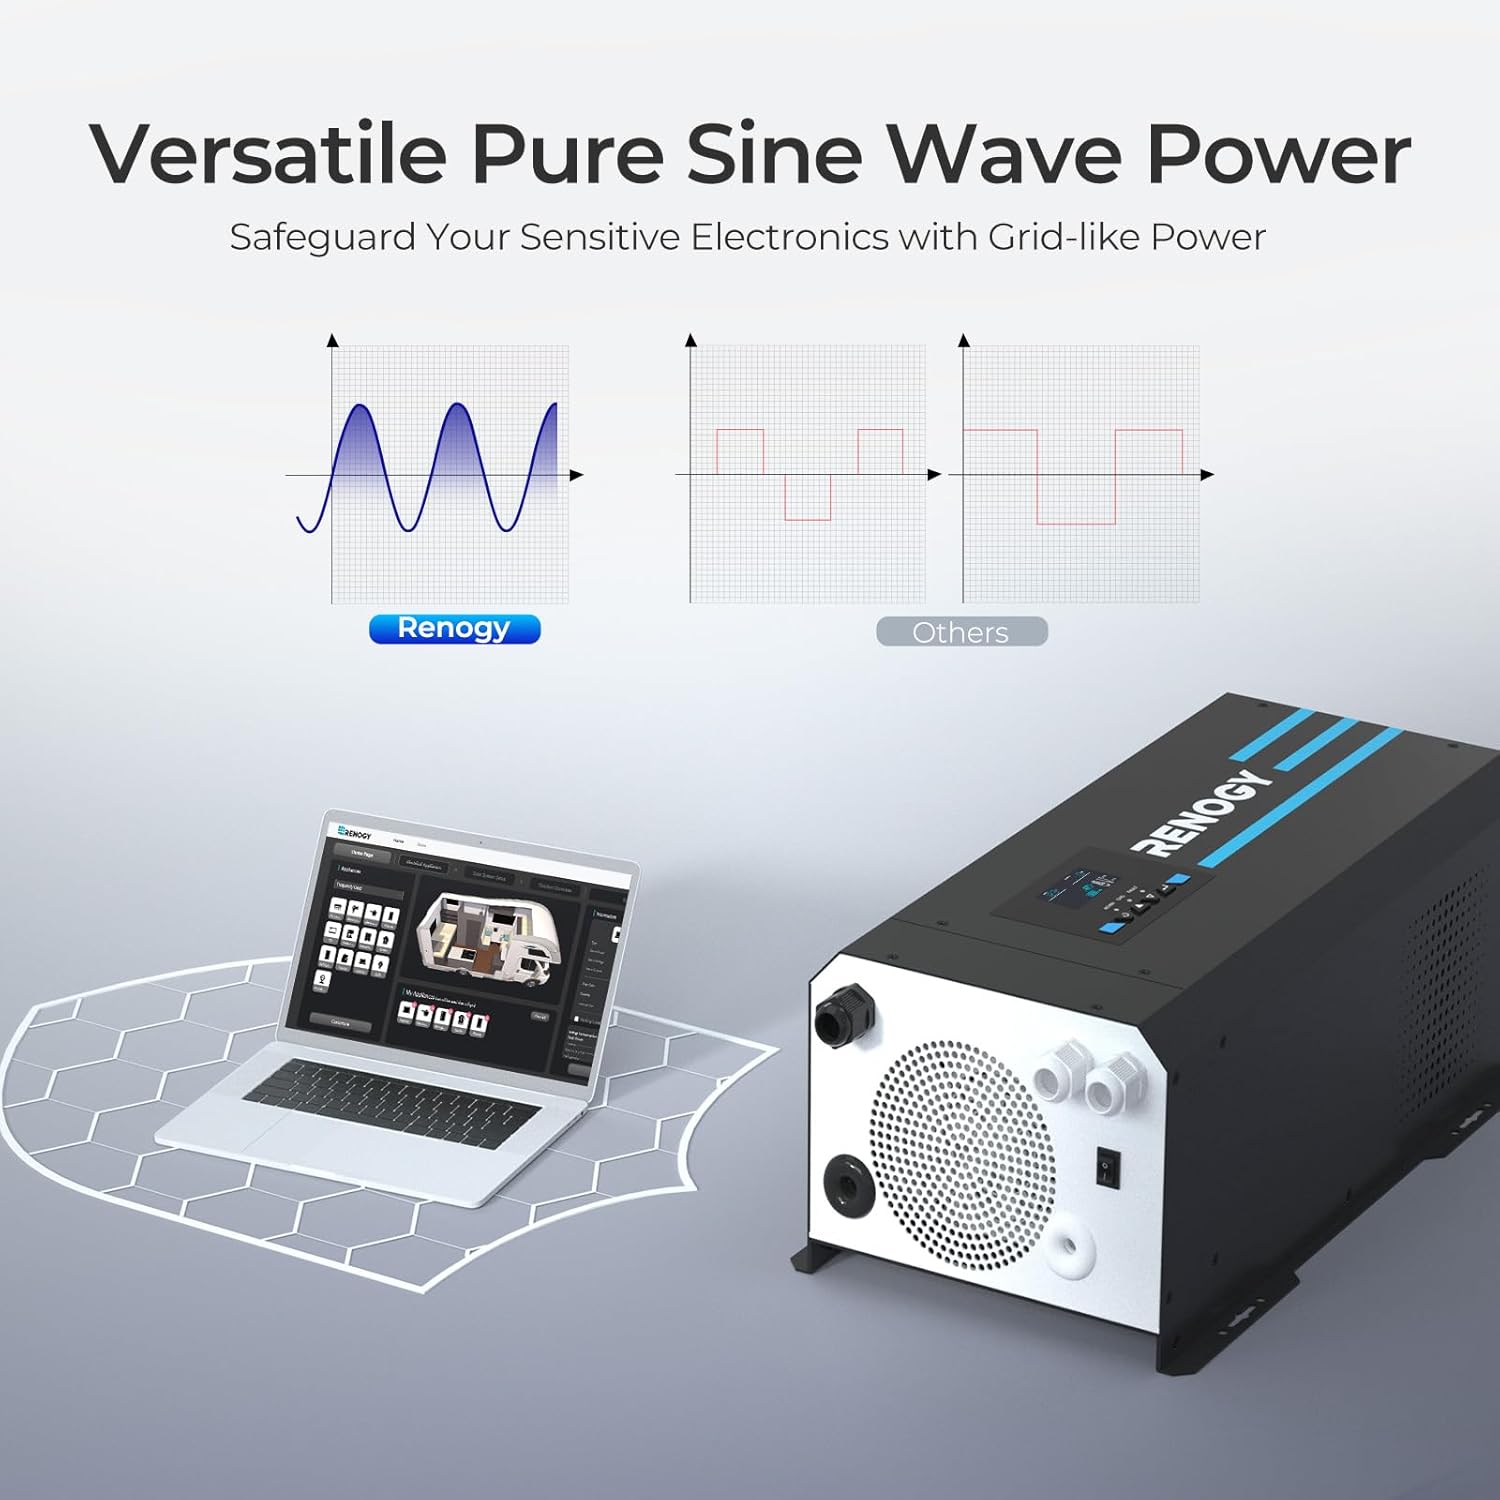
Figure 3.4: Pure Sine Wave Technology for Sensitive Electronics
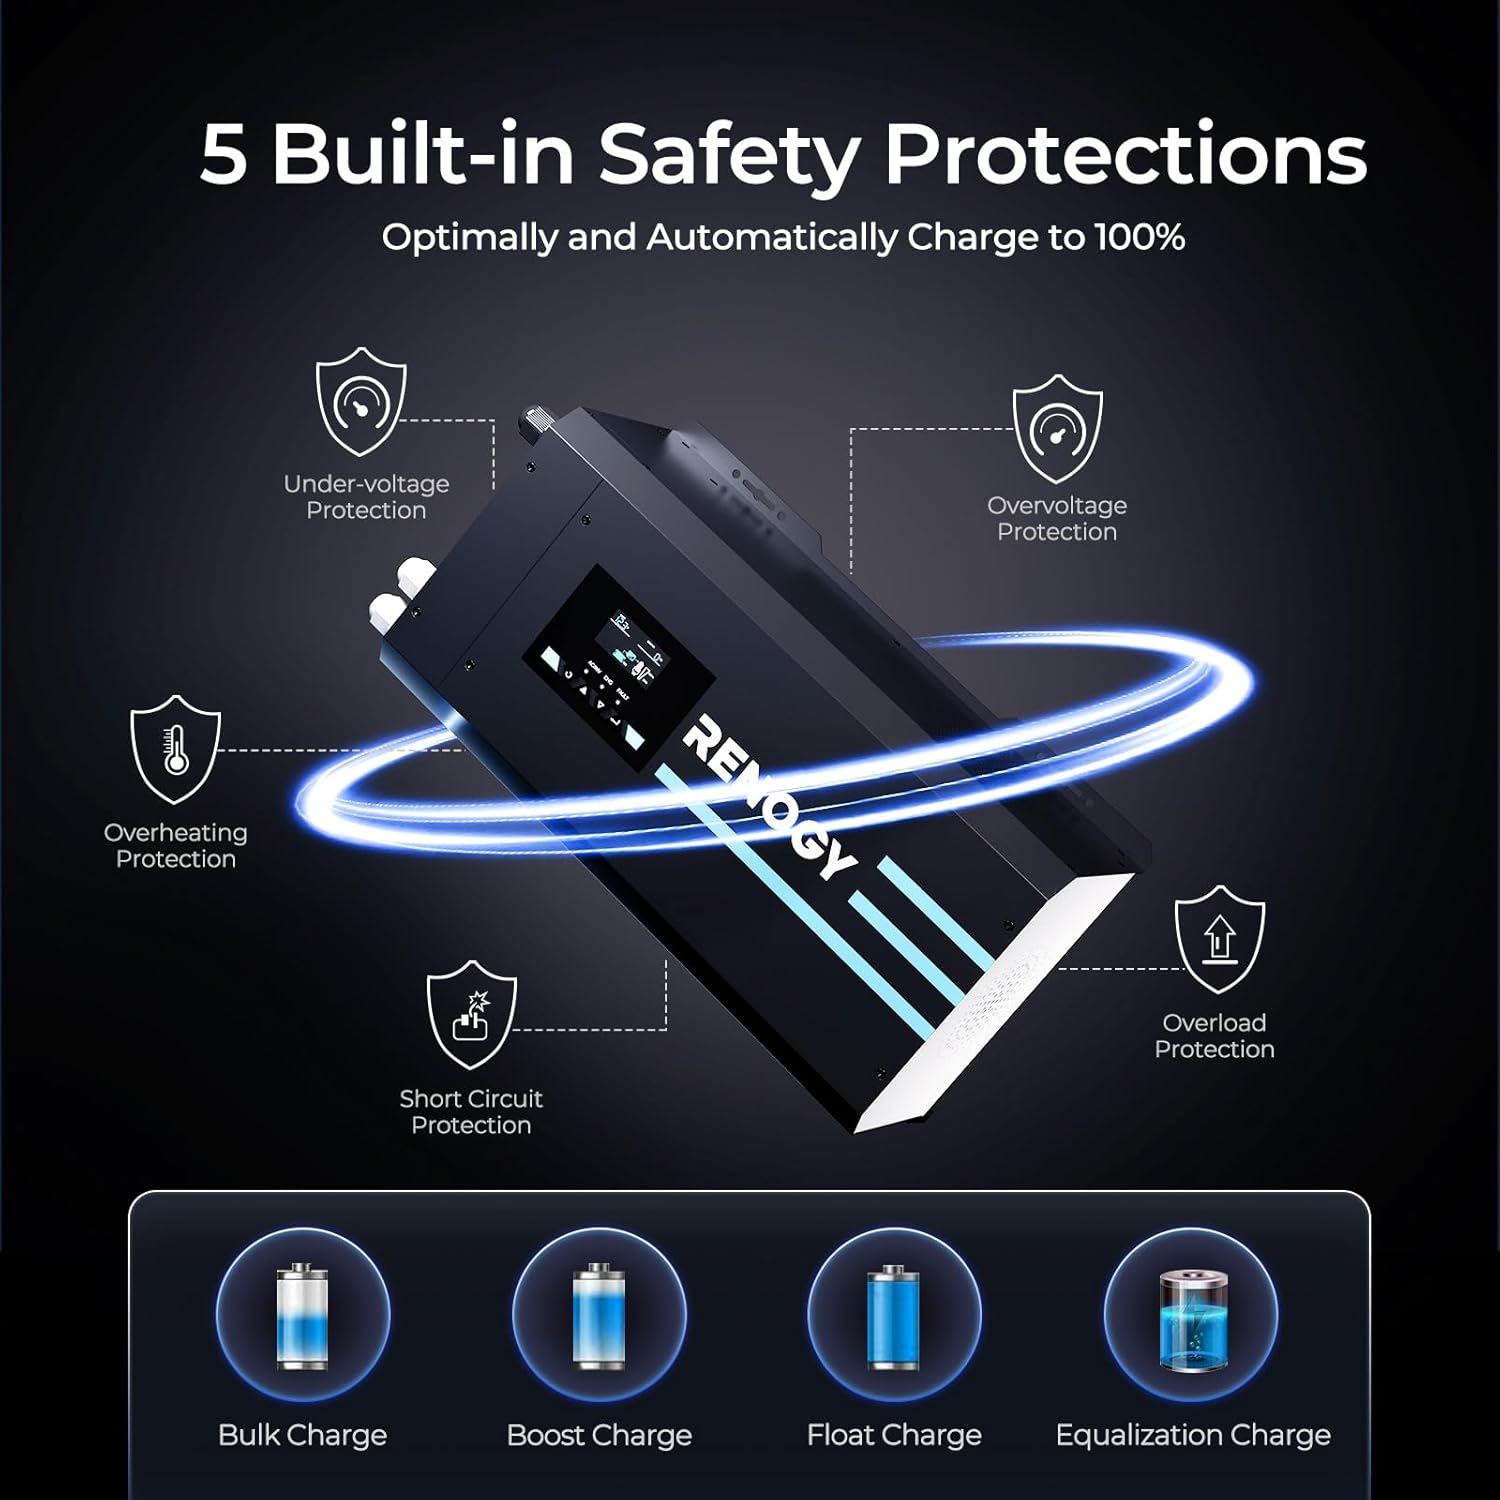
Figure 3.5: Built-in Safety Protections

Figure 3.6: What's in the Box and Dimensions
4. Setup & Installation
Before beginning installation, ensure the inverter charger is in the OFF position. It is recommended to wear appropriate safety gear, including gloves and eye protection.
4.1 Battery Connection
- Remove the terminal cover from the inverter charger.
- Loosen the negative terminal nut on the inverter charger.
- Insert the negative battery cable (black) onto the negative terminal and tighten the nut securely.
- Connect the other end of the negative battery cable to the negative post of your battery bank.
- Repeat steps 2-4 for the positive battery cable (red), ensuring correct polarity.
Note: The inverter charger is compatible with GEL, AGM, SLA, FLD, CAL, and LI battery types. Ensure your battery bank is adequately sized for your power needs.
4.2 AC Input and Output Wiring
The inverter charger uses hardwired connections for AC input (shore power) and AC output (appliances). Ensure the unit is OFF before proceeding.
- Feed the bare wire ends of your AC input cable through the designated input faceplate terminals (L, N, Ground).
- Securely connect the wires to the corresponding terminals.
- Repeat steps 1-2 for the AC output cable, connecting it to the output faceplate terminals.
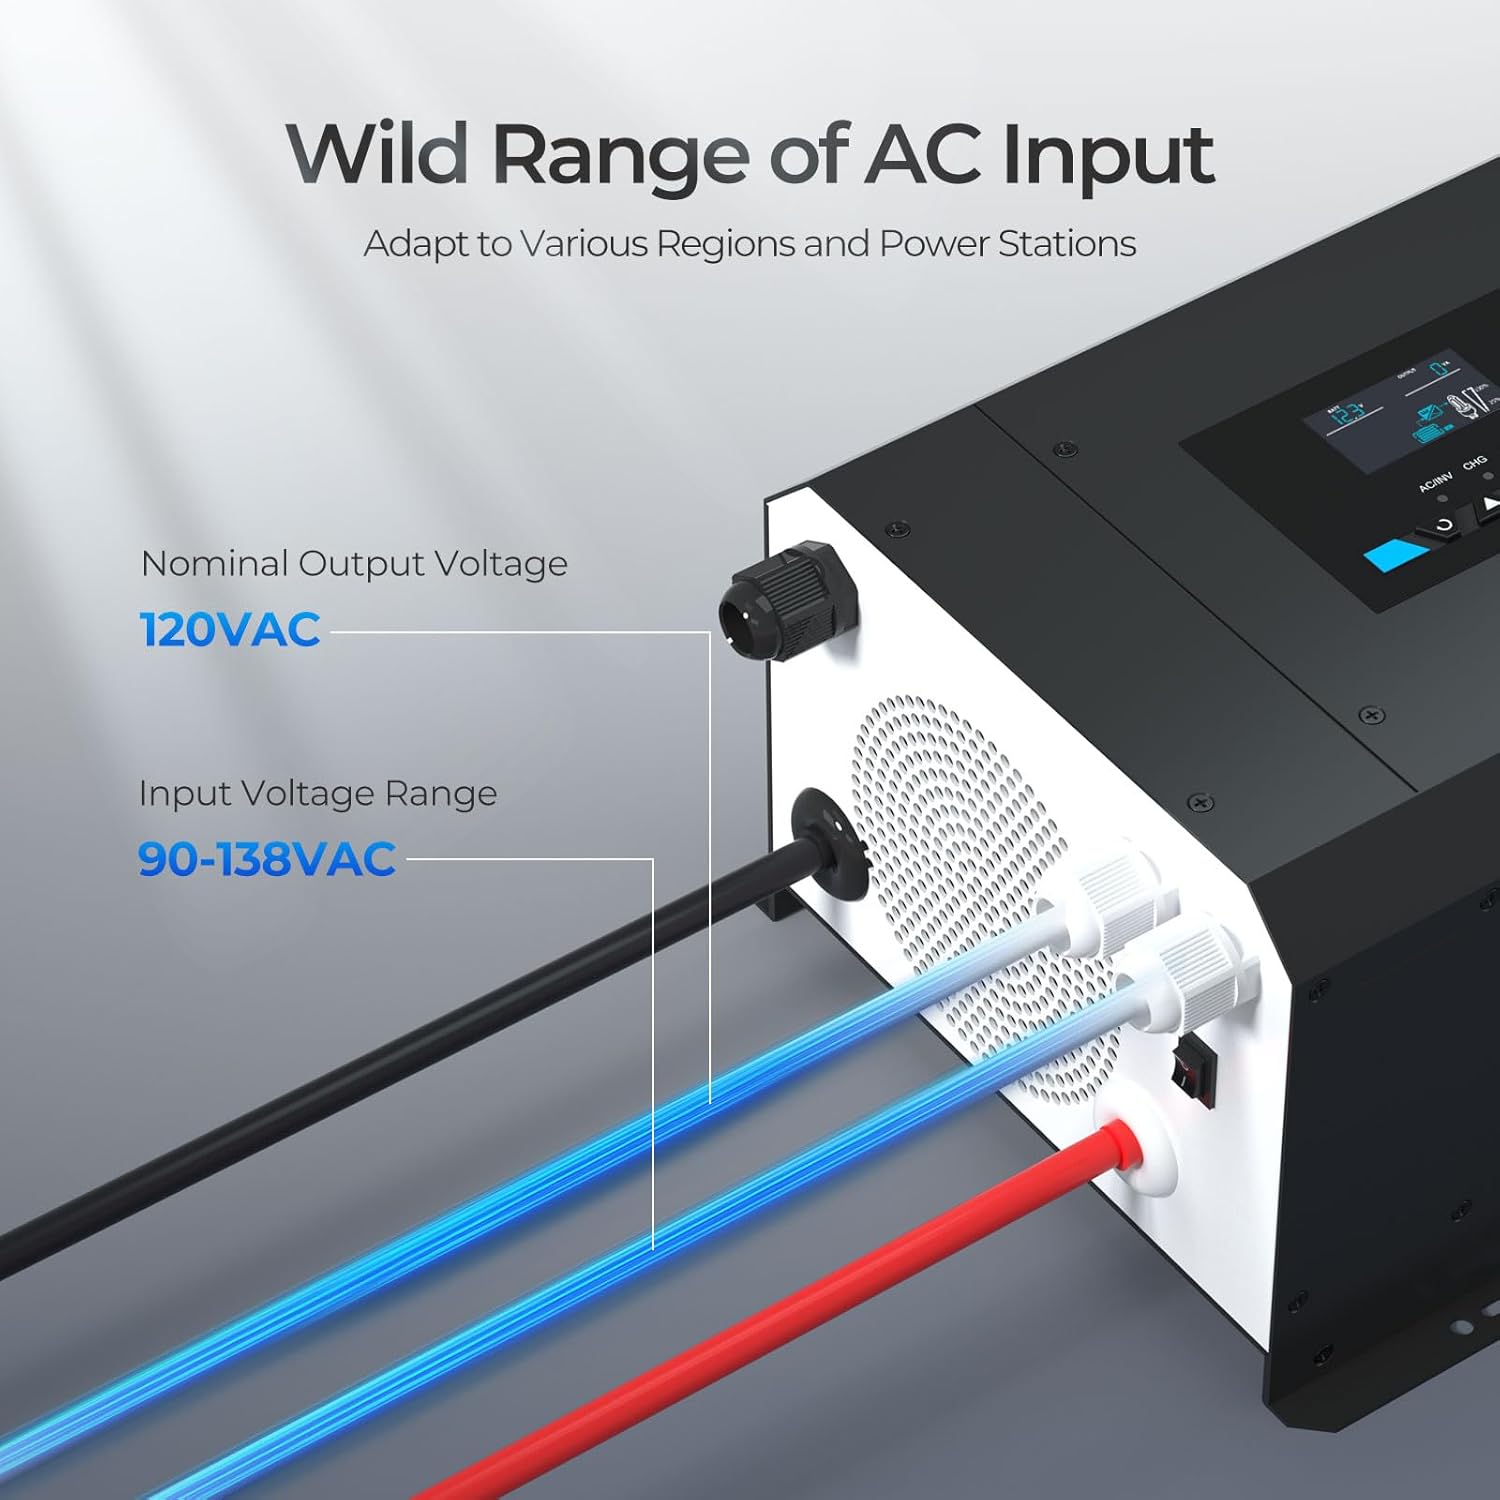
Figure 4.1: AC Input and Output Connections
4.3 Connecting Accessories
- Battery Temperature Sensor: Connect the provided battery temperature sensor to the designated port on the inverter charger. Place the sensor next to the battery to allow the inverter charger to continuously adjust charging voltage based on battery temperature.
- Wired Remote Control: Connect the wired remote control to the RJ11 port on the inverter charger. This allows you to turn the unit on and off from a more convenient location.
Video 4.2: Renogy 3000W Pure Sine Wave Inverter Charger with LCD Display - This official seller video demonstrates the connection process for the inverter charger, including battery, AC input/output, and accessories. While it features a 3000W model, the connection principles are largely the same for the 2000W unit.
5. Operation
5.1 Powering On/Off
Once all connections are secure, switch the inverter charger to the ON position. The LCD display will illuminate, indicating the unit is operational.
5.2 LCD Display and Settings
The intelligent LCD display panel provides real-time status updates and allows for programming various features. Use the navigation buttons to scroll through different screens and adjust settings.
Key display indicators include:
- AC/INV: Indicates AC input or inverter operation.
- CHG: Indicates battery charging status.
- FAULT: Indicates an error or fault condition.
To access settings, hold down the 'Enter' button for 3 seconds. You can then navigate to specific options, such as battery type selection (e.g., Lithium, GEL, AGM, etc.) to optimize charging parameters.
5.3 Charging Functionality
The Renogy Inverter Charger features a 4-Stage battery charger:
- Bulk Stage: Charges the battery at the maximum current until it reaches a set voltage.
- Boost Stage: Continues charging at a constant voltage to ensure full charge.
- Float Stage: Maintains the battery at a safe voltage to prevent self-discharge.
- Equalization: Periodically overcharges certain battery types to balance cell voltages (if applicable and enabled).
The unit ensures optimal and automatic charging to reach 100% capacity efficiently.
6. Maintenance
Regular maintenance ensures the longevity and optimal performance of your inverter charger.
- Cleaning: Keep the unit clean and free from dust and debris. Use a dry cloth to wipe the exterior. Ensure ventilation openings are clear.
- Connections: Periodically check all electrical connections for tightness and corrosion. Loose connections can lead to overheating and poor performance.
- Battery Health: Monitor your battery bank's health and ensure it is properly maintained according to the battery manufacturer's guidelines.
7. Troubleshooting
If you encounter issues with your inverter charger, refer to the following common troubleshooting steps:
- No Power Output: Check battery connections, ensure the unit is ON, and verify battery voltage is within the operating range.
- Fault Indicator: If the 'FAULT' LED is illuminated, check the LCD display for specific error codes. Refer to the detailed user manual (PDF) for a comprehensive list of fault codes and their remedies.
- Overload: If the unit shuts down due to overload, reduce the connected AC load and restart the inverter.
- Overheating: Ensure adequate ventilation around the unit. Clear any obstructions from the cooling fans.
For persistent issues, contact Renogy customer support.
8. Specifications
| Feature | Specification |
|---|---|
| Model Name | 12V DC to 120V AC |
| Wattage | 2000W (Continuous) / 6000W (Surge) |
| Power Source | Solar Powered (via battery bank) |
| Product Dimensions | 20.1 x 11.2 x 7.6 inches |
| Item Weight | 51.1 pounds |
| Manufacturer | Renogy |
| Compatibility | GEL, AGM, SLA, FLD, CAL, and LI batteries |
9. Warranty & Support
Renogy stands behind the quality of its products. For specific warranty details, please refer to the warranty information included with your purchase or visit the official Renogy website.
For technical assistance, troubleshooting, or any other inquiries, please contact Renogy customer support. You can also refer to the comprehensive User Manual (PDF) for more in-depth information.