
1. Product Overview
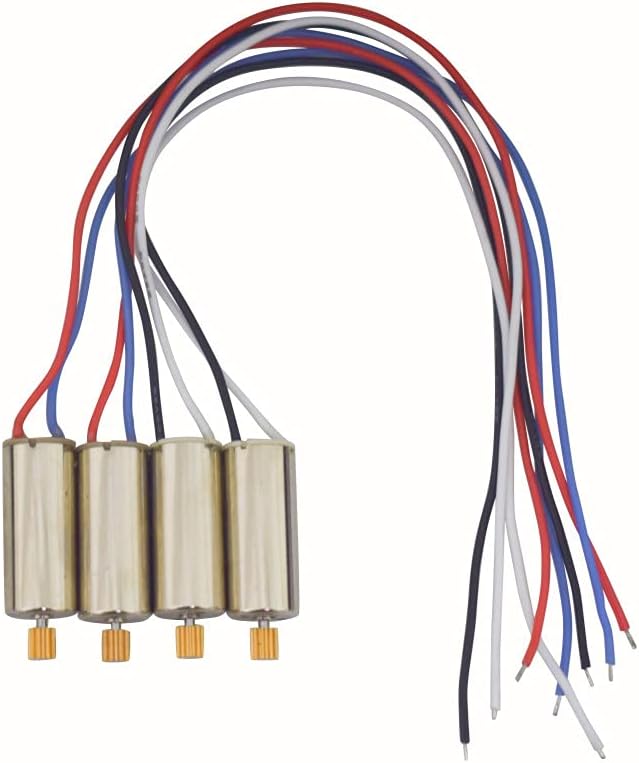
The Fytoo 8520 motors are high-quality replacement parts designed specifically for UDIRC U52G, U52, D50, and U89S four-axis remote control drones. This package includes two forward rotation motors and two reverse rotation motors, ensuring a complete set for your drone's propulsion system. These lightweight motors are engineered for smooth and reliable operation, providing an excellent replacement for original components.
- Designed for UDIRC U52G, U52, D50, U89S four-axis aircraft.
- Lightweight construction for optimal drone performance.
- Ensures smooth and consistent operation.
- High-quality components, comparable to original equipment.
2. Compatibility
These motors are specifically compatible with the following UDIRC drone models:
- UDIRC U52G
- UDIRC U52
- UDIRC D50
- UDIRC U89S
Ensure your drone model matches one of the listed compatible models before attempting installation.
3. Package Contents
Upon opening the package, you should find the following items:
- 2 x Fytoo 8520 Forward Rotation Motors
- 2 x Fytoo 8520 Reverse Rotation Motors
Inspect all components for any signs of damage during transit. If any items are missing or damaged, please contact customer support.
4. Specifications
| Specification | Value |
|---|---|
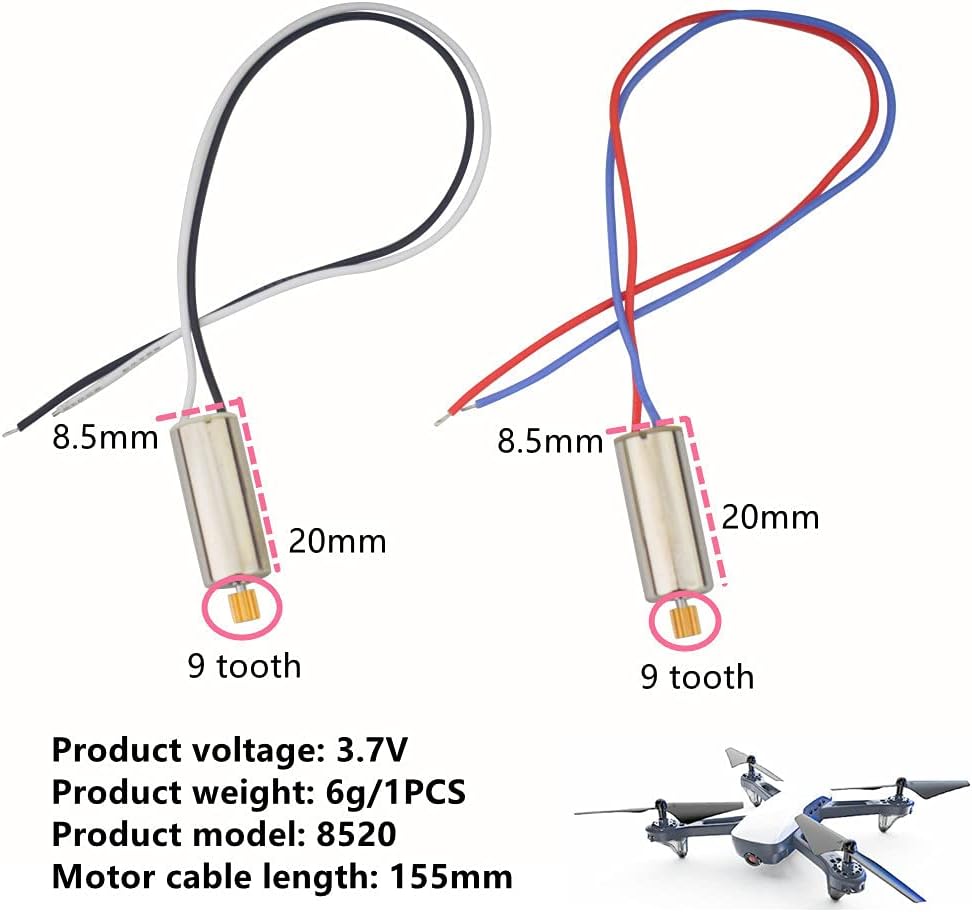
| Product Model | 8520 |
| Product Voltage | 3.7V |
| Motor Weight (per piece) | 6g |
| Motor Cable Length | 155mm |
| Gear Teeth | 9 teeth |
| Motor Diameter | 8.5mm |
| Motor Length | 20mm |
| Total Package Weight | 22g |
5. Installation Guide
Replacing drone motors requires careful attention. If you are unsure about any steps, it is recommended to seek assistance from an experienced technician or refer to your drone's specific service manual.
5.1. General Safety Precautions
- Always disconnect the drone's battery before beginning any installation or maintenance work.
- Work in a clean, well-lit area to prevent loss of small parts.
- Handle motors and wires carefully to avoid damage.
- Wear appropriate eye protection if soldering is involved.
5.2. Tools Required (May Vary by Drone Model)
- Small Phillips head screwdriver
- Wire cutters/strippers
- Soldering iron and solder (if original motors are soldered)
- Heat shrink tubing or electrical tape
- Tweezers (optional, for handling small wires)
5.3. Motor Identification (Forward vs. Reverse)
It is crucial to install the correct motor type (forward or reverse) in the designated arm of your drone. Incorrect installation will prevent the drone from flying correctly.
- Forward Rotation Motors: Typically have red and blue wires. These motors spin clockwise (CW).
- Reverse Rotation Motors: Typically have black and white wires. These motors spin counter-clockwise (CCW).

5.4. Installation Steps (General)
- Identify the Faulty Motor: Determine which motor needs replacement and its rotation direction (CW or CCW). Note the wire colors of the motor you are replacing.
- Disassemble Drone Arm: Carefully remove the screws and plastic housing covering the motor in the drone arm.
- Disconnect Old Motor: Gently pull out the old motor. If the wires are soldered, carefully desolder them from the drone's circuit board or existing wiring. If they are connected via a plug, disconnect it.
- Prepare New Motor: Take the new motor of the correct rotation type (matching the wire colors of the old motor). If necessary, trim the wires to the appropriate length.
- Connect New Motor: Solder the new motor's wires to the corresponding points on the drone's circuit board or existing wiring. Ensure polarity is correct (match wire colors: red to red, blue to blue, black to black, white to white). If using connectors, simply plug in the new motor.
- Secure Wiring: Use heat shrink tubing or electrical tape to insulate any exposed solder joints or wire connections.
- Reassemble Drone Arm: Carefully place the new motor into its housing and reattach the plastic cover and screws. Ensure no wires are pinched.
- Test Flight: Reconnect the drone's battery and perform a short, controlled test flight to ensure the new motor functions correctly and the drone is stable.
6. Maintenance
Proper maintenance can extend the lifespan of your drone motors.
- Keep Clean: Regularly inspect motors for dust, dirt, or debris accumulation. Use a soft brush or compressed air to gently clean them.
- Avoid Overheating: Do not continuously operate the drone for extended periods without allowing the motors to cool down.
- Check for Damage: Periodically check motor shafts and housings for any signs of bending, cracks, or unusual wear.
- Propeller Balance: Ensure propellers are balanced and free from damage, as unbalanced propellers can cause excessive vibration and stress on motors.
7. Troubleshooting
This section addresses common issues you might encounter with drone motors.
| Problem | Possible Cause | Solution |
|---|---|---|
| Motor not spinning | Loose wire connection Damaged motor Incorrect motor type installed | Check and secure all wire connections. Resolder if necessary. Replace the motor. Verify correct forward/reverse motor is in place. |
| Motor spinning slowly or inconsistently | Debris in motor Bent motor shaft Weak battery | Clean motor with compressed air. Replace the motor. Charge or replace drone battery. |
| Drone unstable after motor replacement | Incorrect motor rotation direction Unbalanced propeller | Ensure correct forward/reverse motor is installed in each arm. Check propellers for damage and balance. Replace if necessary. |
| Unusual noise from motor | Debris in motor Worn bearings Bent propeller | Clean motor. Replace the motor. Replace propeller. |
8. Warranty and Support
For information regarding product warranty, returns, or technical support, please refer to the seller's policy on the platform where the product was purchased. Keep your purchase receipt as proof of purchase.
For further assistance, you may also visit the official Fytoo store page on Amazon or contact their customer service directly.