
1. Introduction
This manual provides comprehensive instructions for the Phoncoo JS-C33 Universal LCD Battery Capacity Indicator and Digital Voltmeter. It covers product features, installation, operation, and maintenance to ensure proper and safe use of the device.
2. Safety Information
- Ensure the input voltage is within the specified range of 10V-100V.
- Connect wires correctly: red to positive, black to negative. Incorrect wiring can damage the device.
- Avoid short circuits during installation and operation.
- Do not expose the device to excessive moisture, extreme temperatures, or direct sunlight.
- Keep the device away from children.
3. Product Features
- Durable Design: Features a simple dustproof and waterproof surface with a full protective cover.
- Clear Display: Color liquid crystal display provides clear visibility, including soft night illumination.
- Versatile Battery Compatibility: Customizable for various battery types, including lead-acid, lithium-ion, lithium iron phosphate, and metal hydride batteries.
- Multi-Parameter Display: Shows remaining battery power percentage, voltage, and temperature value.
- Wide Input Voltage: Supports a 10V-100V input voltage range with reverse polarity protection.
- Power Saving: Automatically enters sleep mode after 10 seconds of inactivity.
- Low Power Alert: A flashing red mark indicates low power, accompanied by an adjustable low beep alarm.
- Easy Installation: Designed for simple installation with a buckle mechanism, requiring no screws.
- Open Programming Mode: Allows for advanced customization of settings.
4. Package Contents
Please verify that all items are present in your package:
- Phoncoo JS-C33 Battery Capacity Indicator and Voltmeter
- PH2.0 Terminal Wire
- (Optional) NTC Temperature Sensor
5. Product Overview
5.1. Device Components
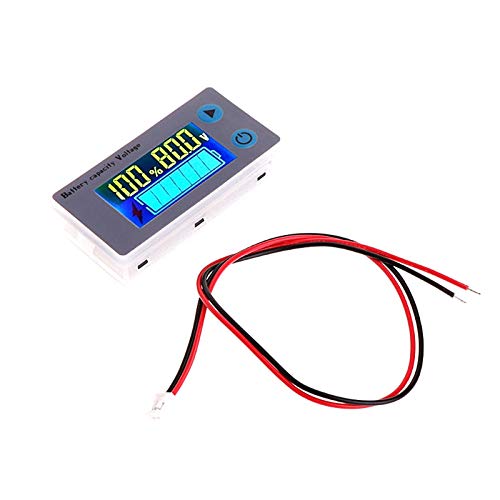
Image: The Phoncoo JS-C33 device shown with its wiring harness. The device features an LCD screen and two control buttons.
5.2. Front View
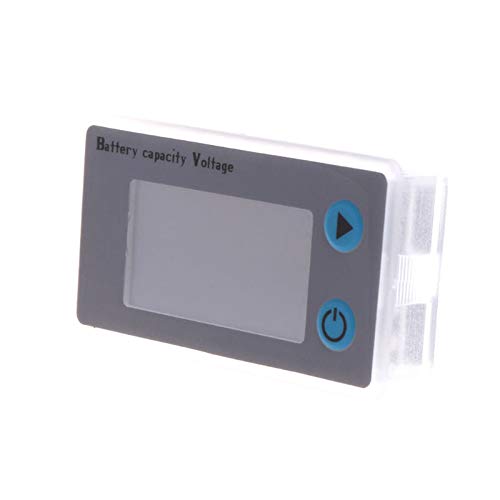
Image: A clear front view of the JS-C33 device, highlighting the LCD screen and the two control buttons on the right side.
5.3. Rear View
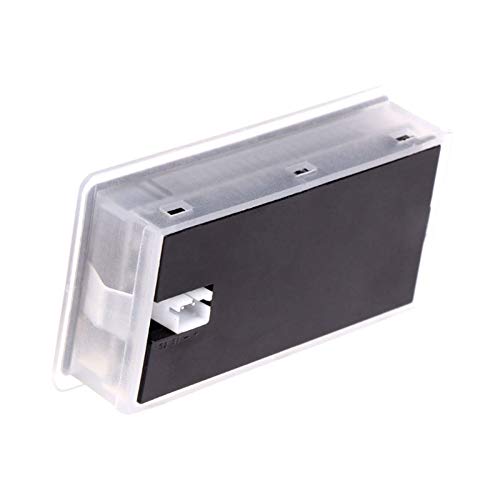
Image: The rear view of the JS-C33, displaying the PH2.0 connector port for the wiring harness.
5.4. Dimensions
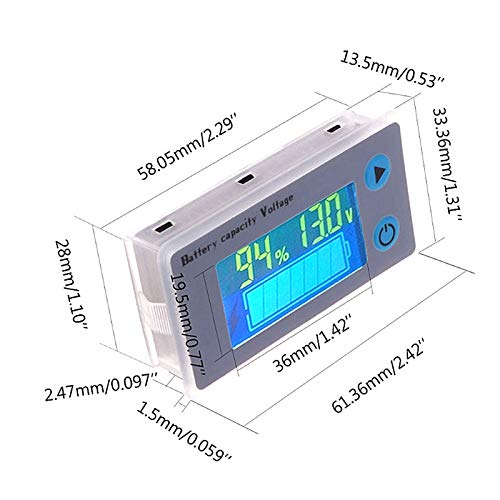
Image: A technical diagram illustrating the precise dimensions of the JS-C33 device, including length, width, and depth, in both millimeters and inches.
6. Setup and Installation
6.1. Wiring Connection
- Connect the PH2.0 terminal wire to the corresponding port on the circuit board face of the device. Ensure it is securely plugged in.
- Connect the red wire to the positive (+) terminal of your battery or power source.
- Connect the black wire to the negative (-) terminal of your battery or power source.
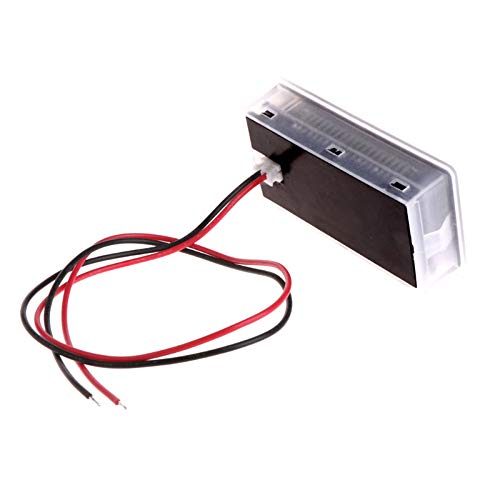
Image: A close-up view of the PH2.0 wiring harness, showing the red and black wires with their respective connectors.
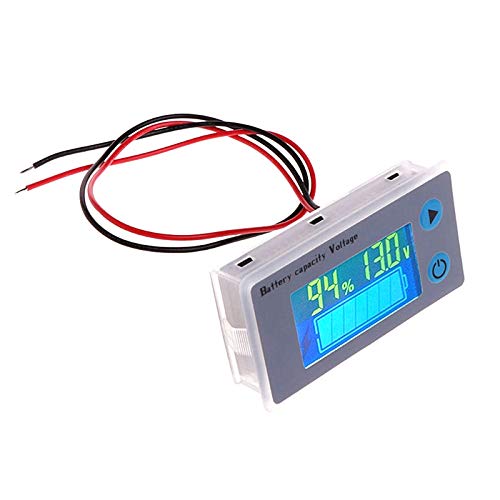
Image: The JS-C33 device with the PH2.0 wiring harness properly connected to its rear port.
6.2. Temperature Sensor (Optional)
If using an external NTC temperature sensor, place the sensor directly on the component or area where you wish to measure the temperature. Avoid squeezing or damaging the sensor during placement.
6.3. Mounting
The device is designed for simple installation using its integrated buckle mechanism. Insert the device into the desired panel cutout until it clicks into place. No additional screws are required for mounting.
7. Operating Instructions
7.1. Initial Power-On
Once the instrument is powered on, the display will show the percentage of remaining battery power, the current voltage value, and an analog battery symbol.
7.2. Power On/Off and Sleep Mode
- To turn off the instrument, press the designated power button.
- In sleep mode, you can wake up the instrument by pressing any button.
- The device will automatically enter sleep mode after 10 seconds of inactivity to conserve power.
7.3. Display Mode Switching
Click the button (usually the 'up' or 'mode' button) to cycle through and switch between displaying the voltage value and the temperature value.
7.4. Battery Level Display
The battery symbol on the display interface consists of 7 display boxes, arranged from right to left, which visually represent the current battery power level.
7.5. Low Power Alarm
When the battery power is low, a red mark will flash on the display to remind the user. Additionally, a low beep alarm will sound. The voltage threshold for this alarm is adjustable through the device's settings.
7.6. Customizing Battery Type (Open Programming Mode)
The device features an open programming mode that allows you to customize the battery type settings. This ensures accurate readings for various battery chemistries, including lead-acid, lithium-ion, lithium iron phosphate, and metal hydride batteries. Refer to the advanced settings menu for specific programming steps.
8. Maintenance
- Keep the device clean by wiping it with a soft, dry cloth.
- Avoid using abrasive cleaners or solvents.
- Ensure the device remains dry and protected from moisture.
- Store the device in a cool, dry place when not in use.
9. Troubleshooting
- No Display:
- Check all power connections. Ensure the red wire is connected to the positive terminal and the black wire to the negative terminal.
- Verify that the input voltage is within the 10V-100V operating range.
- Incorrect Readings:
- If customizable, ensure the correct battery type is selected in the device settings.
- Confirm that all wiring is secure and free from corrosion.
- Device Not Responding:
- The device may be in sleep mode. Press any button to wake it up.
- Check power supply.
- Low Beep Alarm Constantly On:
- Check the battery voltage. The alarm indicates low power.
- Adjust the alarm voltage threshold in the settings if necessary.
10. Specifications
| Product Size: | 61.5mm x 33.5mm x 13.5mm |
| Installation Size: | 58.5mm x 28.5mm |
| Display Size: | 36mm x 19.5mm |
| Working Voltage: | 10V-100V |
| Power Consumption (LED ON): | 5-6mA |
| Voltage Accuracy: | ±0.1 (Typical), ±0.5 (Max) |
| Sleep Power Consumption: | 6-12uA (at 20V) |
| Working Temperature: | -10°C to 55°C |
| Brand: | Phoncoo |
| Measurement Type: | Voltmeter |
| Power Source: | Battery Powered |
11. Warranty and Support
For warranty information, technical assistance, or any product-related inquiries, please contact your retailer or the manufacturer, Phoncoo. Please retain your proof of purchase for warranty claims.