
Crenova Black
Contents
Crenova Laminator Machine User Manual
Model: Black
1. Introduction
Thank you for choosing the Crenova Laminator Machine. This manual provides essential information for the safe and efficient operation of your new laminator. Please read it thoroughly before use and retain it for future reference.
The Crenova Laminator is designed for both hot and cold lamination, offering a fast warm-up time and efficient performance for preserving documents, photos, and various other materials. Its compact and portable design makes it ideal for home, office, and school use.

Image: The Crenova Laminator Machine, black in color, shown with a laminated photograph emerging from its slot and a stack of 10 laminating pouches. This illustrates the primary function and included accessories.

Image: A visual comparison demonstrating the benefits of lamination. On the left, an "Unlaminated" image appears damaged and faded. On the right, a "Laminated" image shows durable and vivid colors, highlighting waterproof, dustproof, anti-scratch, and non-fading properties.
2. Safety Instructions
- Read all instructions before using the laminator.
- Do not operate the laminator if the power cord or plug is damaged.
- Keep the laminator away from water or other liquids. Do not use it in damp environments.
- Ensure proper ventilation around the machine during operation.
- Do not touch the hot parts of the laminator during or immediately after use.
- Unplug the laminator when not in use or before cleaning.
- Keep out of reach of children. Adult supervision is recommended when children are near the device.
- During the first use, slight smoking due to vulcanization is normal and does not affect safety.
3. Package Contents
Please check the package contents upon unboxing:
- Crenova Laminator Machine (Black)
- 10 x A6 Laminating Pouches
- User Manual
4. Product Overview
Familiarize yourself with the components of your Crenova Laminator:
- Power Switch: Controls the laminator's power and mode selection (OFF/COLD/HOT).
- Mode Indicator Lights: Green light indicates ready status for selected mode.
- Inlet Slot: Where documents with laminating pouches are inserted.
- Outlet Slot: Where laminated documents exit.
- ABS Lever: Used to release jammed documents.

Image: A detailed view of the Crenova Laminator's control panel, highlighting the "HOT" and "COLD" mode switch and the corresponding indicator lights. This illustrates the dual mode functionality and user interface.
5. Setup
- Unpack: Carefully remove the laminator and all accessories from the packaging.
- Placement: Place the laminator on a flat, stable, and heat-resistant surface. Ensure there is enough space behind the machine for laminated items to exit freely.
- Power Connection: Plug the power cord into a standard electrical outlet.
6. Operating Instructions
6.1. Hot Lamination
Hot lamination is suitable for most standard documents and photos using thermal laminating pouches.
- Prepare Document: Place your document or photo inside a laminating pouch, ensuring it is centered and there is an even border around the edges.
- Select Mode: Move the power switch to the "HOT" position.
- Warm-up: The laminator will begin to preheat. The green "Ready" indicator light will illuminate (typically 1-2 minutes) when the machine is ready for use.
- Insert Pouch: Carefully insert the sealed edge of the laminating pouch into the inlet slot, ensuring it is straight and centered. The laminator will automatically feed the pouch through.
- Retrieve: Once the laminated item exits the outlet slot, place it on a flat surface to cool and flatten.
- Power Off: When finished, move the power switch to the "OFF" position and unplug the laminator.

Image: A four-step visual guide to lamination. Step 1 shows switching to HOT or COLD mode. Step 2 shows the mode indicator turning green. Step 3 depicts straight insertion of the document into the inlet. Step 4 shows switching off the laminator after use.

Image: The Crenova Laminator in operation, with a document smoothly passing through the machine. Icons indicate shorter warm-up (1-2 min), quicker laminating (1 min finished), no bubbles/wrinkles/curling, and low noise, illustrating its excellent performance.
6.2. Cold Lamination
Cold lamination is used with self-adhesive laminating pouches (not included) and does not require heat. This mode is ideal for heat-sensitive materials.
- Prepare Document: Place your document inside a self-adhesive laminating pouch according to the pouch manufacturer's instructions.
- Select Mode: Move the power switch to the "COLD" position. No warm-up time is required for this mode.
- Insert Pouch: Carefully insert the sealed edge of the self-adhesive pouch into the inlet slot, ensuring it is straight and centered. The laminator will feed the pouch through.
- Retrieve: Once the laminated item exits the outlet slot, it is ready for use.
- Power Off: When finished, move the power switch to the "OFF" position and unplug the laminator.

Image: The Crenova Laminator with a close-up on its mode switch, clearly indicating "HOT" and "COLD" settings. This highlights the dual lamination capability suitable for various items.
6.3. Jam Prevention and Release
To prevent jams, always ensure the laminating pouch is inserted straight and centered into the inlet slot. Do not force the pouch into the machine.
If a paper jam occurs:
- Switch Off: Immediately switch off the laminator.
- Press ABS Lever: Locate the ABS lever (usually at the back or side of the machine) and press and hold it down. This releases the pressure on the rollers.
- Pull Pouch: Gently pull the stuck paper and pouch out of the inlet or outlet slot.
- Release Lever: Release the ABS lever.
- Restart: If necessary, restart the laminator and attempt lamination again with a new pouch.

Image: A three-step guide demonstrating how to use the JAM RELEASE ABS LEVER. Step 1 shows switching off the machine. Step 2 shows pressing and holding the ABS lever. Step 3 illustrates pulling the jammed pouch out, ensuring document protection.
7. Maintenance
- Cleaning: Ensure the laminator is unplugged and completely cool before cleaning. Wipe the exterior with a soft, dry cloth. Do not use abrasive cleaners or solvents.
- Roller Cleaning: Periodically run a cleaning sheet (available separately) through the laminator to remove any adhesive residue from the rollers.
- Storage: Store the laminator in a cool, dry place away from direct sunlight and extreme temperatures.
8. Troubleshooting
| Problem | Possible Cause | Solution |
|---|---|---|
| Laminator not turning on. | Not plugged in; power switch off; power outlet issue. | Ensure power cord is securely plugged in. Turn power switch to HOT or COLD. Test outlet with another device. |
| Laminating pouch jams. | Pouch inserted incorrectly (not straight/centered); pouch too thick; foreign object. | Use the ABS lever to release the jam (refer to Section 6.3). Ensure pouch is inserted straight. Use appropriate pouch thickness. |
| Laminated document has bubbles or wrinkles. | Laminator not fully warmed up (for hot mode); pouch not inserted straight; incorrect pouch thickness. | Wait for the green "Ready" light. Ensure pouch is inserted straight. Use recommended pouch thickness. |
| Laminator is slow. | Normal operation; very thick pouch. | Allow the machine to operate at its designed speed. Ensure you are using appropriate pouch thickness. |
9. Specifications
| Feature | Detail |
|---|---|
| Brand | Crenova |
| Model | Black |
| Lamination Modes | Hot & Cold |
| Warm-up Time | 1-2 minutes (Hot Mode) |
| Max. Laminating Width | 230mm (9 inches, A4 size) |
| Product Dimensions (L x W x H) | 13.78 x 4.13 x 3.15 inches (335mm x 88mm x 65mm) |
| Item Weight | 1.75 pounds (792 grams) |
| Included Accessories | 10 x A6 Laminating Pouches |

Image: A graphic illustrating the compact dimensions of the Crenova Laminator (13.19" x 3.46" x 2.56", 1.64 lbs) compared to larger, heavier "Others" (14.19" x 4.53" x 2.76", 2.29 lbs), emphasizing its "ON-THE-GO DESIGN" and portability.
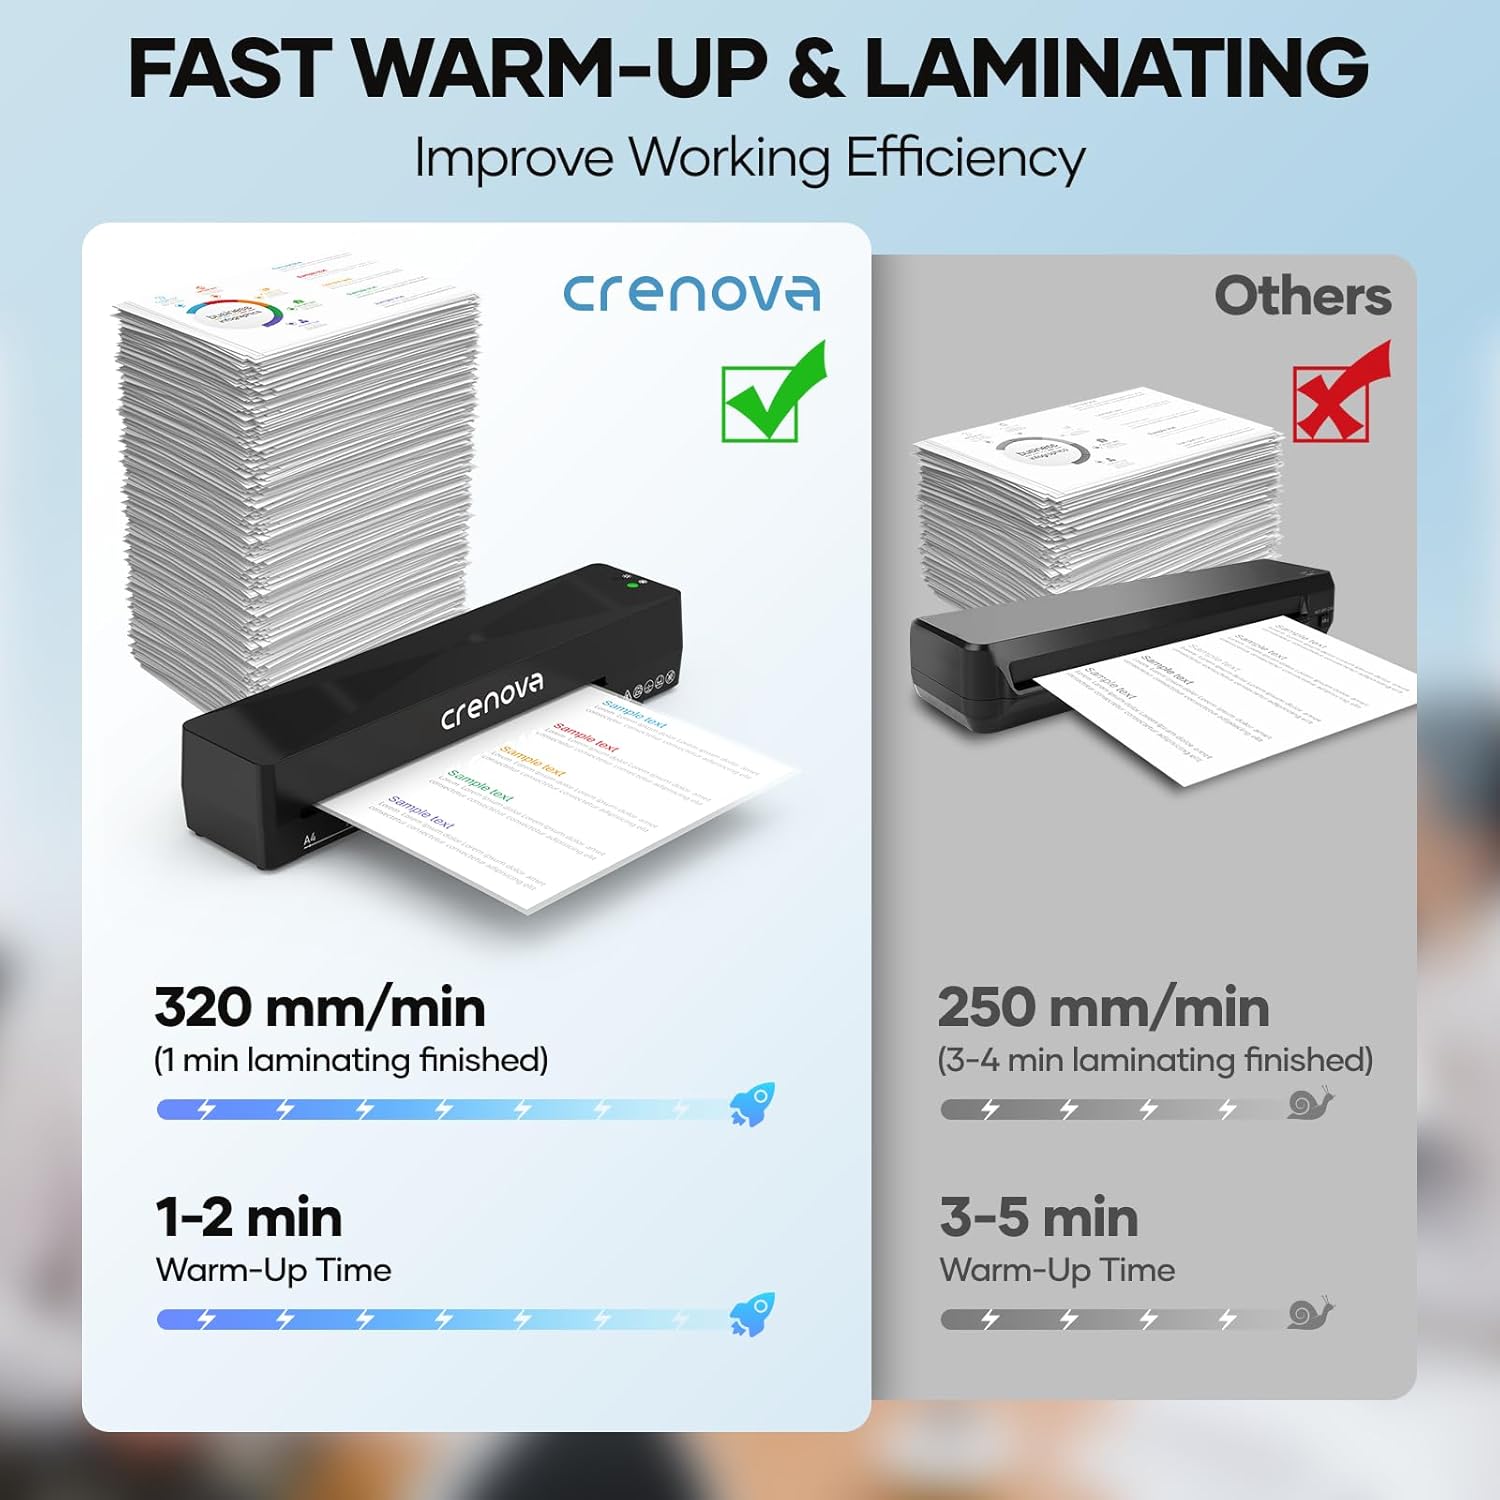
Image: A comparison chart showing the Crenova Laminator's fast warm-up (1-2 min) and laminating speed (320 mm/min, 1 min finished) versus "Others" (3-5 min warm-up, 250 mm/min, 3-4 min finished), highlighting its improved working efficiency.

Image: A graphic illustrating the Crenova Laminator's low noise level, comparing it to a library (40dB) and conversation (60dB), indicating it operates quietly at around 55dB, allowing for focused work.
10. Warranty and Support
For warranty information and customer support, please refer to the contact details provided on the product packaging or visit the official Crenova website. Keep your purchase receipt as proof of purchase for any warranty claims.
For further assistance, you may also contact the seller directly through the platform where the purchase was made.
Documents and downloads
Ask a question about this manual
Ask about setup, troubleshooting, compatibility, parts, safety, or missing instructions. Manuals+ will review the question and use this page’s manual context to help answer it.