
1. Introduction
Thank you for choosing the Proscenic I9 Cordless Vacuum Cleaner. This manual provides essential information for the safe and efficient operation, maintenance, and troubleshooting of your new appliance. The Proscenic I9 is designed for powerful cleaning with its 22000Pa suction and offers up to 35 minutes of battery duration, making it ideal for picking up pet hair and dust.
2. Important Safety Instructions
Please read all instructions carefully before using this appliance and retain them for future reference. Failure to follow these instructions may result in electric shock, fire, or serious injury.
- This appliance is for household use only. Do not use outdoors or on wet surfaces.
- Do not allow children to operate the vacuum cleaner. Close supervision is necessary when used near children.
- Do not pick up flammable or combustible liquids, such as gasoline, or use in areas where they may be present.
- Do not pick up anything that is burning or smoking, such as cigarettes, matches, or hot ashes.
- Do not use without the dust cup and/or filters in place.
- Turn off the appliance before connecting or disconnecting the battery pack, or before performing any maintenance.
- Use only the charger supplied by the manufacturer to recharge.
- Store the appliance indoors in a cool, dry place.
3. Package Contents
Please check the contents of your package to ensure all items are present and in good condition:
- Main Vacuum Body
- Extension Wand
- Motorized Floor Brush
- Crevice Tool
- 2-in-1 Brush
- Wall Mount Bracket
- Power Adapter
- User Manual
4. Product Overview
Familiarize yourself with the components of your Proscenic I9 Cordless Vacuum Cleaner.
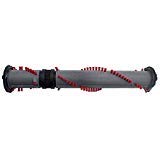
Figure 4.1: Overview of the Proscenic I9 Cordless Vacuum Cleaner, showing the main body, extension wand, and various cleaning attachments.
- Main Body: Contains the motor, dust cup, and battery.
- Dust Cup: Collects dirt and debris.
- Power Button: Turns the vacuum on/off and adjusts suction modes.
- Battery Pack: Removable and rechargeable power source.
- Extension Wand: Connects the main body to the floor brush or other attachments.
- Motorized Floor Brush: For cleaning various floor types.
- Crevice Tool: For narrow spaces and corners.
- 2-in-1 Brush: For upholstery and delicate surfaces.
5. Setup
5.1 Assembly
- Attach the Extension Wand: Insert the top end of the extension wand into the main vacuum body until it clicks securely.
- Attach the Floor Brush: Insert the bottom end of the extension wand into the motorized floor brush until it clicks securely.
- Install Battery: If not already installed, slide the battery pack into the slot on the main body until it locks into place.
- Alternative Attachments: For handheld use, attach the crevice tool or 2-in-1 brush directly to the main body.
5.2 Charging the Battery
Before first use, fully charge the battery for approximately 4-5 hours.
- Connect the power adapter to a wall outlet.
- Connect the other end of the power adapter to the charging port on the battery pack (either on the main unit or when the battery is removed).
- The charging indicator lights will illuminate, showing the charging status. When fully charged, the lights will indicate completion (refer to the specific light pattern in your quick start guide if available).
- Disconnect the charger once charging is complete.
6. Operating Instructions
6.1 Powering On/Off and Suction Modes
- To Power On: Press the power button once. The vacuum will start in the default suction mode.
- To Adjust Suction: Press the power button again to cycle through different suction modes (e.g., Standard, Max). The indicator lights will show the current mode.
- To Power Off: Press and hold the power button for a few seconds until the vacuum stops.
6.2 Using the Vacuum Cleaner
- For floors and carpets, use the motorized floor brush.
- For tight spaces, corners, and edges, attach the crevice tool directly to the main body or extension wand.
- For upholstery, curtains, or delicate surfaces, use the 2-in-1 brush.
- Move the vacuum slowly and steadily over the cleaning area to ensure thorough dirt pickup.
6.3 Emptying the Dust Cup
Empty the dust cup regularly to maintain optimal suction performance.
- Ensure the vacuum is turned off.
- Locate the dust cup release button, usually near the main body.
- Press the release button to detach the dust cup from the main body.
- Position the dust cup over a trash bin.
- Open the bottom lid of the dust cup to release the collected debris.
- Close the lid and reattach the dust cup to the main body until it clicks.
7. Maintenance
Regular maintenance ensures the longevity and optimal performance of your Proscenic I9.
7.1 Cleaning the Dust Cup and Filters
It is recommended to clean the dust cup and filters after every few uses, or when suction power decreases.
- Turn off the vacuum and detach the dust cup.
- Remove the filter assembly from inside the dust cup. This typically includes a HEPA filter and a metal mesh filter.
- Tap the filters gently over a trash bin to remove loose dust.
- Rinse the filters under cool running water until the water runs clear. Do not use hot water or detergents.
- Allow the filters to air dry completely for at least 24 hours before reassembling. Do not use a hairdryer or other heating devices.
- Once dry, reassemble the filters and dust cup, then reattach to the main body.
7.2 Cleaning the Brush Roll
Periodically check the brush roll for tangled hair or debris.
- Turn off the vacuum and detach the motorized floor brush.
- Locate the brush roll access latch or screws on the bottom of the floor brush.
- Open the latch or unscrew to remove the brush roll.
- Use scissors or a cleaning tool to cut and remove any tangled hair or fibers from the brush roll.
- Clean any debris from the brush roll housing.
- Reinsert the brush roll and secure the latch or screws.
8. Troubleshooting
Refer to this section for common issues and their solutions.
| Problem | Possible Cause | Solution |
|---|---|---|
| Vacuum does not turn on. | Battery is not charged or not properly installed. | Ensure battery is fully charged and correctly inserted. |
| Low suction power. | Dust cup is full, filters are clogged, or brush roll is blocked. | Empty dust cup. Clean or replace filters. Remove any blockages from the brush roll. |
| Brush roll not spinning. | Hair or debris tangled in brush roll, or brush roll is jammed. | Turn off the vacuum and remove any obstructions from the brush roll. |
| Battery indicator flashing. | Battery low or an error has occurred. | Recharge the battery. If the issue persists, contact customer support. |
9. Specifications
| Feature | Detail |
|---|---|
| Brand | Proscenic |
| Model Name | I9 |
| Power Source | Battery Powered |
| Color | Red |
| Runtime | 35 minutes |
| Suction Power | 22000Pa |
| Number of Items | 1 |
| UPC | 741663306794 |
| ASIN | B07PHT4F8D |
10. Warranty and Support
Proscenic products are manufactured to the highest quality standards. For specific warranty information, please refer to the warranty card included with your purchase or visit the official Proscenic website. If you encounter any issues or have questions regarding your Proscenic I9 Cordless Vacuum Cleaner, please contact Proscenic customer support for assistance.
You can find more information and support resources on the official Proscenic website: www.proscenic.com