1. Introduction
This manual provides comprehensive instructions for the setup, operation, and maintenance of your Xprinter XP-360B Thermal Label Barcode Printer. Please read this manual thoroughly before using the printer to ensure proper functionality and to prevent damage.
The XP-360B is a high-speed thermal label printer designed for various applications, including barcode printing, shipping labels, and receipt printing. It supports label widths from 20mm to 80mm and offers a maximum print speed of 200mm per second.

Figure 1.1: Xprinter XP-360B Thermal Label Barcode Printer. This image shows the printer from a front-right angle, with labels being fed out of the front slot.
2. Safety Information
To ensure safe operation and prolong the life of your printer, please observe the following safety precautions:
- Do not expose the printer to water or excessive humidity.
- Avoid placing the printer in direct sunlight or near heat sources.
- Use only the power adapter supplied with the printer.
- Do not attempt to disassemble or repair the printer yourself. Refer to qualified service personnel.
- Keep the printer away from dust and debris.
- Ensure the printer is placed on a stable, flat surface.
- Unplug the printer from the power outlet before cleaning or when not in use for extended periods.
3. Package Contents
Verify that all items are present in the package:
- Xprinter XP-360B Thermal Label Barcode Printer
- Power Adapter
- USB Cable
- User Manual (this document)
- Driver CD (or link to download drivers)
4. Product Overview
4.1. Front View

Figure 4.1: Front view of the XP-360B printer, showing the label output slot and control buttons.
- Label Output Slot: Where printed labels exit the printer.
- Control Buttons:
- POWER: Power indicator.
- ERROR: Error indicator.
- PAUSE: Pauses or resumes printing.
- FEED: Feeds a blank label.
4.2. Side View

Figure 4.2: Side view of the XP-360B printer, highlighting the power switch.
- Power Switch: Turns the printer on or off.
4.3. Internal View (Cover Open)

Figure 4.3: Internal view of the XP-360B printer with the top cover open, showing the label roll compartment and print head assembly.
- Print Head Assembly: Contains the thermal print head.
- Label Roll Compartment: Area for loading the label roll.
- Adjustable Paper Guides: Guides to align the label roll.
5. Setup
5.1. Unpacking and Placement
- Carefully remove the printer and all accessories from the packaging.
- Place the printer on a stable, flat surface with adequate ventilation.
- Ensure there is enough space around the printer for proper operation and maintenance.
5.2. Connecting the Printer
- Connect the power adapter to the printer's power input port.
- Plug the power adapter into a suitable electrical outlet.
- Connect one end of the USB cable to the printer's USB port.
- Connect the other end of the USB cable to an available USB port on your computer.
5.3. Loading Labels
- Ensure the printer is turned off.
- Open the top cover of the printer.
- Place the label roll into the label compartment, ensuring the labels feed from the bottom of the roll towards the front of the printer.
- Adjust the movable paper guides to fit the width of your label roll snugly, without being too tight.
- Pull a few labels out past the print head and through the label output slot.
- Close the top cover firmly until it clicks into place.

Figure 5.1: Loading a roll of thermal labels into the XP-360B printer's internal compartment.
5.4. Driver Installation
Before using the printer, you must install the appropriate drivers on your computer. Drivers are typically provided on a CD or can be downloaded from the manufacturer's official website.
- Insert the driver CD into your computer's CD-ROM drive, or navigate to the official Xprinter support website to download the XP-360B drivers.
- Follow the on-screen instructions to complete the driver installation.
- After installation, it is recommended to restart your computer.
6. Operating Instructions
6.1. Powering On/Off
- To turn on the printer, flip the power switch located on the side of the printer to the 'ON' position. The POWER indicator light will illuminate.
- To turn off the printer, flip the power switch to the 'OFF' position.
6.2. Basic Printing
- Ensure the printer is connected to your computer and powered on.
- Open the document or application from which you wish to print labels (e.g., label design software, shipping platform).
- Go to the print settings (File > Print).
- Select "Xprinter XP-360B" as your printer.
- Adjust the paper size and orientation settings to match your labels (e.g., 4x6 inch, portrait/landscape).
- Click "Print". The printer will automatically detect the label gaps and print accordingly.
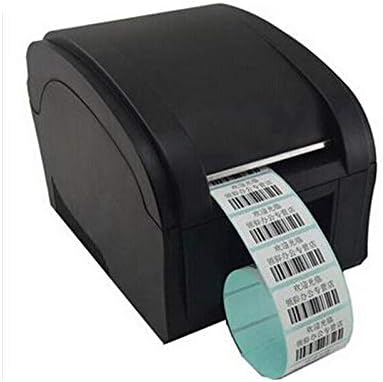
Figure 6.1: The XP-360B printer in operation, feeding out a continuous roll of printed labels.
6.3. Using Control Buttons
- FEED Button: Press this button once to feed a single blank label. This is useful for testing label alignment or advancing to the next label.
- PAUSE Button: Press this button to temporarily pause a print job. Press it again to resume printing.
7. Maintenance
Regular maintenance ensures optimal performance and extends the lifespan of your printer.
7.1. Cleaning the Print Head
The print head should be cleaned regularly, especially if print quality degrades or after printing a large volume of labels.
- Turn off the printer and unplug it from the power outlet.
- Open the top cover of the printer.
- Wait a few minutes for the print head to cool down if the printer has been recently used.
- Gently wipe the thermal print head surface with an alcohol swab or a lint-free cloth lightly dampened with isopropyl alcohol.
- Allow the print head to dry completely before closing the cover and powering on the printer.
7.2. Cleaning the Platen Roller
The platen roller helps feed the labels smoothly. Clean it if you notice feeding issues.
- Follow steps 1-3 from "Cleaning the Print Head".
- Rotate the platen roller manually and wipe its surface with an alcohol swab or a lint-free cloth lightly dampened with isopropyl alcohol.
- Allow it to dry completely before closing the cover.
8. Troubleshooting
This section addresses common issues you might encounter with your XP-360B printer.
| Problem | Possible Cause | Solution |
|---|---|---|
| Printer not powering on | Power cable loose; Power outlet faulty; Printer fault | Check power cable connection; Try a different outlet; Contact support if problem persists. |
| No printing / Printer offline | USB cable loose; Driver not installed; Printer offline in OS | Check USB connection; Install drivers; Check printer status in computer settings. |
| Poor print quality / Faded prints | Dirty print head; Low quality labels; Incorrect print density settings | Clean the print head (see Section 7.1); Use high-quality thermal labels; Adjust print density in driver settings. |
| Labels not feeding correctly | Labels loaded incorrectly; Paper guides not adjusted; Dirty platen roller | Re-load labels correctly; Adjust paper guides; Clean platen roller (see Section 7.2). |
| ERROR light is on | Paper jam; Cover open; Print head overheating | Clear any paper jams; Ensure cover is closed properly; Turn off printer and let it cool down. |
9. Specifications
| Feature | Description |
|---|---|
| Model | XP-360B |
| Printing Method | Direct Thermal |
| Interface | USB |
| Print Speed | Up to 200mm/second |
| Max Paper Width | 80mm (adjustable from 20mm) |
| Paper Feed Mode | Automatic |
| Network Printing | Wired |
| Duplex Printing | No |
| Dimensions | 25 x 22 x 21 cm |
| Weight | 2 kg |
10. Warranty and Support
Xprinter products are designed for reliability and performance. For specific warranty terms and conditions, please refer to the warranty card included with your product or visit the official Xprinter website.
If you encounter any issues that cannot be resolved using the troubleshooting guide, or if you require technical assistance, please contact Xprinter customer support through their official website or the contact information provided in your product documentation.
Please have your model number (XP-360B) and purchase information ready when contacting support.