Introduction
This manual provides essential instructions for the safe and effective use of the Pic Solution ClassicStethoMED Single Aneroid Blood Pressure Monitor with Stethoscope. Please read this manual thoroughly before first use and keep it for future reference.
The Pic Solution ClassicStethoMED is a mechanical aneroid blood pressure monitor designed for professional and home use. It includes a clear, highly readable manometer, a comfortable cuff with a pull-ring and Velcro for easy fitting, and a stethoscope for auscultation during arterial blood pressure measurement. A fabric case is provided for convenient transport and organized storage of all components.
Important Safety Information
Always consult a healthcare professional for diagnosis and treatment of high blood pressure. Self-measurement is for monitoring purposes only and does not replace medical consultation.
- Do not use this device on infants or individuals unable to communicate.
- Do not use this device in an environment where high-frequency surgical equipment or magnetic resonance imaging (MRI) equipment is present.
- Avoid strong electromagnetic fields.
- Keep out of reach of children.
- Do not disassemble or modify the device.
- Ensure the cuff size is appropriate for the user's arm circumference.
What's in the Box
The package contains the following components:
- Aneroid Blood Pressure Monitor (Manometer and Inflation Bulb)
- Arm Cuff
- Stethoscope
- Storage Bag
- Instruction Manual
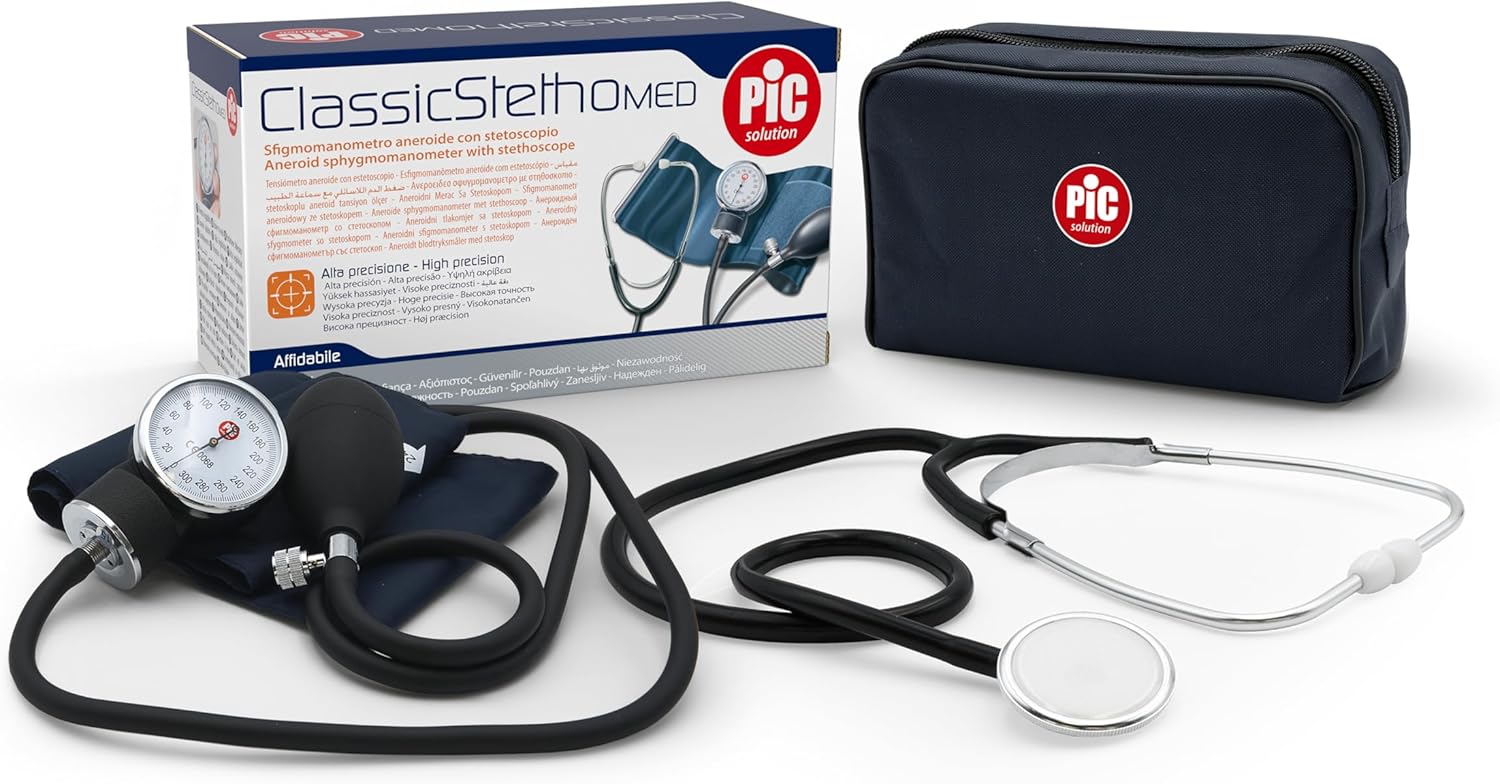
Image: This image displays all the components included with the Pic Solution ClassicStethoMED blood pressure monitor: the aneroid gauge, inflation bulb, arm cuff, stethoscope, and a blue fabric storage bag.
Setup and Assembly
- Connect the Cuff: Ensure the air tube from the cuff is securely connected to the manometer.

Image: A detailed view of the aneroid manometer connected to the blue arm cuff and the black inflation bulb, illustrating the main measurement unit.
- Stethoscope Assembly: The stethoscope is typically pre-assembled. Ensure the earpieces are clean and the diaphragm is intact.

Image: This image provides a close-up of the stethoscope's chest piece (diaphragm) and part of its tubing, highlighting its design for auscultation.
Operating Instructions
Preparing for Measurement
- Rest for at least 5 minutes before measurement.
- Avoid eating, drinking caffeine, smoking, or exercising for 30 minutes prior.
- Sit in a comfortable position with your back supported and feet flat on the floor.
- Place your arm on a flat surface so the cuff is at heart level.
Applying the Cuff
- Slide the cuff onto your bare upper arm, ensuring the lower edge is about 2-3 cm above the elbow joint.

Image: A person demonstrating the correct placement of the blood pressure cuff on the upper arm, positioned just above the elbow for accurate measurement.
- Tighten the cuff using the Velcro closure, ensuring it is snug but not overly tight. You should be able to insert two fingers comfortably under the cuff.
- Position the manometer so it is easily visible.
Taking a Measurement
- Place the stethoscope diaphragm over the brachial artery in the crook of your elbow.
- Close the air release valve on the inflation bulb by turning it clockwise.
- Rapidly inflate the cuff by squeezing the bulb until the manometer reads about 20-30 mmHg above your usual systolic pressure, or until the pulse sound disappears.
- Slowly open the air release valve (counter-clockwise) to deflate the cuff at a rate of 2-3 mmHg per second.
- Listen carefully through the stethoscope for the first faint, tapping sound (Korotkoff sound). This is your systolic pressure. Note the reading on the manometer.
- Continue deflating the cuff. The sounds will become louder, then muffled, and finally disappear. The point at which the sounds completely disappear is your diastolic pressure. Note this reading.
- Once the sounds have disappeared, quickly deflate the cuff completely.
- Record your measurements.
Care and Maintenance
- Cleaning: Wipe the manometer, inflation bulb, and stethoscope with a soft, damp cloth. Use a mild disinfectant if necessary. Do not immerse any part of the device in water.
- Cuff Cleaning: The cuff can be gently hand-washed with mild soap and water. Allow it to air dry completely before storage.
- Storage: Store the device in its provided fabric case in a cool, dry place, away from direct sunlight and extreme temperatures.
- Calibration: Aneroid blood pressure monitors should be checked for accuracy and calibrated periodically, typically every 1-2 years, by a qualified technician.

Image: The blue fabric storage case with the Pic Solution logo, designed to hold and protect all components of the blood pressure monitor for transport and storage.
Troubleshooting
| Problem | Possible Cause | Solution |
|---|---|---|
| Cuff does not inflate or deflates too quickly. | Air leak; valve not closed; loose connection. | Check all connections. Ensure the air release valve is fully closed before inflation. Inspect cuff and tubing for damage. |
| Difficulty hearing pulse sounds. | Stethoscope placement incorrect; ambient noise; earpieces not properly sealed. | Reposition stethoscope over the brachial artery. Ensure a quiet environment. Adjust earpieces for a snug fit. |
| Inconsistent or inaccurate readings. | Improper cuff placement; rapid deflation; lack of rest before measurement; device needs calibration. | Review "Operating Instructions" for correct procedure. Ensure slow, controlled deflation. Allow adequate rest. Consider professional calibration. |
Specifications
- Model Name: Pic Solution ClassicStethoMED
- Model Number: 02021402000000
- Type: Aneroid Blood Pressure Monitor with Stethoscope
- Display Type: Analog
- Product Dimensions: 18.8 x 7.87 x 11.18 cm
- Item Weight: 360 Grams
- Components Included: Aneroid monitor, flat stethoscope, transport bag, manual
- Intended Age Range: Adult
- Country of Origin: Italy
Warranty and Support
For warranty information, technical support, or service inquiries, please refer to the contact details provided on the product packaging or visit the official Pic Solution website.
This device is a CE Medical Device (0068). Please read the warnings and instructions for use carefully.
Manufacturer: Pikdare S.p.A.


