Introduction
This manual provides detailed instructions for the safe and efficient operation of your Margoun SM-202A Portable Mini Sewing Machine. Designed for ease of use, this machine is suitable for basic sewing tasks, crafting, and home decoration. Please read this manual thoroughly before first use to ensure proper setup and operation.
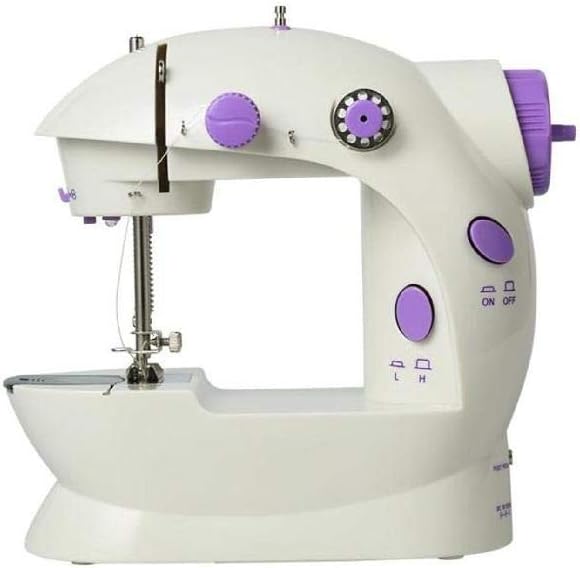
Figure 1: Front view of the Margoun SM-202A Portable Mini Sewing Machine. This image shows the compact design, needle area, and main controls.
Product Components
Familiarize yourself with the main components of your sewing machine:
- Main Unit: The primary body of the sewing machine.
- Foot Pedal: For controlling sewing speed and operation.
- Power Adapter Port: For connecting to an external power supply.
- Battery Compartment: For optional battery operation (AA batteries, not included).
- LED Light: Illuminates the sewing area.
- On/Off Switch: Manual power control.
- Thread Tension Dial: Adjusts the tension of the upper thread.
- Bobbin Winder: For winding thread onto the bobbin.
- Needle and Presser Foot: Essential for stitching.
- Built-in Thread Cutter: For easily cutting threads after sewing.

Figure 2: Key features of the sewing machine, including the dual thread design for neat stitches, the ON/OFF switch, and the foot pedal for operation.
Setup
1. Powering the Machine
The Margoun SM-202A can be powered in two ways:
- AC Power Adapter: Connect the power adapter (not included) to the DC 6V 1000mA port on the back of the machine and plug it into a standard wall outlet.
- AA Batteries: Open the battery compartment on the bottom of the machine and insert 4 x AA batteries (not included), ensuring correct polarity.
Note: Do not use both power sources simultaneously.

Figure 3: Rear view of the sewing machine, highlighting the foot pedal input and the DC 6V 1000mA power input.
2. Connecting the Foot Pedal
Insert the plug of the foot pedal into the designated "FOOT PEDAL" port on the back of the machine. The foot pedal provides an alternative method to control the machine's operation.
3. Threading the Machine
Proper threading is essential for correct stitching.
Upper Threading:
- Place a spool of thread on the spool pin.
- Guide the thread through the first thread guide.
- Pass the thread through the tension control dial.
- Guide the thread through the take-up lever.
- Thread the needle from front to back.
Bobbin Threading:
- Slide the bobbin cover plate to the left to open the bobbin case.
- Insert a wound bobbin into the bobbin case, ensuring the thread unwinds in the correct direction (usually counter-clockwise).
- Pull the bobbin thread through the small slot in the bobbin case.
- Close the bobbin cover plate.
- Turn the handwheel towards you to lower the needle, catching the bobbin thread. Pull both upper and bobbin threads to the back under the presser foot.
Operating Instructions
1. Starting and Stopping
The machine can be operated using either the On/Off button or the foot pedal.
- On/Off Button: Press the "ON" side of the switch to start sewing. Press the "OFF" side to stop.
- Foot Pedal: If the foot pedal is connected, pressing it will start the machine, and releasing it will stop the machine. The foot pedal allows for variable speed control.
Note: Ensure the manual On/Off switch is in the "OFF" position when using the foot pedal.
2. Adjusting Speed
The machine features two speed settings: Low (L) and High (H). Select the desired speed using the speed switch located on the front of the machine. The foot pedal also allows for fine-tuned speed adjustment.
3. Sewing
- Place the fabric under the presser foot.
- Lower the presser foot lever.
- Start the machine using the On/Off button or foot pedal.
- Guide the fabric gently as the machine stitches.
- To finish a seam, lift the presser foot and pull the fabric away. Use the built-in thread cutter to trim the threads.
The machine is designed with a dual threads system to create neat, straight, and firm stitches. It also includes an easy reverse stitch button for reinforcing seams.
Maintenance
Regular maintenance ensures the longevity and optimal performance of your sewing machine.
- Cleaning: Use a soft brush to remove lint and dust from the needle plate area and bobbin case after each use.
- Storage: Store the machine in a dry, clean place away from direct sunlight and extreme temperatures.
- Needle Replacement: Replace the needle regularly, especially if it becomes bent or dull, to prevent skipped stitches and fabric damage.
Troubleshooting
Refer to the table below for common issues and their solutions.
| Problem | Possible Cause | Solution |
|---|---|---|
| Machine not turning on | No power supply; batteries dead or incorrectly inserted; power switch off. | Check power adapter connection; replace batteries; ensure On/Off switch is in "ON" position. |
| Skipped stitches | Incorrect threading; bent or dull needle; incorrect needle size for fabric. | Re-thread the machine correctly; replace the needle; use appropriate needle for fabric type. |
| Thread breaking | Incorrect thread tension; poor quality thread; burr on needle or machine parts. | Adjust thread tension; use good quality thread; inspect needle and thread path for damage. |
| Fabric not feeding | Presser foot not lowered; feed dogs obstructed. | Lower the presser foot; clean any lint or debris from feed dog area. |
Specifications
| Feature | Detail |
|---|---|
| Model Number | SM-202A (Item model number: 2724650772954) |
| Product Dimensions | 5 x 8.8 x 8.2 cm |
| Product Weight | 860 g |
| Material Type(s) | Plastic, Metal |
| Power Source | Electric (AC adapter) or 4 x AA Batteries (not included) |
| Recommended Age | 6 Years & Above |
| Features | LED Light, Foot Pedal, Auto-declutch Bobbin Winder, Easy Reverse Stitch Button, Built-in Thread Cutter, Dual Threads Design, Dual Speed Settings (L/H) |
Warranty and Support
Information regarding product warranty and customer support was not available in the provided product data. Please refer to the product packaging or contact the retailer for details on warranty coverage and support options.


