1. Overview
The Cisco Catalyst 2960-X Series Switches are fixed-configuration, stackable Gigabit Ethernet switches that provide enterprise-class access for campus and branch applications. Designed for operational simplicity to lower total cost of ownership, they enable scalable, secure, and energy-efficient business operations with intelligent services and a range of advanced Cisco IOS Software features.
This particular model, the WS-C2960X-48FPS-L, features 48 Gigabit Ethernet ports with Power over Ethernet Plus (PoE+) capability, making it suitable for connecting and powering a wide array of network devices such as IP phones, wireless access points, and video surveillance cameras.

Figure 1: Front view of the Cisco WS-C2960X-48FPS-L switch, displaying its 48 Ethernet ports, console port, USB ports, and LED indicators.
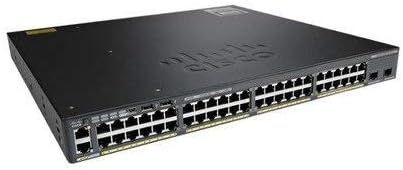
Figure 2: Angled perspective of the Cisco WS-C2960X-48FPS-L switch, showcasing its overall form factor and port layout.
2. Setup
2.1 Unpacking and Inspection
Upon receiving your Cisco WS-C2960X-48FPS-L switch, carefully unpack all components and inspect them for any signs of damage during transit. Retain the packaging materials for future use or in case of return.
- Verify that all items listed in the packing list are present.
- Check the switch chassis for any dents, scratches, or other physical damage.
- Inspect all ports and connectors for bent pins or obstructions.
2.2 Rack Mounting
The switch is designed for standard 19-inch rack mounting. Use the provided rack-mount brackets and screws to secure the switch in your equipment rack.
- Attach the rack-mount brackets to the sides of the switch using the screws provided.
- Align the switch with the desired rack unit (RU) space in your equipment rack.
- Secure the switch to the rack posts using appropriate rack screws. Ensure the switch is level and firmly seated.
2.3 Power Connection
Connect the power cord to the AC power connector on the rear of the switch and then to a grounded AC power outlet. Ensure the power source meets the switch's power requirements.
- Use only the power cord supplied with the switch or a compatible replacement.
- Verify that the power outlet is properly grounded.
- Once connected, the system LED on the front panel should illuminate, indicating power is supplied.
2.4 Initial Configuration Access
To perform initial configuration, you can connect to the switch via the console port or a management Ethernet port.
- Console Port: Connect a console cable (RJ-45 to DB-9 or USB-to-RJ-45) from your computer's serial port or USB port to the switch's console port. Use terminal emulation software (e.g., PuTTY, Tera Term) with settings: 9600 baud, 8 data bits, no parity, 1 stop bit, no flow control.
- Management Port: Connect an Ethernet cable from your computer to the switch's dedicated management port (if available) or any standard Ethernet port. Configure your computer's IP address to be in the same subnet as the switch's default management IP (refer to Cisco documentation for default IP).
3. Operating
3.1 Basic Operation
Once powered on, the switch will perform a Power-On Self-Test (POST). After POST completes, the switch will load the Cisco IOS software. You can then access the command-line interface (CLI) via the console or management port to configure network settings, VLANs, security features, and more.
3.2 LED Indicators
The front panel of the switch features various LED indicators that provide status information about the system and individual ports. Refer to the table below for common LED meanings:
| LED | Color/State | Meaning |
|---|---|---|
| System (SYST) | Green (Solid) | System is operating normally. |
| Amber (Solid) | System fault or error. | |
| RPS | Green (Solid) | Redundant Power System is active and providing power. |
| Port Status | Green (Solid) | Link established. |
| Green (Flashing) | Activity on port. | |
| Off | No link or port disabled. | |
| PoE (PoE+) | Green (Solid) | PoE power being supplied. |
| Amber (Solid) | PoE fault or power issue. |
3.3 Connecting Devices
Connect network devices (computers, servers, IP phones, access points) to the switch's Ethernet ports using standard Ethernet cables (Cat5e or better for Gigabit speeds). For PoE+ enabled devices, simply connect them to any of the 48 PoE+ ports; the switch will automatically detect and provide power if the device is compliant.
3.4 Power over Ethernet (PoE+) Functionality
The WS-C2960X-48FPS-L supports PoE+ (802.3at) and PoE (802.3af), providing up to 30W per port for connected devices. The switch intelligently manages power allocation. Ensure that the total power draw of all connected PoE devices does not exceed the switch's maximum PoE power budget.
4. Maintenance
4.1 Cleaning
Regular cleaning helps maintain optimal performance and extends the lifespan of your switch.
- Ensure the switch is powered off and disconnected from the power source before cleaning.
- Use a soft, dry, lint-free cloth to wipe the exterior of the chassis.
- For dust accumulation in ventilation openings, use compressed air to gently blow out dust. Do not use liquid cleaners or aerosol sprays directly on the switch.
4.2 Firmware Updates
Periodically check the Cisco support website for the latest Cisco IOS software updates for your switch model. Keeping the firmware updated ensures you have the latest features, security patches, and bug fixes. Follow Cisco's official documentation for the correct procedure to upgrade the IOS software.
4.3 Environmental Considerations
To ensure reliable operation, maintain the switch within its specified environmental limits:
- Temperature: Operate within the recommended ambient temperature range (typically 0°C to 45°C or 32°F to 113°F).
- Humidity: Maintain non-condensing humidity levels (typically 10% to 90%).
- Ventilation: Ensure adequate airflow around the switch. Do not block ventilation openings.
5. Troubleshooting
5.1 Common Issues
| Problem | Possible Cause | Solution |
|---|---|---|
| Switch not powering on | No power to outlet, faulty power cord, internal power supply issue. | Check power outlet, replace power cord, verify power supply status. |
| Port Link LED is off | Cable not connected, faulty cable, incorrect port configuration, device not powered on. | Verify cable connection, try a different cable, check device power, ensure port is enabled in configuration. |
| PoE device not receiving power | Device not PoE compliant, cable issue, power budget exceeded, port disabled for PoE. | Verify device PoE compliance, check cable, ensure total power draw is within budget, check port PoE configuration. |
| Cannot access switch CLI | Incorrect console settings, wrong cable, network connectivity issue for management port. | Verify console settings (baud rate, etc.), use correct console cable, check IP configuration for management access. |
5.2 Resetting the Device
In some cases, a factory reset may be necessary to resolve persistent issues or to clear configurations. Refer to Cisco's official documentation for the specific procedure to perform a factory reset on the WS-C2960X-48FPS-L, as this will erase all configurations and return the switch to its default state.
6. Specifications
The following table outlines the key technical specifications for the Cisco WS-C2960X-48FPS-L switch:
| Feature | Detail |
|---|---|
| Model Number | WS-C2960X-48FPS-L |
| Brand | Cisco |
| Switch Type | Managed |
| Number of Ports | 48 Gigabit Ethernet (PoE+) |
| Interface Type | RJ45 |
| PoE+ Support | Yes (IEEE 802.3at/af) |
| Case Material | Metal |
| Color | Black |
| Product Dimensions | 18 x 15 x 2 inches |
| Item Weight | 14 pounds |
| Manufacturer | CISCO SYSTEMS - ENTERPRISE |
| UPC | 090952120314, 647213670592 |
7. Warranty and Support
This product is listed as "Renewed" and is typically backed by the Amazon Renewed Guarantee. This guarantee ensures that the product has been professionally inspected and tested to work and look like new. If you are not satisfied with your purchase, renewed products are eligible for replacement or refund under the Amazon Renewed Guarantee.
For detailed information regarding the Amazon Renewed Guarantee, please visit the official Amazon Renewed Store or refer to the product listing on Amazon. For technical support and advanced configuration, refer to Cisco's official documentation and support resources for the Catalyst 2960-X series switches.


