Introduction
Thank you for choosing the Moukey UHF Wireless Microphone System. This manual provides detailed instructions for setting up, operating, and maintaining your new wireless microphone system. Please read this manual thoroughly before use to ensure optimal performance and longevity of your product.
This system is designed for various applications including karaoke, voice amplification, PA systems, and church events, offering stable frequency transmission and anti-interference capabilities.
Package Contents
Please verify that all items listed below are included in your package:
- 2 x Moukey Handheld Wireless Microphones
- 1 x Moukey Wireless Receiver Unit
- 2 x Rechargeable Lithium Batteries (pre-installed in microphones)
- 2 x AA Battery Adapters
- 1 x Dual USB Charging Cable
- 1 x 3.5mm to 6.3mm Audio Cable
- 1 x DC 5V Power Adapter (for receiver)
- 1 x User Manual (this document)
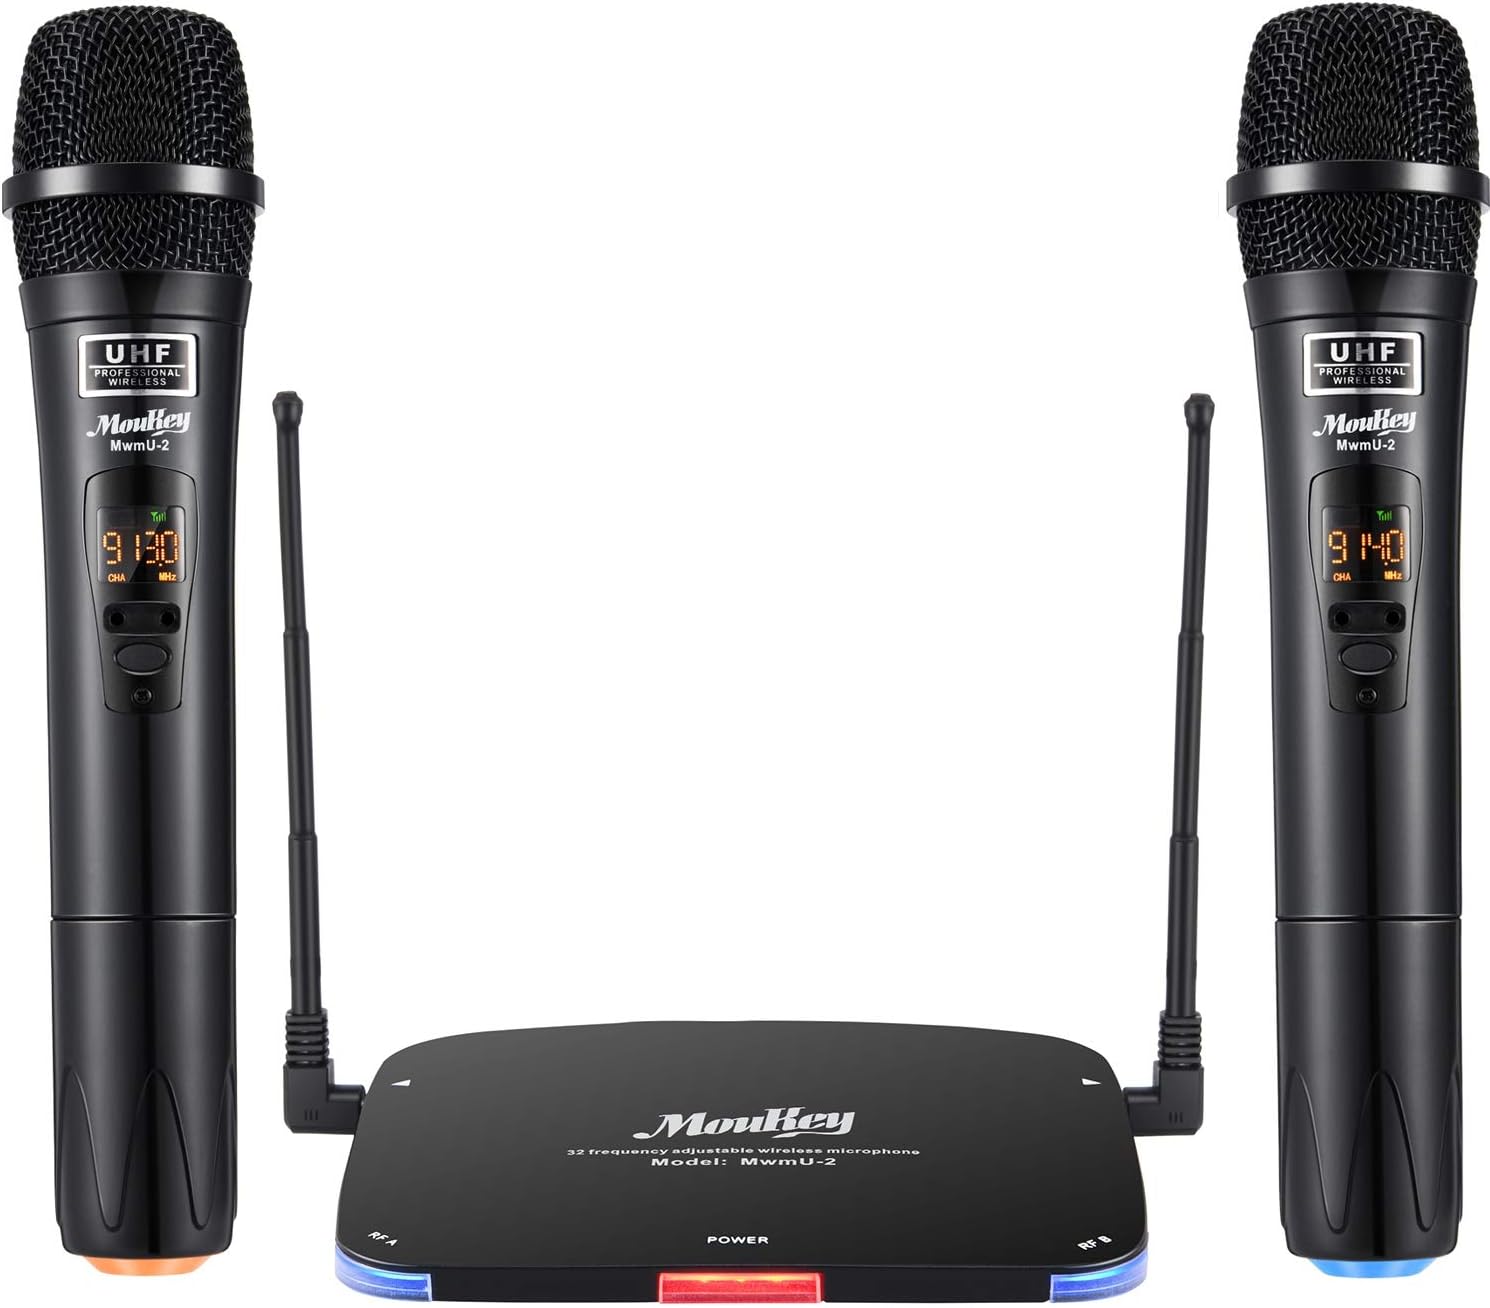
Image: Complete Moukey UHF Wireless Microphone System, showing two microphones and the receiver.
Setup Guide
1. Charging the Microphones
The microphones come with pre-installed rechargeable lithium batteries. Before first use, ensure they are fully charged. Unscrew the bottom of each microphone to access the battery. Connect the provided dual USB charging cable to the batteries and a USB power source (e.g., phone charger, computer USB port). The charging indicator light on the battery will turn off when fully charged (approx. 1-2 hours).
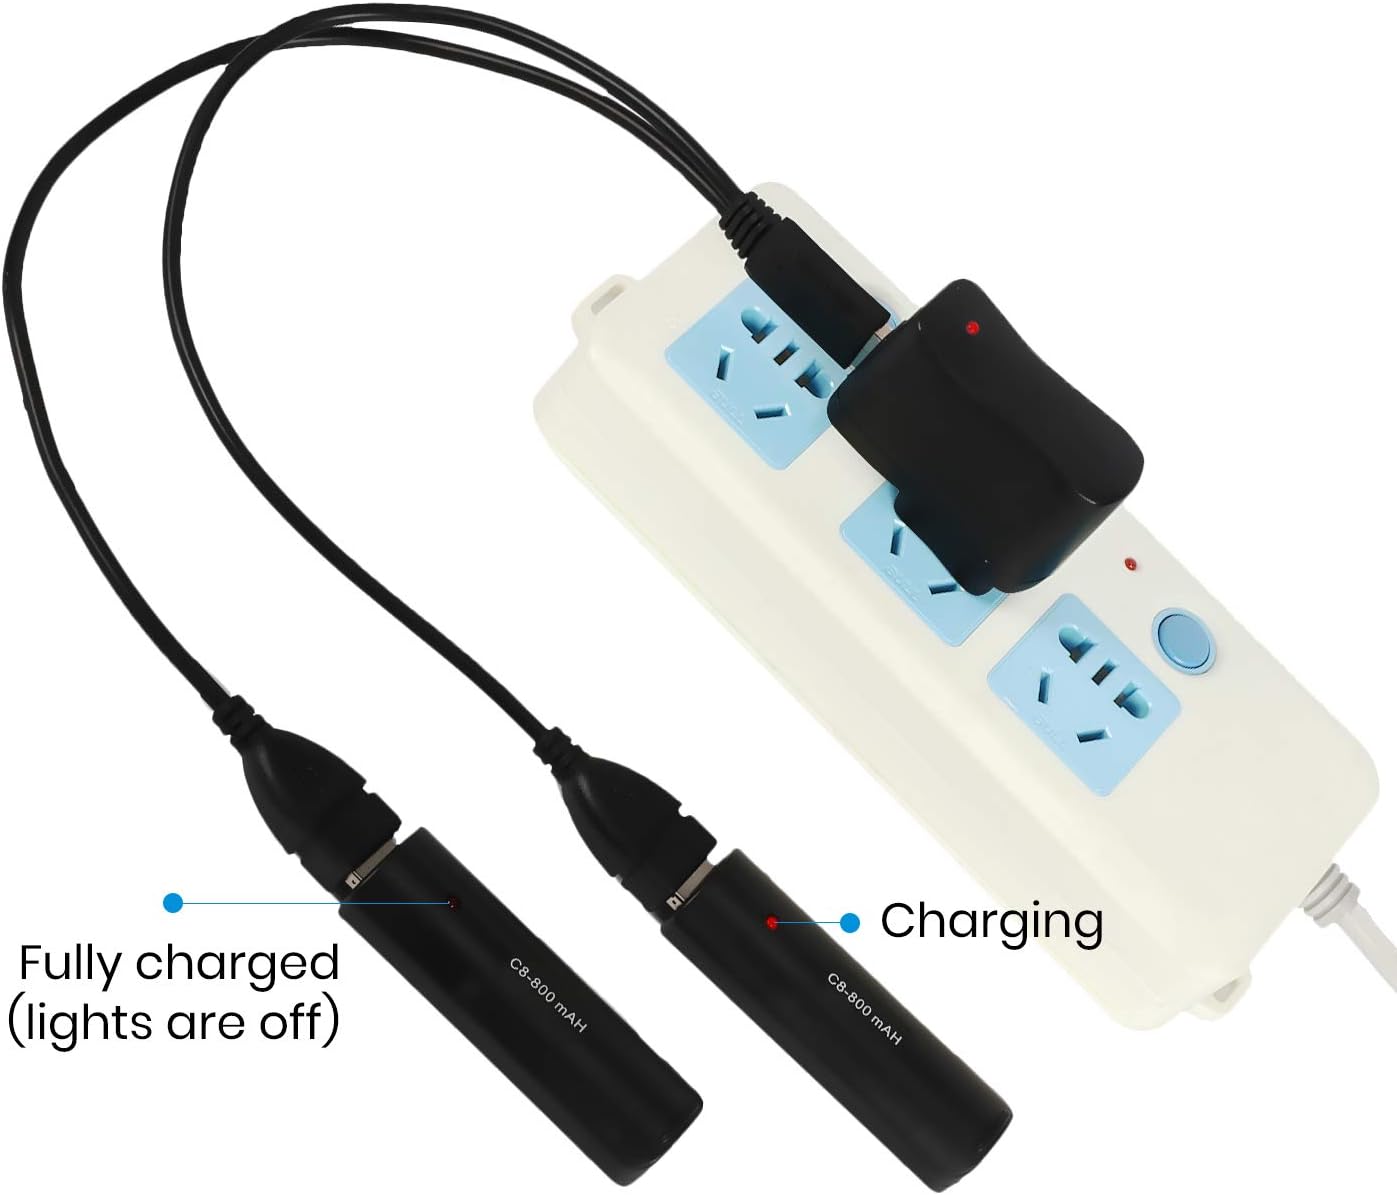
Image: Illustration of charging the microphone batteries using the dual USB cable.
Alternatively, you can use 1.5V AA batteries with the provided AA battery adapters. Insert the AA batteries into the adapters, then insert the adapters into the microphones.
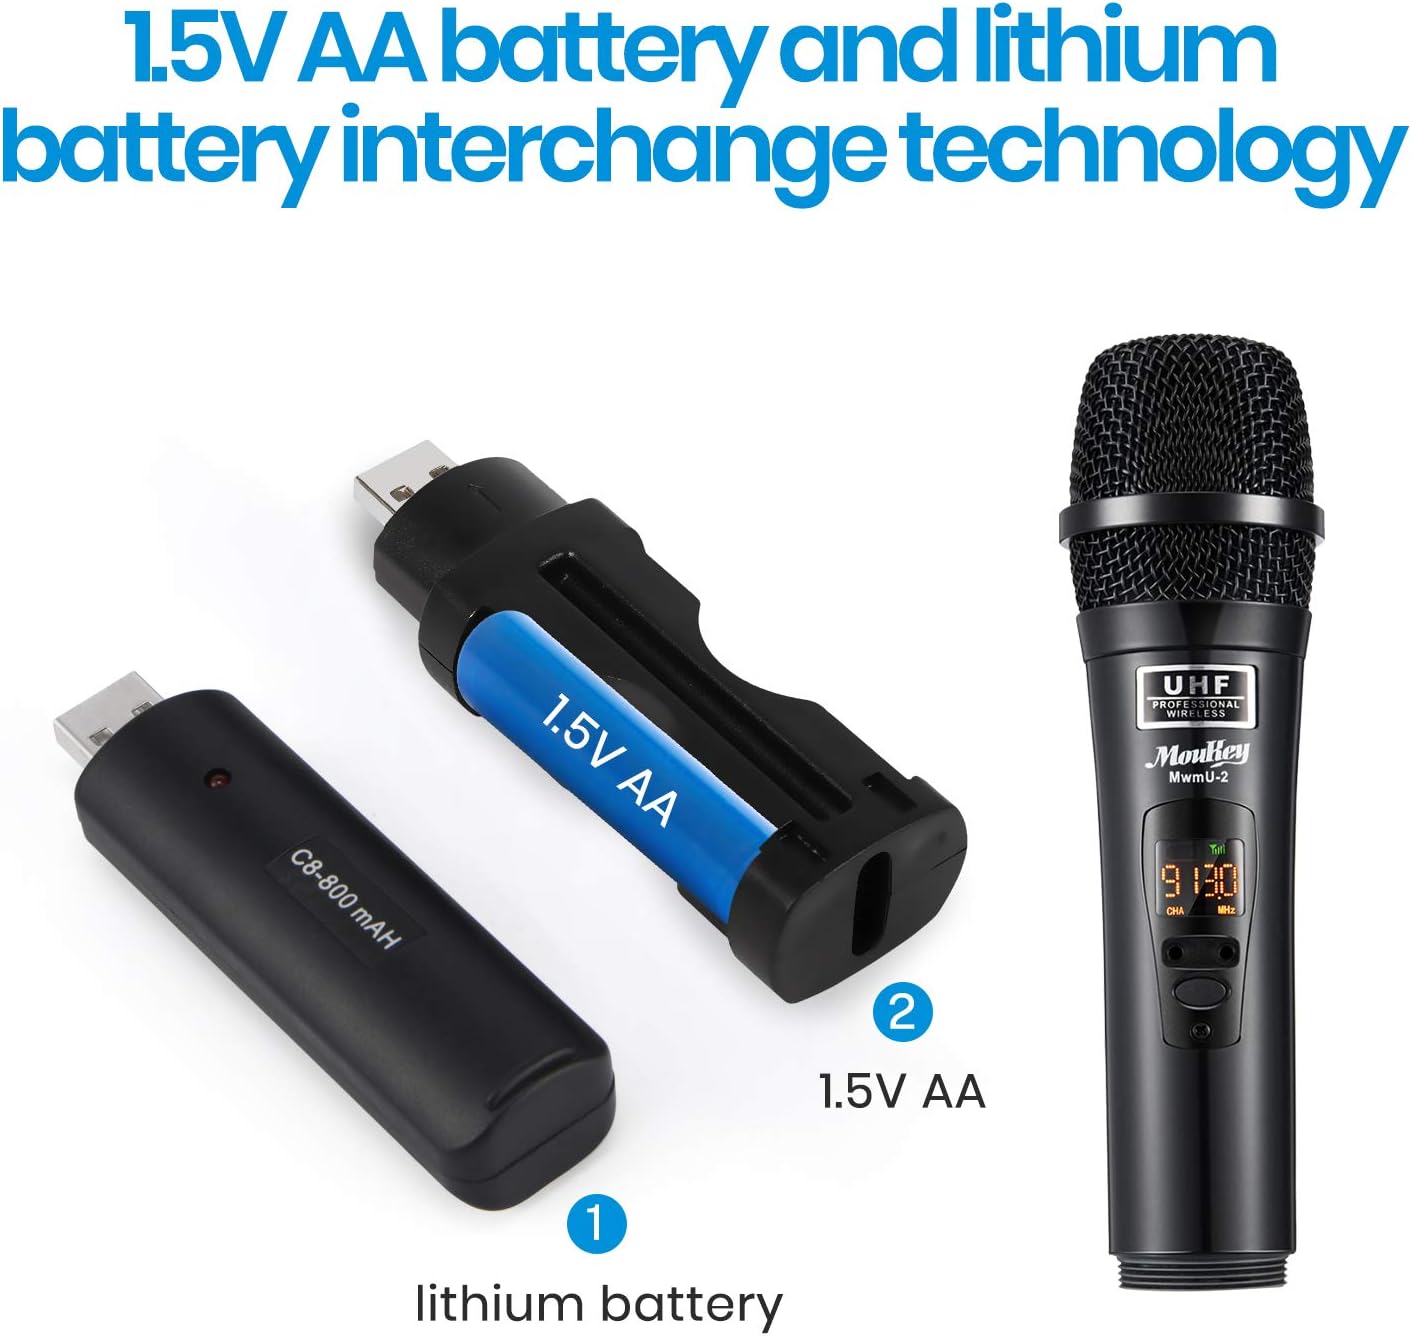
Image: Demonstrates the interchangeability of lithium and AA batteries for the microphones.
2. Connecting the Receiver
Connect the receiver unit to a power source using the DC 5V power adapter. Plug the 3.5mm end of the audio cable into the "OUTPUT" port on the receiver and the 6.3mm end into the microphone input of your amplifier, mixer, or PA system.
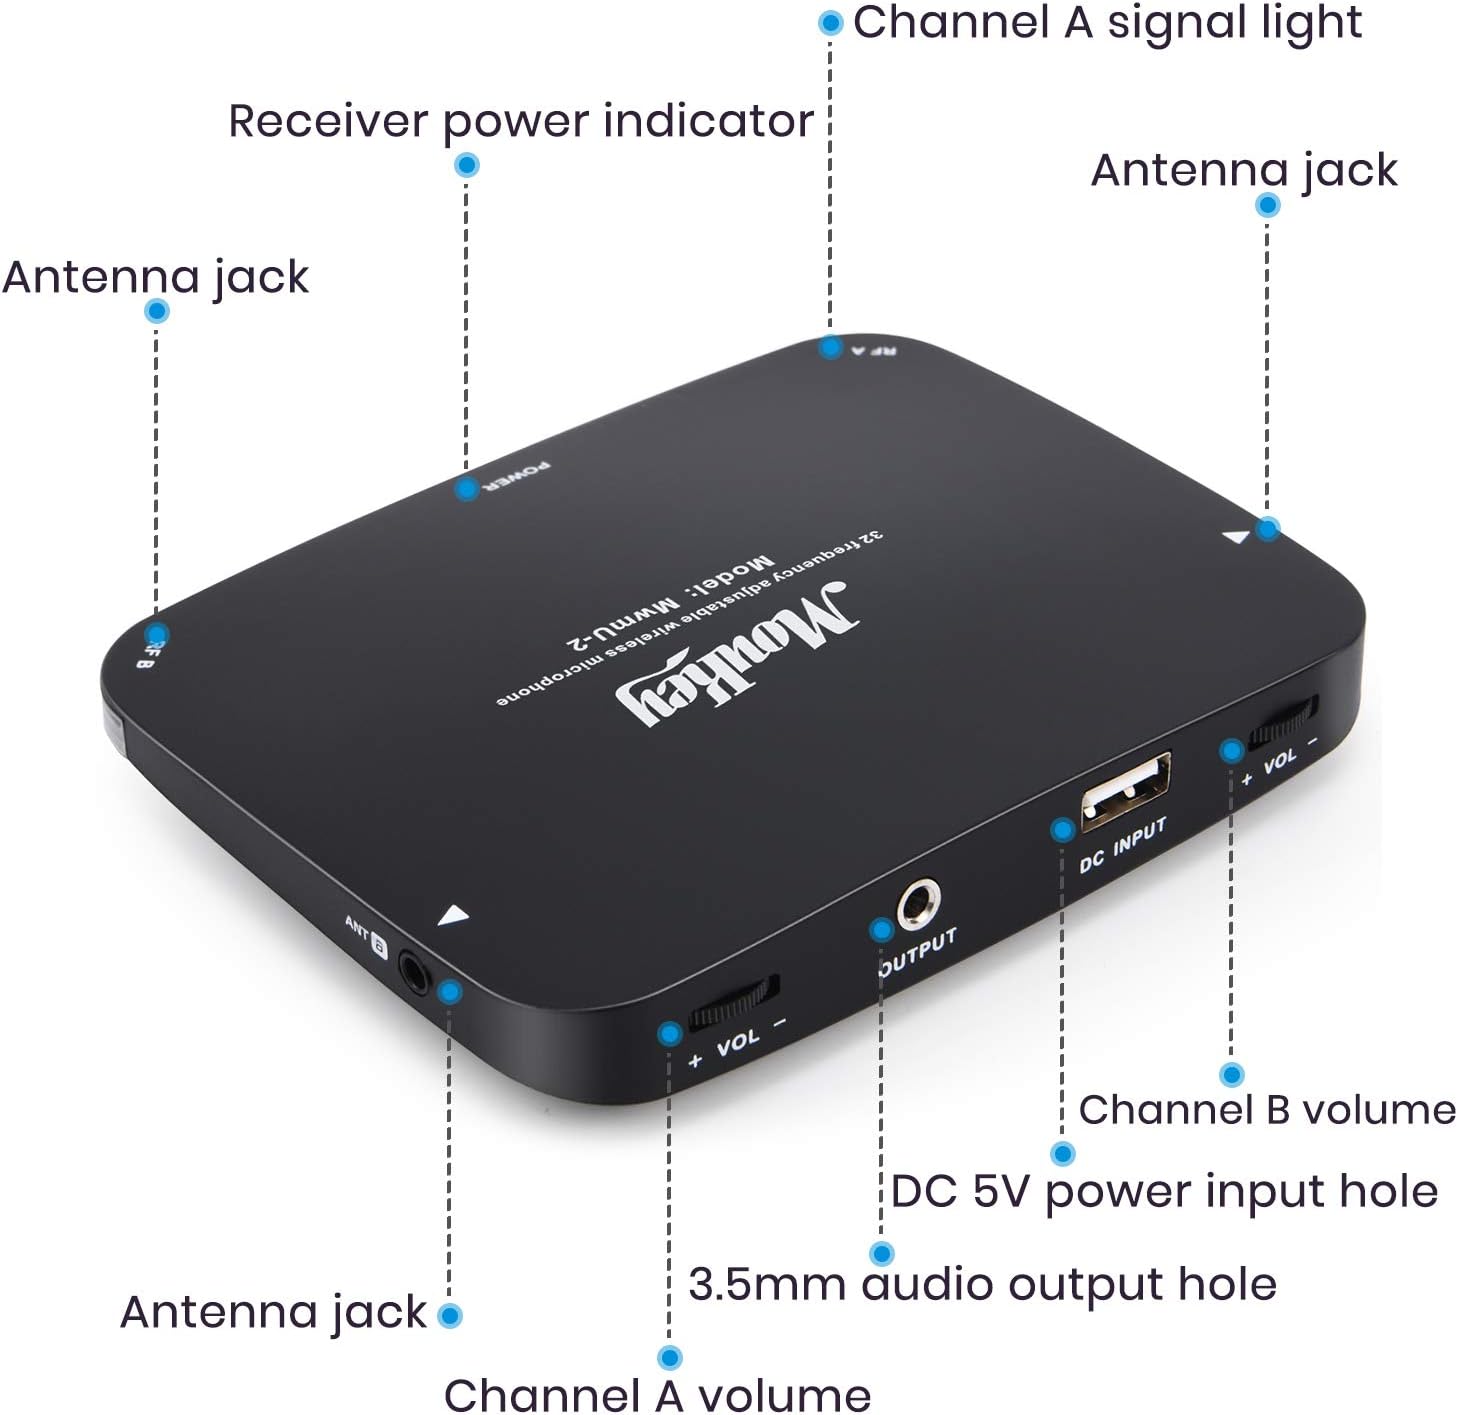
Image: Detailed view of the receiver unit's ports and indicators.
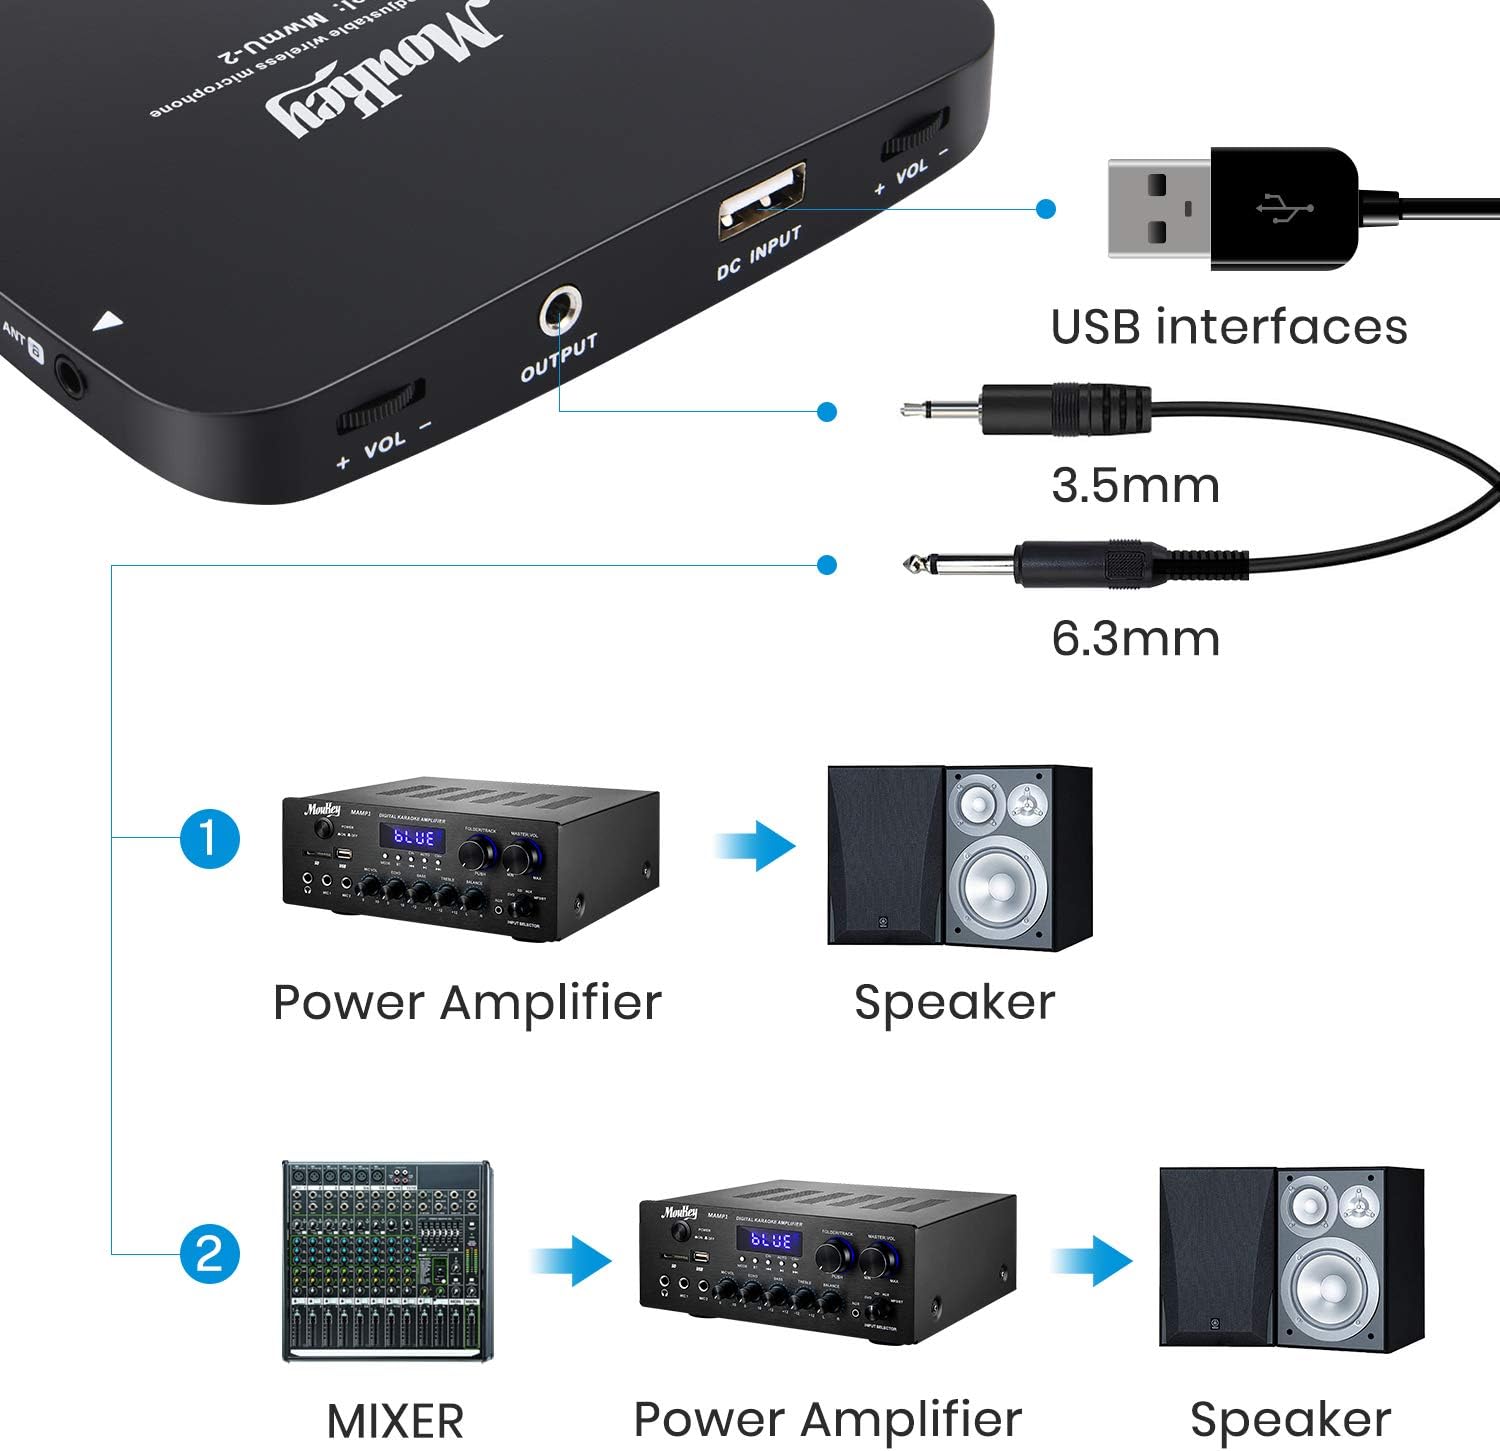
Image: Connection diagram for the wireless microphone system with external audio equipment.
3. Powering On and Pairing
Turn on the receiver unit. The power indicator light will illuminate. Turn on each handheld microphone using its power switch. The microphones will automatically pair with the receiver. The channel signal lights (Channel A and Channel B) on the receiver will light up when a microphone is successfully connected.

Image: Close-up of a microphone displaying its controls for frequency adjustment and power.
Operating Instructions
- Frequency Adjustment: The system operates at 902~928MHz with up to 32 selectable frequency channels. If you experience interference, you can change the frequency by touching the frequency up/down buttons on the microphone. The receiver will automatically match the new frequency.
- Volume Control: Adjust the individual volume for Channel A and Channel B directly on the receiver unit using the dedicated volume knobs.
- Operating Range: The system offers a barrier-free operating range of up to 262 feet (80 meters), providing stable and consistent sound transmission.
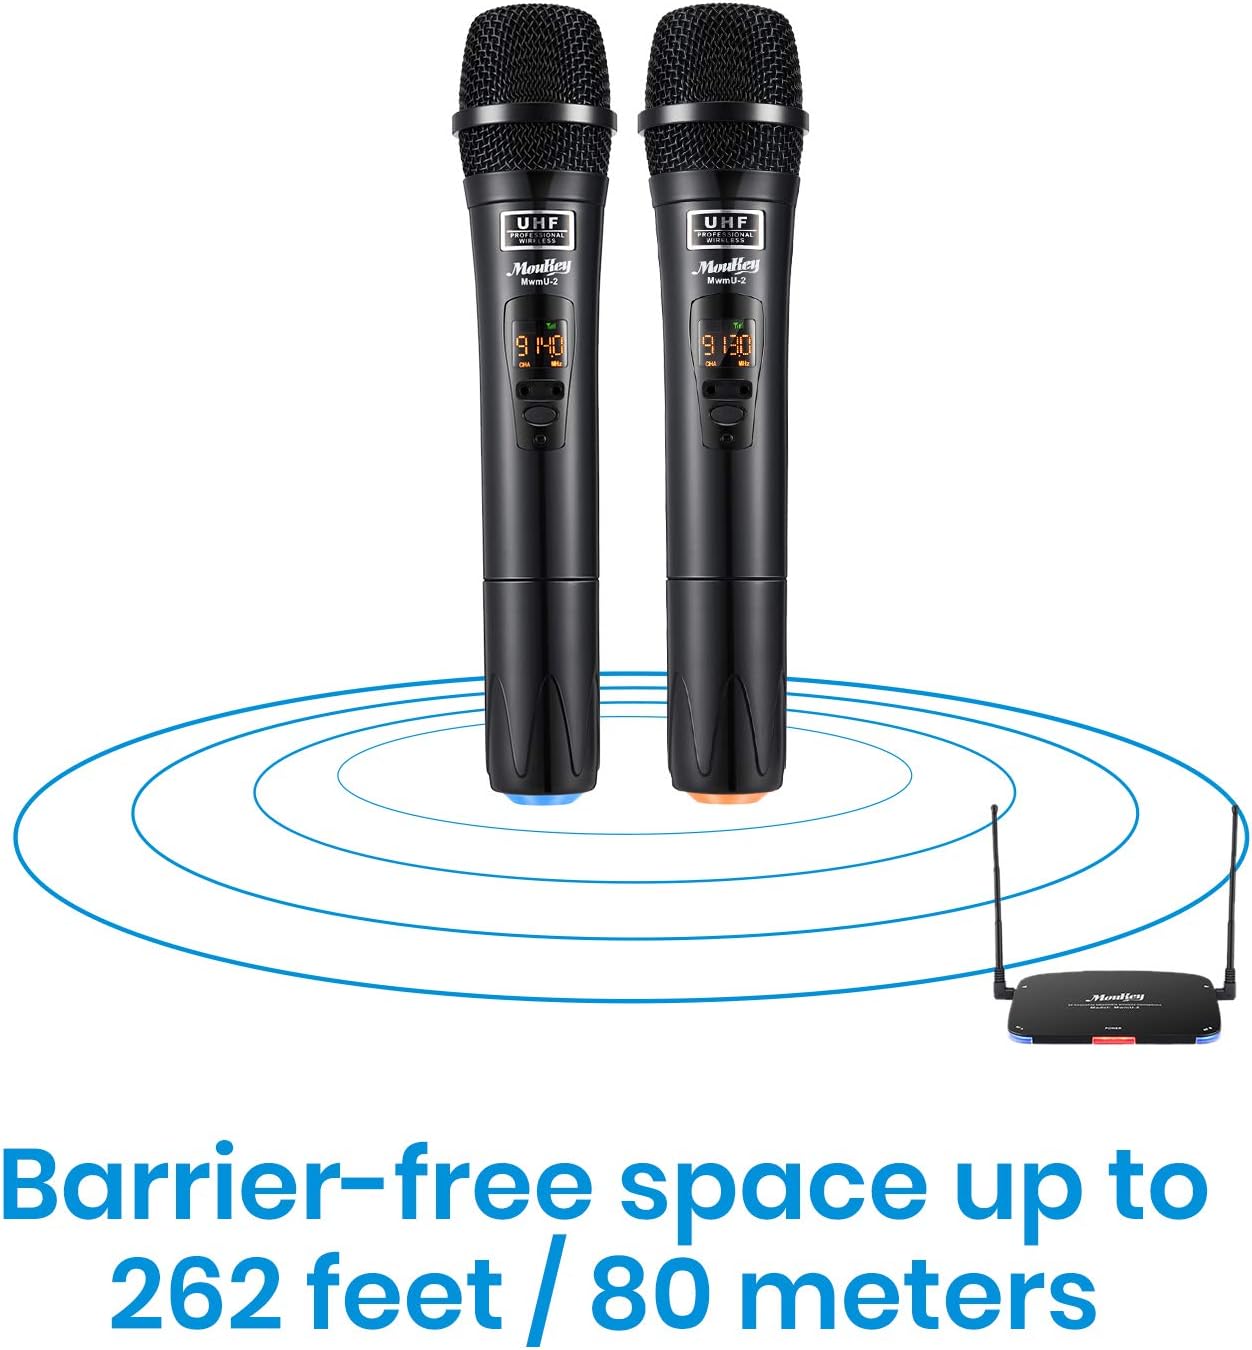
Image: Visual representation of the wireless system's operating range.
- Anti-RF Interference: The advanced anti-interference design ensures the receiver only works when a handheld microphone is turned on and recognized, minimizing noise from other devices.
Maintenance
- Cleaning: Use a soft, dry cloth to clean the microphones and receiver. Do not use liquid cleaners or abrasive materials.
- Storage: Store the system in a cool, dry place away from direct sunlight and extreme temperatures when not in use.
- Battery Care: For rechargeable batteries, avoid complete discharge for extended periods. Recharge them regularly to maintain battery health. If using AA batteries, remove them if the microphones will not be used for a long time to prevent leakage.
Troubleshooting
| Problem | Possible Cause | Solution |
|---|---|---|
| No sound from microphones. |
|
|
| Interference or static noise. |
|
|
| Short operating range. |
|
|
Specifications
| Feature | Detail |
|---|---|
| Brand | Moukey |
| Model Number | X-116 |
| Microphone Form Factor | Microphone System |
| Frequency Range | UHF 902~928MHz |
| Number of Channels | 32 (selectable) |
| Operating Range | Up to 262 feet (80 meters) barrier-free |
| Microphone Battery Life | Up to 8 hours (per microphone) |
| Charging Time | 1-2 hours |
| Battery Type | Rechargeable Lithium (interchangeable with 1.5V AA) |
| Signal-to-Noise Ratio | 95 dB |
| Connectivity Technology | Auxiliary |
| Connector Type | 3.5 mm Jack, USB |
| Special Feature | Mute Function, Anti-RF Interference, Auto Frequency Matching |
| Product Dimensions | 14.96 x 10.94 x 2.17 inches |
| Item Weight | 2.26 pounds (1026 Grams) |
| Material | Plastic |
| Color | Black |
Warranty and Support
Moukey products are designed for reliability and performance. For warranty information, technical support, or any inquiries regarding your product, please visit the official Moukey website or contact their customer service directly.
Moukey Store: Visit the Moukey Store on Amazon
Company Information: Since 2017, Moukey has been committed to creating new experiences of consumer electronics. Their passionate and dedicated R&D team continues to innovate with high-quality and affordable audio products and accessories that enrich the lives of their customers.