1. Introduction
This manual provides detailed instructions for the installation, operation, and maintenance of your Renogy MPPT 30A Solar Charge Controller. Designed for 12V/24V DC systems, this controller optimizes power harvesting from your solar panels and efficiently charges various battery types, including Lithium, AGM, and Gel. Please read this manual thoroughly before installation and use to ensure optimal performance and safety.
2. Product Overview
Key Features:
- Innovative MPPT Design: Die-cast aluminum design ensures excellent heat dissipation. Renogy's Maximum Power Point Tracking technology offers up to 99% tracking efficiency and 98% peak conversion efficiency, providing optimal charging even in cloudy conditions.
- Automatic 12V/24V Detection: Automatically detects 12V or 24V DC system voltages. The LCD screen and multiple LED indicators display solar charging information, battery operation, customizable parameters, and error codes.
- Comprehensive System Protection: Features self-diagnostic capabilities to protect against reverse polarity, battery overcharge, battery over-discharge, overload, short circuit, and reverse current.
- Advanced 4-Stage Charging: Provides 4-stage charging (Bulk, Absorption, Float, and Equalization) for lead-acid batteries and 2-stage charging (Bulk and Absorption) for Lithium batteries, including Lithium reactivation.
- Versatile Load Control: Connect DC appliances directly to optional load terminals to monitor consumption or configure timed controls directly from the controller.
- Remote Monitoring: The RS232 communication port allows the Renogy Rover to connect with the Renogy BT-1 Bluetooth module (recommended, not included) for monitoring system status and productivity via the Renogy DC Home App.
Product Components:
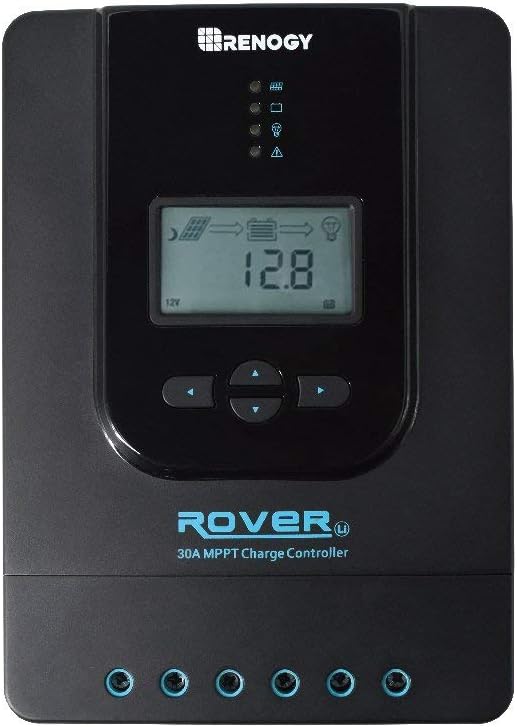
Figure 1: Front view of the Renogy MPPT 30A Solar Charge Controller, showing the LCD display, control buttons, and LED indicators.

Figure 2: Dimensions of the Renogy MPPT 30A Solar Charge Controller (238mm x 173mm x 72.5mm, Weight: 2.0kg).

Figure 3: Key features of the Renogy MPPT 30A Solar Charge Controller, including MPPT Technology, Electronic Protection, Reverse Protection, 4 Charging Stages, Max Input 100VDC, and RS232 Communication Port.
3. Setup & Installation
Proper installation is crucial for the safe and efficient operation of your solar charging system. Follow these steps carefully.
Wiring Diagram:

Figure 4: General wiring diagram showing connections between solar panel, charge controller, battery, and optional inverter/load. Ensure correct polarity for all connections.
Connection Sequence:
- Connect the battery to the charge controller.
- Connect the solar panel to the charge controller.
- Connect the DC load (if applicable) to the charge controller.
Important: Always connect the battery first and disconnect the solar panel first when disassembling the system. This prevents damage to the controller.
Video Guide: Installation and Basic Operation
Video 1: A comprehensive guide demonstrating the unboxing, component overview, connection sequence, and initial setup of a similar MPPT solar charge controller. This video provides visual instructions for connecting the battery, solar panel, and load, as well as navigating the display and setting basic parameters.
4. Operating Instructions
The Renogy MPPT 30A Solar Charge Controller features an intuitive LCD display and control buttons for easy operation and monitoring.
LCD Display Interface:

Figure 5: Overview of the LCD display, showing various parameters such as main screen, solar panel voltage, charging current, battery capacity, battery voltage, load current, ambient temperature, discharged Ah, and accumulated Ah.
Use the "SELECT" and "ENTER" buttons to navigate through the display screens and adjust settings.
Battery Type Settings:
The controller supports various battery types. To select your battery type:
- Press the "SELECT" button to navigate to the battery type interface.
- Long press the "ENTER" button until the battery type number flashes.
- Use the "SELECT" button to cycle through the available battery types (Sealed, Gel, Flooded, Lithium, User).
- Press "ENTER" to confirm your selection.

Figure 6: Display showing different battery type options: Sealed (default), Gel, Flooded, Li (Lithium), and User-defined.
Load Mode Settings:
The controller offers various load operating modes. To adjust the load mode:
- Press the "SELECT" button to navigate to the load mode interface.
- Long press the "ENTER" button until the load mode number flashes.
- Use the "SELECT" button to cycle through the available load modes (e.g., 24-hour, dusk-to-dawn, timed, manual).
- Press "ENTER" to confirm your selection.
For manual load control, you can activate/deactivate the load directly via the ENTER button when in manual load mode.
Advanced Voltage Parameters (User-Defined Battery Type):
If you select the "User" battery type, you can customize various voltage parameters. This is typically for advanced users or specific battery chemistries not covered by the default settings. Refer to your battery manufacturer's specifications for appropriate values.
To adjust voltage parameters:
- Ensure the battery type is set to "User".
- Navigate to the desired voltage parameter screen using the "SELECT" button.
- Long press the "ENTER" button until the value flashes.
- Use the "SELECT" button to adjust the value.
- Press "ENTER" to confirm the new value.
Note: Incorrect voltage settings can damage your battery. Consult your battery's specifications or a qualified professional before making adjustments.
5. Maintenance
Regular maintenance ensures the longevity and optimal performance of your Renogy MPPT 30A Solar Charge Controller.
- Cleanliness: Keep the controller clean and free from dust and debris. Use a dry cloth for cleaning.
- Connections: Periodically check all wiring connections for tightness and corrosion. Loose connections can cause overheating and damage.
- Ventilation: Ensure adequate airflow around the controller for proper heat dissipation. Do not block ventilation openings.
- Battery Inspection: Regularly inspect your batteries for any signs of damage, swelling, or leakage. Ensure battery terminals are clean and secure.
- Firmware Updates: Check the Renogy website for any available firmware updates for your controller model.
6. Troubleshooting
If you encounter issues with your solar charging system, refer to the following common troubleshooting steps:
- No Display/Power:
- Check battery connections and ensure they are secure and correctly polarized.
- Verify battery voltage is within the controller's operating range (12V/24V).
- Inspect fuses or circuit breakers in the battery circuit.
- No Charging from Solar Panels:
- Ensure solar panel connections are secure and correctly polarized.
- Check for sufficient sunlight reaching the solar panels.
- Verify solar panel voltage is within the controller's input range.
- Inspect any inline fuses or circuit breakers in the solar panel circuit.
- Load Not Working:
- Check load connections and ensure they are secure and correctly polarized.
- Verify the load mode setting on the controller.
- Check for overcurrent or short circuit on the load terminals.
- Ensure battery voltage is above the low voltage disconnect (LVD) setting.
- Error Codes:
- Refer to the controller's LCD display (Figure 5) for any error codes. Consult the full product manual (if provided separately) for specific error code definitions and solutions.
If the issue persists after following these steps, contact Renogy customer support for further assistance.
7. Specifications
| Attribute | Value |
|---|---|
| Brand | Renogy |
| Model Number | RNG-CTRL-RVR30-FBA |
| UPC | 810009711612 |
| Dimensions (L x W x H) | 23.8 x 17.2 x 7.73 cm |
| Weight | 2 Kilograms |
| Material | Aluminum |
| Voltage | 12 Volts (12V/24V Auto-detect) |
| Display Type | LCD |
| Color | Blue/Black/Green/White |
8. Warranty & Support
For warranty information and technical support, please refer to the official Renogy website or contact their customer service directly. Keep your purchase receipt as proof of purchase for warranty claims.
Renogy is committed to providing high-quality renewable energy products and support to its customers.


