1. Introduction
This manual provides essential information for the safe and proper use, fitting, and maintenance of your VEGA Crux CRX-B-S Flip-up Helmet. Please read these instructions carefully before using your helmet to ensure maximum safety and product longevity.

Image 1.1: Front-side view of the VEGA Crux CRX-B-S Flip-up Helmet with visor down.
2. Safety Information
Wearing a helmet is crucial for rider safety. Always ensure your helmet is properly fitted and secured before every ride. A helmet that is too loose may not provide adequate protection in the event of an impact.
- Proper Fit: A new helmet should feel snug, almost uncomfortably tight, as the internal padding will compress over time to conform to your head shape.
- Chin Strap: Always fasten the chin strap securely. It should be tight enough that you cannot remove the helmet by pulling it from the back.
- Visor: Ensure the visor is clean and free from obstructions for clear visibility. Replace scratched or damaged visors immediately.
- Impact: If the helmet sustains an impact, even if there is no visible damage, it should be replaced. The protective capabilities may be compromised.
3. Product Features
The VEGA Crux CRX-B-S Flip-up Helmet is designed with the following key features:
- Aerodynamic Shell: Constructed with an ABS shell for durability and an aerodynamic design to reduce wind resistance.
- Flip-up Mechanism: Features a convenient press-button mechanism for smooth flip-up action of the chin bar, allowing for ventilation and ease of communication when stationary.
- Visor: Equipped with an anti-scratch visor that offers a large eye port for greater visibility and enhanced peripheral vision.
- Interior: Features a comfortable leather finish touch interior.
- Design: Incorporates an off-road look suitable for various riding styles.
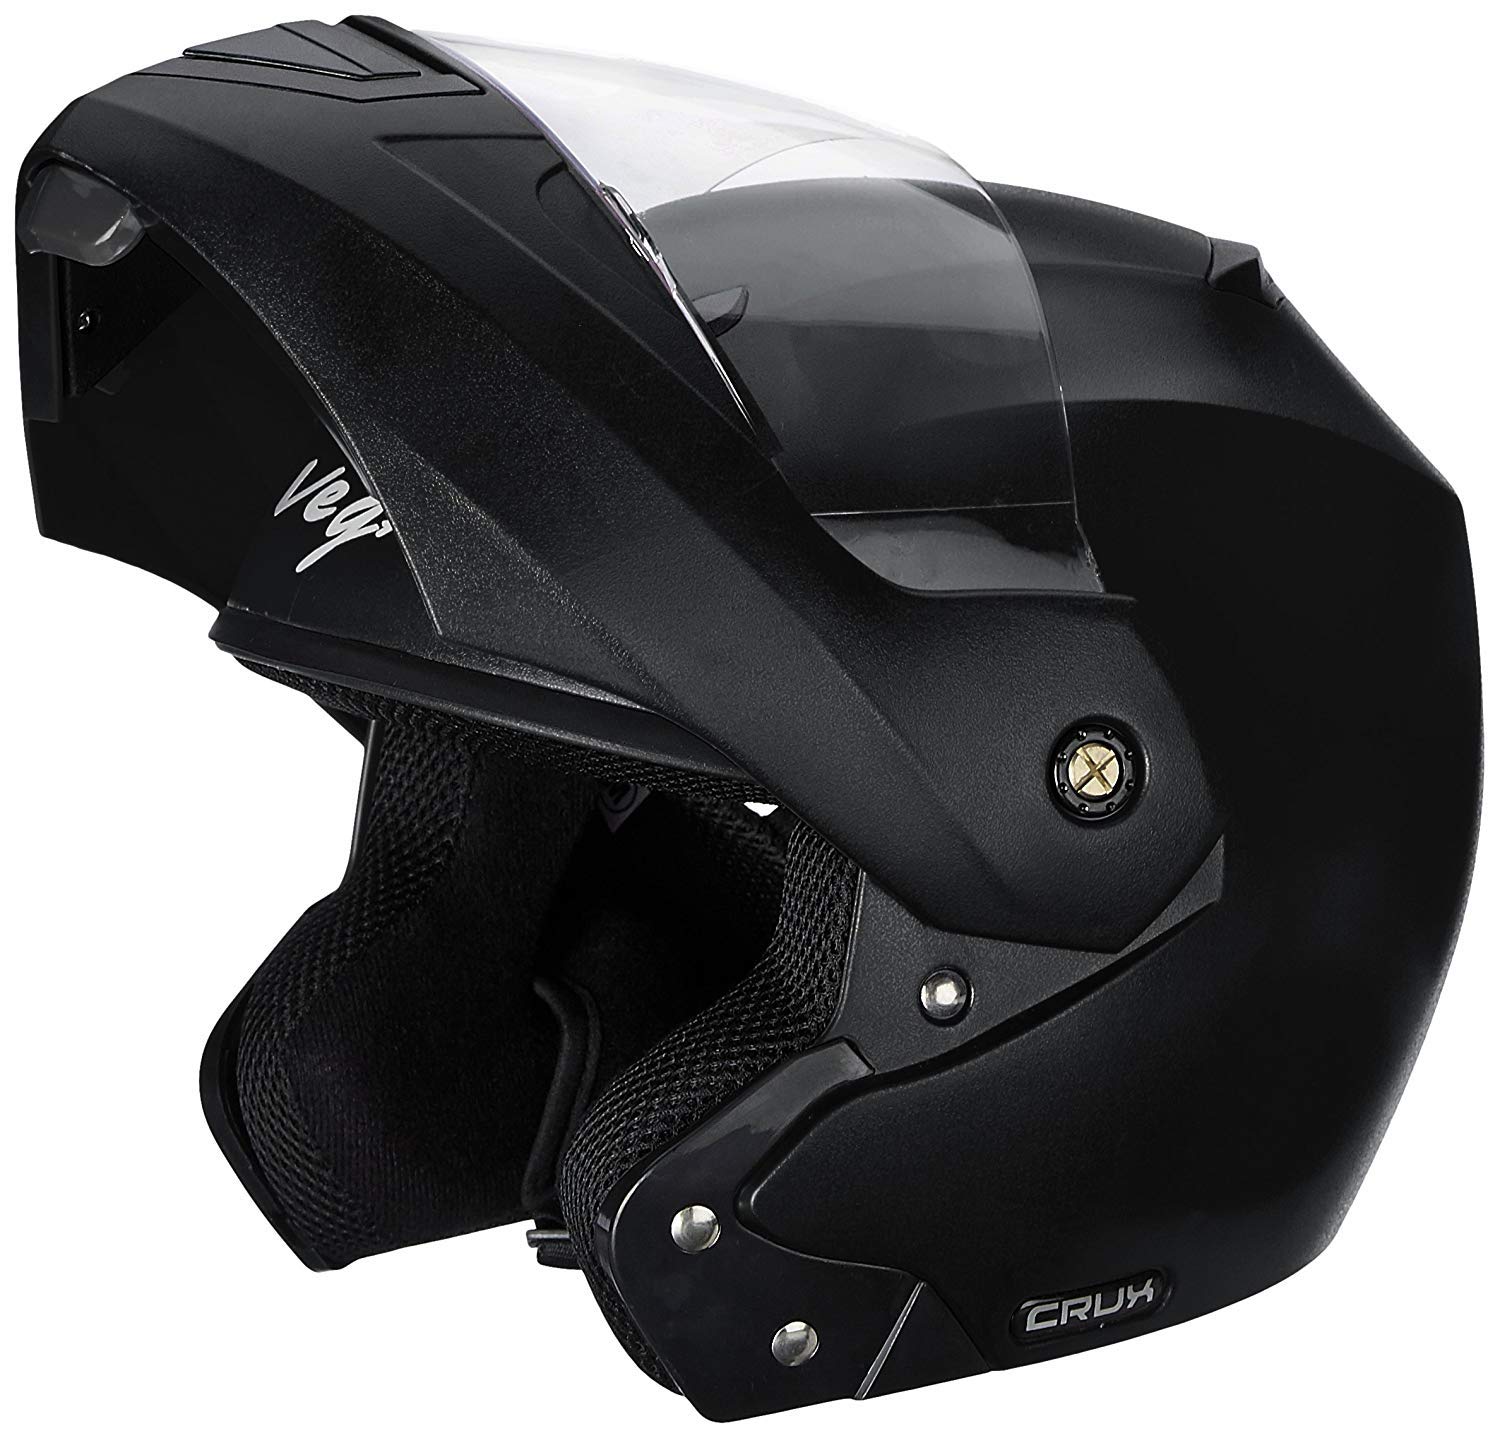
Image 3.1: Side view of the helmet demonstrating the flip-up chin bar mechanism.

Image 3.2: Side view of the helmet, highlighting the 'CRUX' branding on the chin bar.
4. Setup and Fitting
A correctly sized and fitted helmet is essential for safety and comfort. Follow these steps to determine the best fit:
- Measure Head Circumference: Use a flexible tape measure to measure the circumference of your head approximately one inch above your eyebrows.
- Consult Size Chart: Match your measurement with the helmet size chart provided by VEGA.
- Try On Helmet: Gently place the helmet on your head. It should feel snug and apply even pressure around your head. The helmet should not move freely when you shake your head.
- Check for Movement: If the helmet is too loose, it will move around on your head, which can be noisy and unsafe during a ride.
Available sizes for this model include: Small (55-56cm), Medium (56-58cm), Large (58-59cm), Extra Large (59-60cm).

Image 4.1: Guide on how to measure your head for proper helmet sizing.

Image 4.2: View of the helmet's interior, highlighting the comfortable padding and adjustable chin strap.
5. Operating Instructions
5.1. Flip-up Mechanism
To operate the flip-up mechanism, locate the press button typically found at the front-center of the chin bar. Press this button firmly and lift the chin bar upwards until it locks into the open position. To close, press the button again and pull the chin bar down until it securely latches into place.
5.2. Visor Operation
The visor can be easily opened and closed by lifting or lowering it using the tab located on the visor. Ensure the visor is fully closed when riding at speed to protect against wind, debris, and insects. The visor is designed to be anti-scratch, but proper care is still recommended.
6. Maintenance
Regular maintenance will extend the life of your helmet and ensure its protective capabilities.
- Cleaning the Exterior: Use a soft cloth dampened with mild soap and water to clean the helmet's exterior. Avoid harsh chemicals or abrasive cleaners.
- Cleaning the Visor: Clean the visor with a soft, damp cloth and mild soap. Rinse thoroughly with clean water and dry with a soft, lint-free cloth. Do not use chemical cleaners or paper towels, which can scratch the visor.
- Cleaning the Interior: The interior padding can often be removed for cleaning. Refer to the manufacturer's instructions for specific cleaning methods for the leather finish interior. Typically, hand washing with mild soap and air drying is recommended.
- Storage: Store your helmet in a cool, dry place away from direct sunlight and extreme temperatures. Avoid placing heavy objects on top of the helmet.
- Inspection: Periodically inspect the helmet for any signs of damage, such as cracks in the shell, worn padding, or a damaged chin strap. Replace any damaged components or the entire helmet if necessary.
7. Troubleshooting
- Helmet feels too tight: All helmets are designed to feel tight initially to meet safety requirements. The foam padding will adjust over time to conform to your head size. If it causes pain or discomfort after extended wear, re-evaluate your size using the fitting guide.
- Visor fogs up: This can occur due to temperature differences and humidity. Ensure proper ventilation by slightly opening the visor if safe to do so, or consider anti-fog treatments for the visor.
- Chin bar not locking securely: Ensure the press button is fully depressed and the chin bar is pushed down firmly until you hear a click, indicating it is latched. Inspect for any obstructions.
8. Specifications
| Feature | Detail |
|---|---|
| Brand | VEGA |
| Model Name | Crux |
| Model Number | CRX-B-S |
| Colour | BLACK |
| Size (as reviewed) | S (Small) |
| Available Sizes | Small (55-56cm), Medium (56-58cm), Large (58-59cm), Extra Large (59-60cm) |
| Inner Material | Leather |
| Special Features | Aerodynamic shell, large eye port, ABS shell, anti-scratch visor, flip-up mechanism |
| Item Dimensions (L x W x H) | 29.1 x 24.3 x 21.3 Centimeters |
| Item Weight | 0.95 Grams |
| Manufacturer | Vega |
9. Warranty and Support
For warranty information or technical support, please refer to the documentation provided with your purchase or contact VEGA customer service directly. Keep your proof of purchase for warranty claims.


