
Retro-Bit 849172010239
Retro-Bit Official Sega Genesis USB Controller 8-Button Arcade Pad Instruction Manual
Model: 849172010239
1. Introduction
This manual provides detailed instructions for the Retro-Bit Official Sega Genesis USB Controller 8-Button Arcade Pad. This controller is designed to offer a classic gaming experience with modern compatibility, featuring a familiar design and additional functionality for various platforms. Please read this manual thoroughly to ensure proper setup and operation of your device.
2. Product Overview
The Retro-Bit Official Sega Genesis USB Controller is an officially licensed replica of the classic Sega Genesis controller, enhanced with modern features for broad compatibility.
Key Features:
- Official SEGA Licensed Controller (Original Grade Quality)
- Classic 6-button layout with repositioned Mode button
- New L/R Shoulder Buttons for extra configuration options
- 10-foot cable length for flexible gameplay
- Compatible with Sega Genesis Mini, Nintendo Switch/Switch 2, PC, Mac, Steam, RetroPie, Raspberry Pi
- Supports both D-Input and X-Input modes
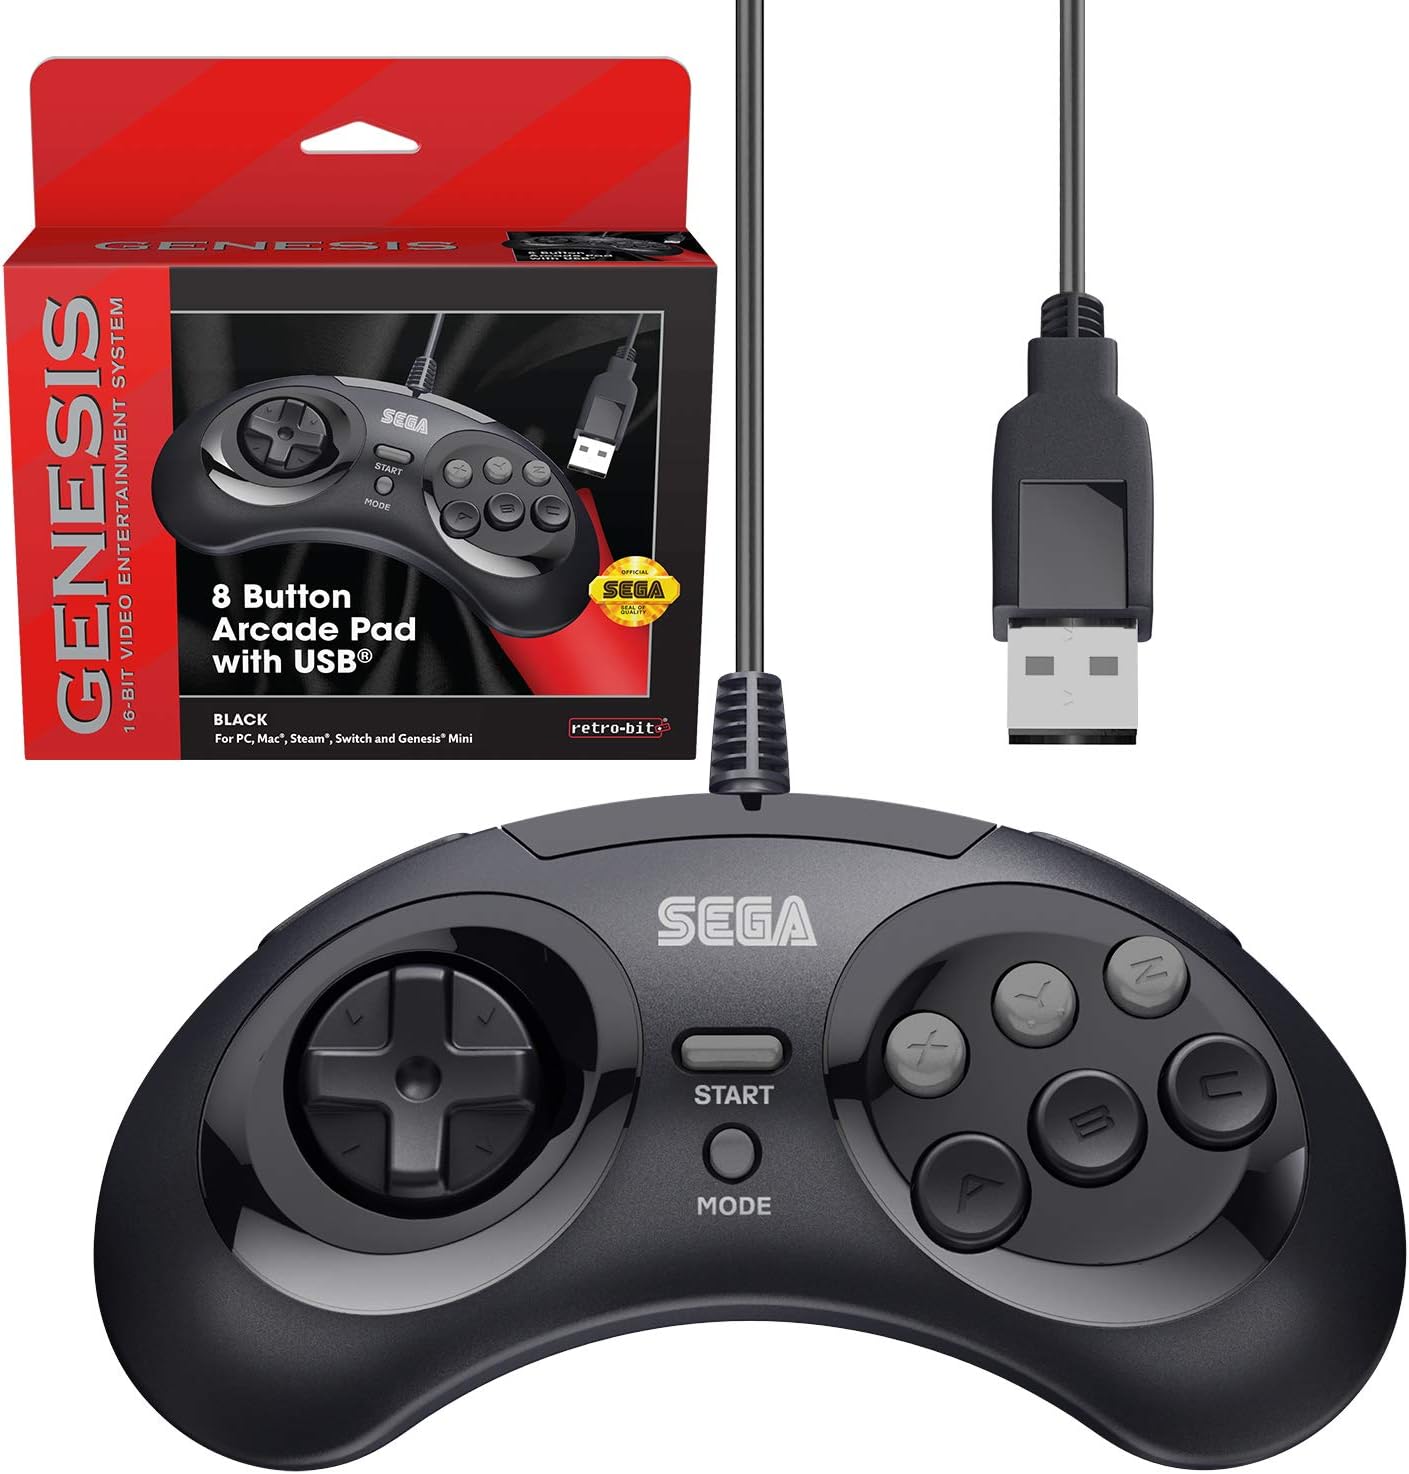
Figure 2.1: The Retro-Bit Official Sega Genesis USB Controller 8-Button Arcade Pad and its packaging.
3. Setup
Setting up your Retro-Bit Sega Genesis USB Controller is a straightforward process. The controller is designed for plug-and-play functionality on most supported systems.
3.1 Connecting the Controller
- Locate an available USB port on your desired gaming device (PC, Mac, Nintendo Switch, Sega Genesis Mini, RetroPie, Raspberry Pi).
- Plug the USB-A connector of the controller's 10-foot cable into the USB port.
- The system should automatically detect and install the necessary drivers. No additional software installation is typically required.
- For Nintendo Switch handheld mode, a USB-C adapter (not included) may be required to connect the USB-A cable.

Figure 3.1: Close-up view of the controller's face buttons and D-pad.
Video 3.1: An unboxing of the Retro-Bit Official Sega Genesis USB Controller, demonstrating the physical product and its packaging. This video shows the controller being removed from its box and highlights its wired USB connection.
4. Operating Instructions
The controller features a classic 6-button layout with additional shoulder buttons and a Mode button for enhanced functionality.
4.1 Button Layout
- D-Pad: Directional input for movement.
- A, B, C, X, Y, Z Buttons: Main action buttons.
- Start Button: Typically used for pausing games or confirming selections.
- Mode Button: Can be used for specific game functions or system navigation.
- L/R Shoulder Buttons: New additions for expanded control options in modern games or emulators.

Figure 4.1: Side view of the controller, highlighting the newly added L and R shoulder buttons.
4.2 Switching Input Modes (D-Input / X-Input)
The controller supports both D-Input (DirectInput) and X-Input (XInput) modes. X-Input is commonly used for modern PC games, while D-Input is often used for older games and some emulation platforms.
- To swap between D-Input and X-Input, hold the START button for 5 seconds. The controller will switch modes.
- Note: The controller defaults to D-Input mode upon connection and does not retain settings between sessions. You may need to switch modes each time you connect the controller.
4.3 Switch Macros (Nintendo Switch Specific)
For Nintendo Switch, specific button combinations can be used to change D-Pad input or swap button layouts:
- Hold START for 5 seconds: Mode Enabled
- Up + START: D-Pad input (Left Joystick)
- Left + START: Left Joystick
- Right + START: Right Joystick
- Down + START: Swap A, B, X, Y buttons
Video 4.2: A detailed review of the Retro-Bit Official Sega Genesis USB Controller, including demonstrations of its features, button feel, and compatibility with various systems. This video also explains the D-Input/X-Input switching and button mapping.
5. Compatibility
The Retro-Bit Official Sega Genesis USB Controller offers broad compatibility with various modern and retro gaming platforms:
- Sega Genesis Mini
- Nintendo Switch / Switch 2
- PC (Windows)
- Mac (macOS)
- Steam (PC/Mac)
- RetroPie
- Raspberry Pi
- PS3 (as indicated in manual, though not on box)

Figure 5.1: A compatibility chart showing various Retro-Bit controller types and their supported platforms. This wired USB model is compatible with many systems.

Figure 5.2: The controller is fully compatible with the Sega Genesis Mini console, providing an authentic retro gaming experience.
6. Default Button Mapping
The following table illustrates the default button mapping across different input modes and platforms. Please refer to this table for optimal configuration.
| Controls | Genesis | D-Input | X-Input | PS3* | Mac* | Switch |
|---|---|---|---|---|---|---|
| Up | Up ↑ | Up ↑ | Y-Axis ↑ | Up ↑ | Up ↑ | Up ↑ |
| Right | Right → | Right → | X-Axis → | Right → | Right → | Right → |
| Down | Down ↓ | Down ↓ | Y-Axis ↓ | Down ↓ | Down ↓ | Down ↓ |
| Left | Left ← | Left ← | X-Axis ← | Left ← | Left ← | Left ← |
| A | A | 1 | A | 2 | 1 | B |
| B | B | 2 | B | 1 | 2 | A |
| C | C | 3 | X | 3 | 3 | Y |
| X | X | 4 | Y | 4 | 4 | X |
| Y | Y | 5 | LB | L1 | 5 | L |
| Z | Z | 6 | RB | R1 | 6 | R |
| L | L | 7 | LT | L2 | 7 | ZL |
| R | R | 8 | RT | R2 | 8 | ZR |
| Mode | Select | 9 | Back | Select | 9 | - |
| Start | Start | 10 | Start | Start | 10 | + |
| Start + A | Guide | 11 | Guide | Home | 11 | Home |
*PS3 and Mac compatibility may vary or require specific settings.
7. Maintenance
To ensure the longevity and optimal performance of your controller, follow these maintenance guidelines:
- Cleaning: Use a soft, dry cloth to wipe down the controller. For stubborn dirt, slightly dampen the cloth with water. Avoid harsh chemicals or abrasive cleaners.
- Storage: Store the controller in a cool, dry place away from direct sunlight and extreme temperatures. Avoid wrapping the cable too tightly to prevent damage.
- Handling: Do not drop the controller or expose it to excessive force. Avoid pulling the cable forcefully from the USB port.
8. Troubleshooting
If you encounter issues with your controller, please refer to the following common troubleshooting steps:
- Controller Not Detected:
- Ensure the USB cable is securely plugged into an active USB port.
- Try plugging the controller into a different USB port on your device.
- Restart your gaming device or computer.
- Verify that your operating system or gaming platform supports the controller (refer to Section 5: Compatibility).
- Buttons Not Responding Correctly:
- Check the input mode (D-Input vs. X-Input) by holding the START button for 5 seconds. Some games or emulators require a specific mode.
- For Nintendo Switch, try the Switch Macros (Section 4.3) to adjust D-Pad input or swap buttons if needed.
- Ensure the game or emulator's control settings are configured correctly for a 6-button or 8-button controller.
- Lag or Input Delay:
- Ensure the controller is directly connected to a USB port and not through an unpowered USB hub.
- Minimize background applications on your PC/Mac that might consume system resources.
- For optimal performance, ensure your display device (monitor/TV) is set to a low-latency "Game Mode" if available.
9. Specifications
| Feature | Detail |
|---|---|
| Brand | Retro-Bit |
| Series | SEGA Genesis 8-button Arcade Pad |
| Model Number | 849172010239 |
| Connectivity Technology | USB (Wired) |
| Cable Length | 10 feet (approx. 3 meters) |
| Controller Type | Gamepad |
| Compatible Devices | SEGA Genesis Mini, PC, Mac, Steam, RetroPie, Raspberry Pi, Nintendo Switch |
| Input Modes | D-Input, X-Input (switchable) |
| Item Weight | 9.7 ounces |
| Package Dimensions | 7.09 x 5.75 x 2.48 inches |
10. Warranty and Support
For warranty information and customer support, please refer to the official Retro-Bit website or contact their customer service directly. Details are typically provided with the product packaging or on the manufacturer's website.
If you have questions, comments, or if this product did not turn out the way it was intended, please contact Retro-Bit customer service at info@retro-bit.com.
Related documents849172010239


Ask a question about this manual
Ask about setup, troubleshooting, compatibility, parts, safety, or missing instructions. Manuals+ will review the question and use this page’s manual context to help answer it.