1. Introduction
Thank you for choosing the Proscenic M7 Robot Vacuum Cleaner. This device is designed to provide efficient and thorough cleaning for your home, featuring advanced laser navigation, powerful suction, and intelligent mopping capabilities. Please read this manual carefully before using the product to ensure proper operation and maintenance.
2. Important Safety Instructions
- Read all instructions before using this appliance.
- Do not allow children to operate the robot vacuum. Supervise children and pets when the robot is operating.
- Ensure the charging dock is placed against a wall on a level surface, away from water or heat sources.
- Remove any loose cables, small objects, or fragile items from the floor before operation to prevent entanglement or damage.
- Do not use the robot vacuum in wet environments or to clean up liquids.
- Do not use the robot vacuum near open flames or flammable materials.
- Only use the original power adapter and charging dock provided by the manufacturer.
- Turn off the robot and unplug the charging dock before performing any maintenance or cleaning.
3. Product Overview
3.1 Key Features
- Laser Navigation (LDS): Scans your home in 360 degrees to create real-time maps for efficient cleaning paths.
- App & Alexa Control: Manage cleaning modes, schedules, virtual no-go zones, and spot cleaning via the ProscenicHome app or Alexa voice commands.
- Y-shaped Mopping: Emulates manual mopping for thorough dirt and grime removal with a 500ml electronically controlled water tank.
- Powerful Suction: Up to 2000Pa suction power with three adjustable modes for various floor types.
- Recharge and Resume: Automatically returns to the charging dock when the battery is low and resumes cleaning from where it left off.
3.2 Robot Components
Familiarize yourself with the main components of your Proscenic M7 robot vacuum.

Image: Proscenic M7 Robot Vacuum highlighting its navigation and safety features like SLAM, Anti-Collision, LDS, Anti-falling, and Jam-resistant technology. A map overlay illustrates its ability to plan cleaning routes.
- LDS Sensor: Located on top for 360-degree scanning and mapping.
- Bumper: Front bumper with anti-collision sensors.
- Side Brushes: Two side brushes to sweep debris into the main brush path.
- Main Brush: Underside brush for deep cleaning.
- Dustbin/Water Tank: Removable compartments for dry vacuuming and wet mopping.
- Charging Contacts: On the underside, for connecting to the charging dock.
- Drop Sensors: On the underside, to prevent falling down stairs.
4. Setup Guide
4.1 Charging the Robot
- Place the charging dock against a wall in an open area, ensuring there are no obstacles within 1 meter (3 feet) to the sides and 2 meters (6 feet) in front.
- Connect the power adapter to the charging dock and plug it into a wall outlet.
- Place the robot onto the charging dock, ensuring the charging contacts align. The robot will begin charging. Allow it to fully charge before first use (approximately 5 hours).
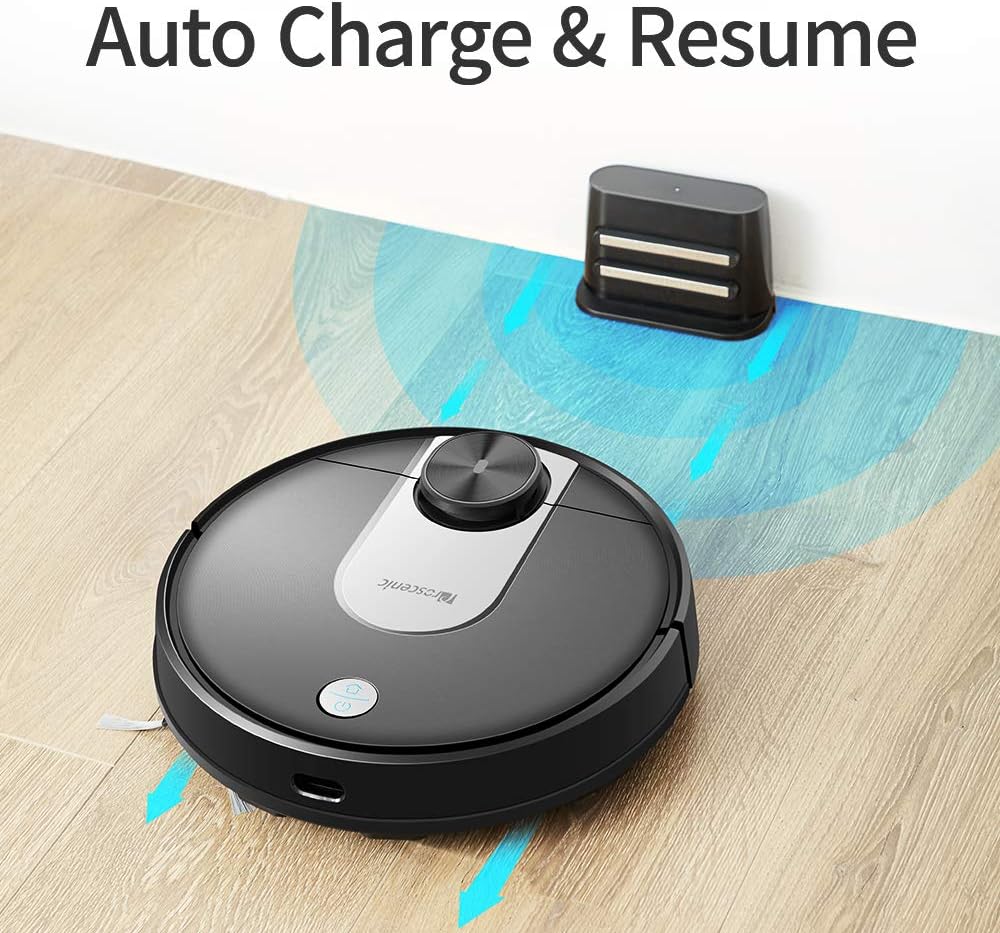
Image: The Proscenic M7 robot vacuum approaching its charging station, demonstrating its auto-charge and resume function.
4.2 Installing the ProscenicHome App
The ProscenicHome app allows you to control your robot vacuum remotely and access advanced features.
- Download the "ProscenicHome" app from the App Store (iOS) or Google Play Store (Android).
- Register an account and log in.
- Follow the in-app instructions to add your Proscenic M7 device. Ensure your phone is connected to a 2.4GHz Wi-Fi network, as the robot does not support 5GHz networks.
- During the binding process, ensure the robot is fully charged and near your Wi-Fi router for optimal connection. If you encounter issues, try restarting your router or moving the robot closer.

Image: A smartphone screen displaying the ProscenicHome app interface. It shows a generated cleaning map, current cleaned area, battery level, and cleaning time. Icons for scheduling, map saving, zoned cleaning, mopping, no-go zones, spot cleaning, and remote control are visible, along with compatibility logos for Alexa, Android, and iPhone.
5. Operating Instructions
5.1 Starting a Cleaning Cycle
- Manual Start: Press the power button on the robot once to start a full cleaning cycle.
- App Control: Open the ProscenicHome app and tap "Start" to initiate cleaning.
- The robot will use its laser navigation to map your home and plan an efficient cleaning path.
5.2 Cleaning Modes
The Proscenic M7 offers various cleaning modes accessible via the ProscenicHome app:
- Auto Cleaning: The robot intelligently cleans the entire accessible area.
- Spot Cleaning: Directs the robot to clean a specific small area intensively.
- Zoned Cleaning: Define a rectangular area on the app's map for the robot to clean. This requires a saved map.
- Edge Cleaning: The robot cleans along the perimeter of your rooms.
- Mopping Mode: Attach the water tank and mopping pad for wet cleaning.
5.3 Mopping Function
The M7 features a Y-shaped mopping pattern for effective wet cleaning.
- Fill the 500ml electronically controlled water tank with clean water.
- Attach the mopping pad securely to the water tank.
- Replace the dustbin with the filled water tank assembly.
- Select "Mopping Mode" in the app or allow the robot to detect the water tank and switch automatically.
- Adjust the water flow level via the app if desired.

Image: A close-up view of the Proscenic M7 robot vacuum, showcasing its large 500ml water tank, designed for extensive mopping coverage.

Image: An overhead view of the Proscenic M7 robot vacuum on a wooden floor, illustrating its Y-shaped mopping movement pattern with arrows.
5.4 Map Management and Virtual Walls
- Map Memorization: After completing a full cleaning cycle and successfully returning to the charging dock, the robot will save the generated map. Ensure this feature is enabled in the app.
- Virtual No-Go Zones: Use the app to draw virtual boundaries or "no-go lines" on the map to prevent the robot from entering specific areas.
- Area Cleaning: Once a map is saved, you can define specific areas for cleaning.
6. Maintenance
Regular maintenance ensures optimal performance and extends the lifespan of your robot vacuum.
6.1 Cleaning the Dustbin and Filter
- Press the dustbin release button and remove the dustbin.
- Empty the dustbin contents into a trash receptacle.
- Remove the filter and tap it gently to dislodge dust. Rinse the filter with water if necessary, ensuring it is completely dry before reinstallation.
- Wipe the inside of the dustbin with a dry cloth.
- Reinstall the filter and dustbin.
6.2 Cleaning the Water Tank and Mopping Pad
- Remove the water tank from the robot.
- Empty any remaining water from the tank.
- Remove the mopping pad and rinse it thoroughly with water. Allow it to air dry.
- Clean the water tank with a damp cloth and allow it to dry completely before storage or refilling.
6.3 Cleaning Brushes and Sensors
- Main Brush: Remove the main brush cover and lift out the brush. Use the cleaning tool (if provided) to remove hair and debris.
- Side Brushes: Periodically check side brushes for tangled hair or debris. Remove and clean them as needed. Replace if worn.
- Sensors: Gently wipe the LDS sensor, anti-drop sensors, and charging contacts with a clean, dry cloth to ensure they are free of dust and debris.
7. Troubleshooting
If you encounter issues with your Proscenic M7, refer to the following common problems and solutions.
| Problem | Possible Cause | Solution |
|---|---|---|
| Robot does not start or respond. | Low battery; Power switch off. | Ensure the robot is fully charged; Check if the main power switch is on. |
| Robot gets stuck frequently. | Obstacles (cables, rugs, furniture); Drop sensors dirty. | Clear the cleaning area of obstacles. Use virtual no-go zones for problematic areas. Clean drop sensors. |
| App connection issues (Binding Error). | Incorrect Wi-Fi band (5GHz); Weak Wi-Fi signal; Robot not fully charged. | Ensure your phone is on a 2.4GHz Wi-Fi network. Move the robot closer to the router. Ensure the robot is fully charged before binding. Try restarting your router. |
| Robot does not return to charging dock. | Charging dock obstructed; Charging contacts dirty. | Ensure the charging dock area is clear. Clean the charging contacts on both the robot and the dock. |
| Poor cleaning performance. | Dustbin full; Brushes tangled; Filter clogged. | Empty the dustbin. Clean the main and side brushes. Clean or replace the filter. |
| Mopping leaves streaks or misses spots. | Mopping pad dirty or dry; Water tank empty; Water flow setting too low. | Clean or wet the mopping pad. Refill the water tank. Adjust water flow in the app. |
| Map not saving or virtual walls not working. | First full cleaning cycle not completed; App glitch. | Ensure the robot completes a full cleaning cycle and returns to the dock successfully to generate and save the map. Restart the app or robot if issues persist. |
8. Specifications
| Feature | Detail |
|---|---|
| Brand | Proscenic |
| Model Name | M7 |
| Special Feature | No-Go Zone |
| Color | Black |
| Included Components | Battery |
| Filter Type | Cartridge |
| Battery Life | Up to 1.5 Hours (3200mAh capacity) |
| Dustbin Capacity | 0.5 Liters |
| Water Tank Capacity | 500ml |
| Power Source | Battery Powered |
| Control Method | Voice (Alexa), App |
| Compatible Devices | Amazon Echo (Alexa) |
| Form Factor | Robotic |
| Product Dimensions | 16.5 x 13.4 x 5.5 inches |
| Item Weight | 12.62 pounds |
| Surface Recommendation | Carpet, Hard Floors |
9. Warranty and Support
For warranty information or technical support, please refer to the warranty card included with your product or visit the official Proscenic website. You may also contact Proscenic customer service directly for assistance with product operation, maintenance, or troubleshooting beyond this manual.


