
1. Introduction
Thank you for choosing the Duokon 8858 Hot Air Soldering Blower Rework Station. This portable heat gun is designed for precise soldering and desoldering tasks, featuring advanced temperature control and adjustable airflow. This manual provides essential information for safe operation, setup, maintenance, and troubleshooting to ensure optimal performance and longevity of your device.
2. Safety Instructions
Please read and understand all safety warnings and instructions before using this product. Failure to follow these instructions may result in electric shock, fire, or serious injury.
- Electrical Safety: Ensure the power supply matches the voltage specified on the device (220V). Do not operate in wet conditions. Always unplug the device when not in use or before cleaning.
- Heat Hazard: The hot air gun produces extremely high temperatures. Do not touch the nozzle or heated components. Allow the device to cool completely before storing.
- Ventilation: Use in a well-ventilated area to avoid inhaling fumes from soldering materials.
- Personal Protective Equipment: Always wear appropriate safety glasses and heat-resistant gloves when operating the hot air gun.
- Stable Placement: Always place the hot air gun on its designated stand when not actively holding it. The stand activates standby mode for safe cooling.
- Children and Pets: Keep the device out of reach of children and pets.
3. Product Overview
The Duokon 8858 Rework Station consists of a hot air gun, a control unit, a power cable, a gun stand, and three interchangeable nozzles.
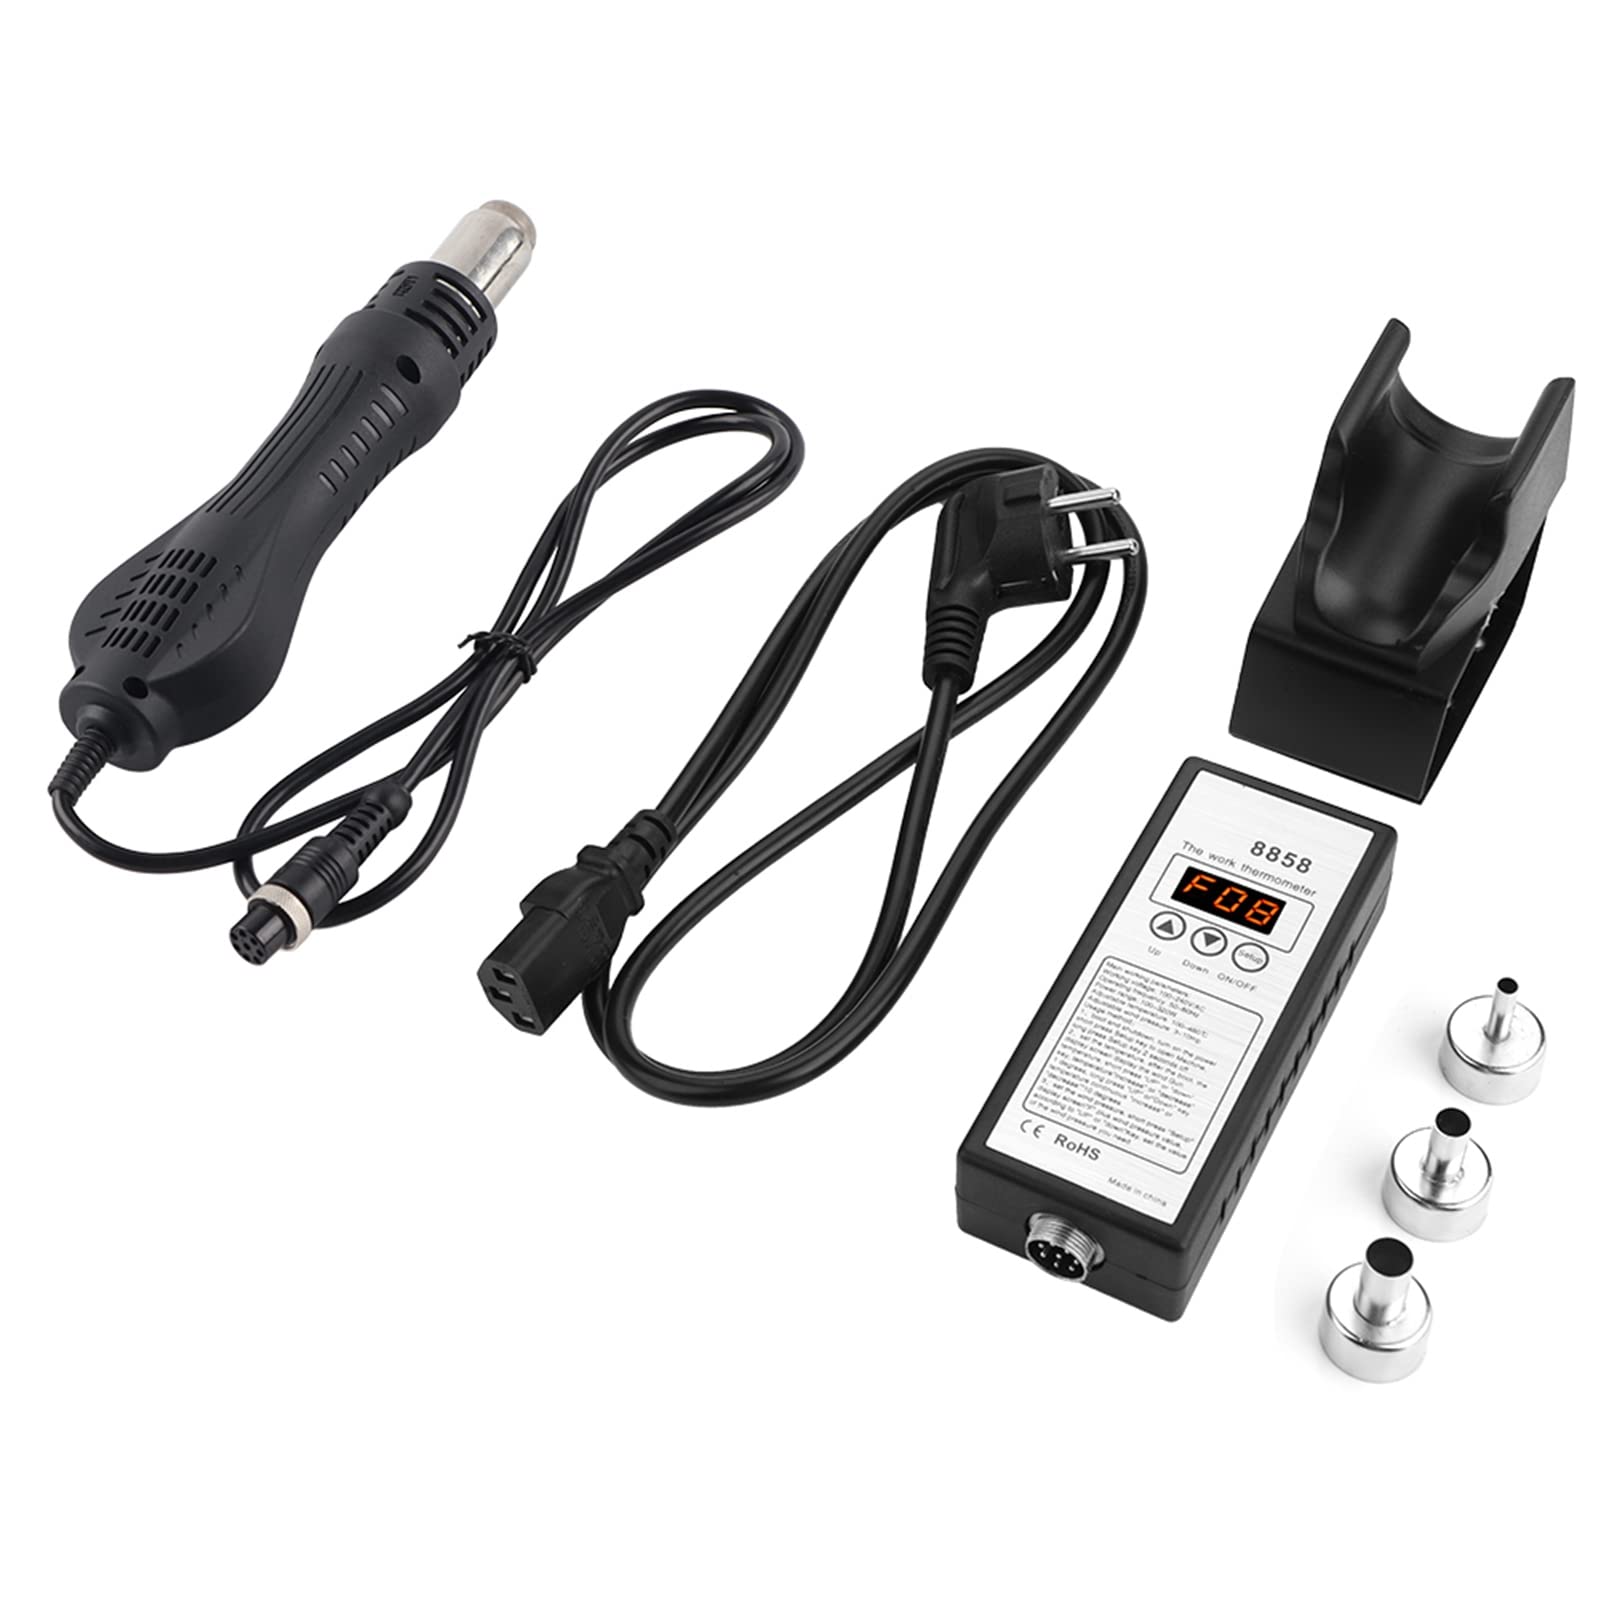
Figure 3.1: Complete kit of the Duokon 8858 Hot Air Soldering Blower Rework Station, including the hot air gun, control unit, power cable, stand, and three nozzles.
Key Features:
- Built-in Microcomputer: Precisely controls temperature to meet various soldering requirements.
- Real-time Digital Temperature Display: Provides clear and easy-to-read temperature feedback during operation.
- High-Quality Resistance: Ensures rapid heating and a long service life for the heating element.
- Adjustable Airflow and Temperature: Easily customize settings using the control unit buttons.
- Rubber Casing: Offers adiabatic properties and a comfortable grip for extended use.

Figure 3.2: The control unit, showing the digital display for temperature and airflow, along with the 'Up', 'Down', 'Setup', and 'ON/OFF' buttons.
4. Setup
Follow these steps for initial setup:
- Unpack Components: Carefully remove all items from the packaging: the hot air gun, control unit, power cable, gun stand, and three nozzles (4.2 mm, 7.4 mm, and 9.2 mm).
- Connect Power Cable: Plug the power cable into the control unit's power input, then connect the other end to a suitable 220V AC power outlet.
- Connect Hot Air Gun: Connect the 8-conductor cable from the hot air gun to the corresponding port on the control unit. Ensure a secure connection.
- Place Gun on Stand: Position the hot air gun securely on its dedicated stand. This stand is equipped with a sensor that activates standby mode when the gun is placed on it.
- Attach Nozzle: Select the appropriate nozzle for your task and attach it firmly to the hot air gun's outlet.

Figure 4.1: The hot air gun connected to the control unit and placed on its stand, ready for operation.
5. Operating Instructions
This section details how to power on, adjust temperature, and control airflow for your soldering and desoldering tasks.
- Power On/Off: Press the 'ON/OFF' button on the control unit to power on the device. The digital display will illuminate. To power off, press the 'ON/OFF' button again.
- Setting Temperature:
- After booting, the display will show the current temperature of the hot air gun.
- Use the 'UP' or 'DOWN' buttons to adjust the temperature. A short press changes the temperature by 1°C. A long press will continuously increase or decrease the temperature by 10°C increments.
- The device will emit a short beep once the set temperature is reached. The heater will cycle on and off to maintain this temperature.
- Setting Airflow:
- Briefly press the 'SETUP' button to enter the airflow adjustment menu. The display will show 'F' followed by a two-digit number (e.g., 'F01' to 'F10').
- Use the 'UP' or 'DOWN' buttons to set the desired airflow level (F01 being the lowest, F10 the highest).
- Press the 'SETUP' button again briefly to exit the airflow setting and return to temperature display.
- Standby Mode: When the hot air gun is placed on its stand, the standby switch will activate. The gun will automatically begin blowing at maximum cooling speed until its temperature drops below 100°C. The display may show dashes during this cooling process. This feature protects the heating element and ensures safety.

Figure 5.1: Example of the hot air gun being used for rework, demonstrating its application in electronic repair.
6. Maintenance
Proper maintenance ensures the longevity and reliable performance of your rework station.
- Cleaning Nozzles: Regularly clean the nozzles to prevent solder residue buildup, which can obstruct airflow. Ensure the device is cool and unplugged before cleaning.
- General Cleaning: Wipe the exterior of the hot air gun and control unit with a soft, dry cloth. Do not use abrasive cleaners or solvents.
- Storage: Store the device in a dry, dust-free environment when not in use. Always place the hot air gun on its stand to allow for proper cooling before storage.
- Cable Inspection: Periodically inspect the power cable and gun cable for any signs of damage. Do not use the device if cables are frayed or damaged.

Figure 6.1: The hot air gun correctly placed on its stand, which is crucial for cooling and safe storage.
7. Troubleshooting
If you encounter issues with your Duokon 8858 Rework Station, refer to the following common problems and solutions:
| Problem | Possible Cause | Solution |
|---|---|---|
| Device does not power on. | No power supply; faulty cable; power button not pressed. | Check power cable connection; ensure outlet is functional; press 'ON/OFF' button firmly. |
| Hot air gun does not heat up or heats poorly. | Incorrect temperature setting; heating element issue; gun not properly connected. | Verify temperature setting; ensure gun cable is securely connected to the control unit. If problem persists, contact support. |
| Temperature display is erratic or confusing. | Sensor issue; temporary glitch. | Power off and restart the device. If the issue continues, contact customer support. |
| No airflow or weak airflow. | Airflow setting too low; fan obstruction; nozzle clogged. | Adjust airflow setting using 'SETUP' and 'UP' buttons; check and clean nozzles for obstructions. |
If you experience any issues not listed here or if the suggested solutions do not resolve the problem, please contact customer support.
8. Specifications
| Specification | Value |
|---|---|
| Manufacturer | Duokon |
| Model | 8858 |
| Product Dimensions | 25 x 15 x 10 cm |
| Product Weight | 40 g |
| Power Source | Wired Electric |
| Voltage | 220 Volts |
| Wattage | 650 watts |
| Display Type | LCD |
| Temperature Stability | 100 to 480 degrees Celsius |
| Rated Upper Temperature | 480 Degrees Celsius |
| UPC | 783335568970 |
| Nozzle Diameters (Included) | 4.2 mm, 7.4 mm, 9.2 mm |
9. Warranty and Support
For warranty information or technical support, please refer to the documentation provided with your purchase or contact the seller/manufacturer directly. Keep your purchase receipt as proof of purchase.