
1. Introduction
This manual provides detailed instructions for the proper installation and use of the Panasonic Strada Digital Terrestrial TV Film Antenna and 3M Double-Sided Tape Set. This product is designed to replace existing film antennas for compatible Panasonic Strada car navigation systems, ensuring optimal digital terrestrial television reception. Please read this manual thoroughly before beginning installation.
2. Package Contents
Verify that all items listed below are present in your package:
- Genuine Panasonic Film Antenna (4 pieces: 2 for left side, 2 for right side)
- 3M Super Strong Acrylic Foam Double-Sided Tape (4 pieces)
Note: Antenna connection cords are not included in this set and must be purchased separately or reused from your existing setup.
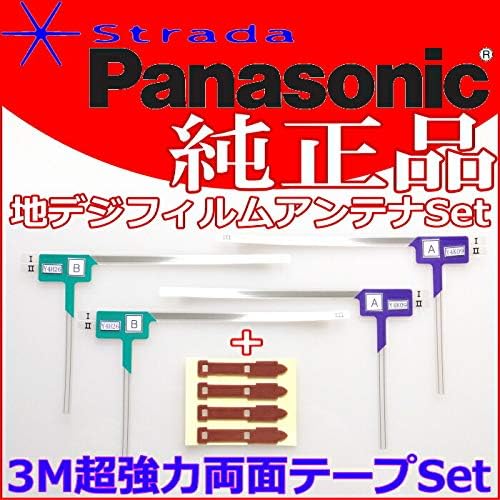
Image: Overview of the package contents, including four film antennas and four pieces of 3M double-sided tape.
3. Compatibility
This film antenna and double-sided tape set is compatible with Panasonic Strada car navigation systems, specifically models CN-RS01D and CN-RS01WD. It is designed to work with genuine Panasonic products to ensure optimal performance and reception quality.
4. Safety Precautions
- Ensure the vehicle's ignition is off and the battery is disconnected before starting installation to prevent electrical hazards.
- Handle film antennas carefully to avoid bending or creasing, which can affect reception.
- Use appropriate tools and wear protective gear if necessary.
- Keep the double-sided tape away from dust and moisture before application to maintain adhesive strength.
- Do not obstruct the driver's view or interfere with airbag deployment when installing antennas on the windshield.
5. Installation (Setup)
Follow these steps for proper installation of the film antennas and double-sided tape:
- Preparation: Clean the designated installation area on the windshield thoroughly with an alcohol wipe to remove any dirt, grease, or residue. Allow the surface to dry completely.
- Antenna Identification: Identify the left (L) and right (R) antennas. The film antennas are typically marked 'A' and 'B' for specific connection points, and 'I' and 'II' for different antenna elements. Refer to your car navigation system's manual for exact placement.
- Tape Application: Carefully peel one side of the protective backing from a piece of 3M double-sided tape. Align the tape precisely with the designated area on the film antenna, ensuring no air bubbles. Press firmly to secure.
- Antenna Placement: Peel the remaining protective backing from the double-sided tape. Align the film antenna on the cleaned windshield surface according to your car navigation system's installation guide. Press firmly from the center outwards to ensure full adhesion and remove any air bubbles.
- Repeat for all Antennas: Repeat steps 3 and 4 for all four film antennas.
- Connect Antenna Cords: Once all film antennas are securely attached, connect your existing or new antenna cords to the corresponding terminals on the film antennas. Ensure a snug and secure connection.
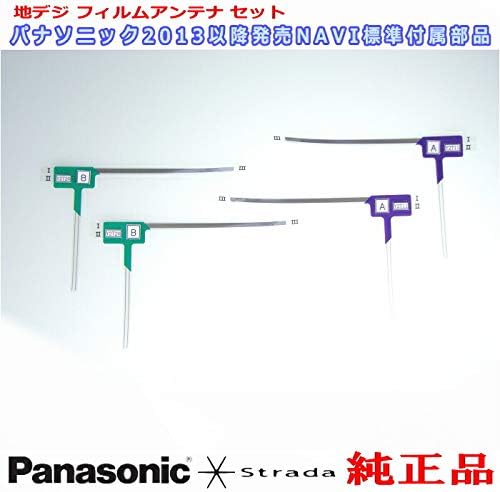
Image: Individual film antennas, showing their distinct 'A' and 'B' markings for proper orientation.
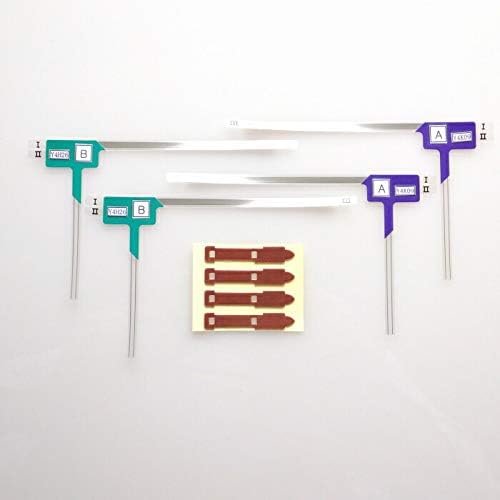
Image: Detailed view of the film antennas and the separate 3M double-sided tape pieces.
6. Operation
After successful installation, reconnect your vehicle's battery and turn on the car navigation system. Navigate to the digital terrestrial TV function. The genuine Panasonic film antennas are designed to maximize reception sensitivity, providing clear and stable television broadcasting. No specific operational steps are required for the antennas themselves beyond proper installation and connection to the car navigation unit.
7. Maintenance
The film antennas require minimal maintenance. Periodically inspect the antennas on the windshield for any signs of peeling or damage. If an antenna begins to peel, re-secure it with new double-sided tape if possible, or replace the antenna if damaged. Avoid using harsh chemicals or abrasive materials when cleaning the windshield area where the antennas are installed, as this may damage the film or adhesive.
8. Troubleshooting
- Poor TV Reception:
- Ensure all antenna connections are secure and properly seated.
- Verify that the film antennas are correctly positioned on the windshield according to your car navigation system's manual.
- Check for any physical damage to the film antennas or antenna cords.
- Confirm that the car navigation system's TV tuner is functioning correctly.
- Antenna Peeling:
- Ensure the windshield surface was thoroughly cleaned and dry before initial installation.
- Apply firm, even pressure during installation to ensure maximum adhesion of the 3M tape.
- If peeling occurs, carefully remove the old tape and reapply with new 3M double-sided tape, ensuring proper surface preparation.
9. Specifications
| Feature | Description |
|---|---|
| Product Type | Digital Terrestrial TV Film Antenna Set |
| Brand | Panasonic |
| Compatible Models | Panasonic Strada CN-RS01D, CN-RS01WD |
| Antenna Type | Film Antenna (for TV reception) |
| Number of Antennas | 4 (2 left, 2 right) |
| Adhesive Type | 3M Super Strong Acrylic Foam Double-Sided Tape |
| Number of Adhesive Tapes | 4 |
| Antenna Cords | Not included |
| Manufacturer Model Number | PD32TSet(512(T04--RS01WD |
10. Warranty and Support
For warranty information and technical support regarding your Panasonic Strada car navigation system or genuine Panasonic accessories, please refer to the documentation provided with your car navigation unit or visit the official Panasonic support website. This antenna set is a genuine Panasonic product, designed for reliable performance.