
Introduction
Thank you for choosing the American Bass VFL ST-4500.1D Class D Monoblock Amplifier. This amplifier is designed to provide powerful and clear audio performance for your car audio system. To ensure optimal performance and longevity, please read this manual thoroughly before installation and operation. Proper installation and understanding of the amplifier's features are crucial for safe and effective use.
Safety Information
- Always disconnect the vehicle's negative battery terminal before beginning any installation.
- Ensure all wiring is properly routed and secured to prevent damage or short circuits.
- Use appropriate gauge power and ground wires as specified in the installation section.
- Install the amplifier in a location that allows for adequate ventilation to prevent overheating.
- Avoid mounting the amplifier in areas exposed to moisture or direct sunlight.
- If you are unsure about any part of the installation process, consult a professional car audio installer.
Product Overview
The American Bass VFL ST-4500.1D is a high-performance monoblock amplifier engineered for robust bass reproduction. It features a compact design, efficient Class D circuitry, and a range of adjustable controls for precise sound tuning.
Amplifier Front View

Image: Front view of the American Bass VFL ST-4500.1D amplifier, showcasing its sleek black casing with the 'VFL AUDIO' logo and 'STEALTH ST-4500' branding.
Amplifier Power and Speaker Connections

Image: Rear view of the amplifier showing the power input terminals (GND, REM, +12V) and speaker output terminals, designed for secure wire connections.
Amplifier Control Panel
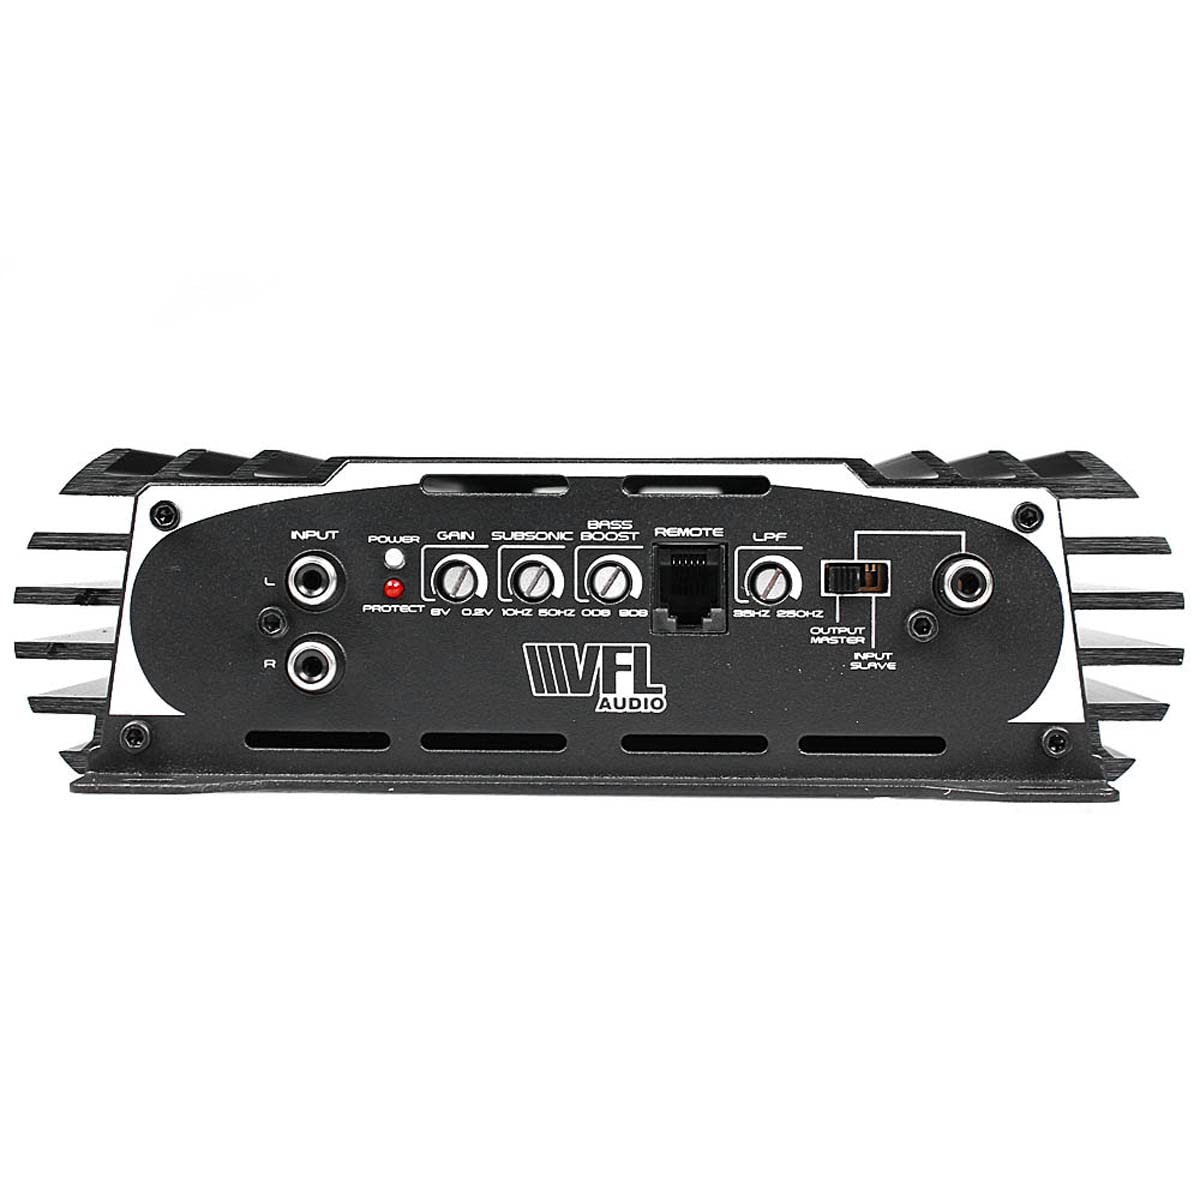
Image: Top view of the amplifier's control panel, featuring input RCA jacks, gain control, bass boost, subsonic filter, low-pass filter (LPF) adjustments, and a remote port.
Remote Bass Knob

Image: The wired remote bass level control knob, featuring power and clipping indicators, allowing for convenient adjustment of bass output from the driver's seat.
Setup and Installation
Proper installation is critical for the performance and safety of your amplifier. Follow these steps carefully.
1. Mounting Location
- Choose a dry, well-ventilated area, such as under a seat or in the trunk.
- Ensure sufficient airflow around the amplifier's heatsink.
- Mount the amplifier securely to a solid surface using the provided hardware to prevent movement during vehicle operation.
2. Wiring Connections
Power (BATT +12V): Connect a heavy-gauge power cable (e.g., 4 AWG or larger for high power applications) directly from the positive terminal of the vehicle's battery to the +12V terminal on the amplifier. Install an appropriate fuse holder with a fuse (not supplied) within 18 inches (45 cm) of the battery.
Ground (GND): Connect a heavy-gauge ground cable of the same size as the power cable from the GND terminal on the amplifier to a clean, unpainted metal surface of the vehicle's chassis. Ensure a solid, low-resistance connection.
Remote (REM): Connect a remote turn-on wire (e.g., 18 AWG) from your head unit's remote output to the REM terminal on the amplifier. This wire turns the amplifier on and off with your head unit.
RCA Input: Connect RCA cables from your head unit's pre-amp outputs to the INPUT RCA jacks on the amplifier.
Speaker Output: Connect your subwoofer(s) to the SPEAKER terminals on the amplifier. Ensure correct polarity (+ to + and - to -) and that the total impedance of your speakers matches the amplifier's stable operating impedance (typically 1 Ohm for this model).
Remote Bass Knob: Connect the remote bass knob cable to the 'REMOTE' port on the amplifier's control panel. Mount the knob in a convenient location for adjustment.
Operating Instructions
Initial Power-Up
- Double-check all wiring connections for security and correct polarity.
- Insert the fuse into the fuse holder near the battery.
- Turn on your vehicle's ignition and head unit. The amplifier's power indicator should illuminate.
Adjusting Controls
Gain (Input Level): This control matches the amplifier's input sensitivity to the output level of your head unit. Start with the gain set to minimum. Play a familiar track at about 75% of your head unit's maximum volume. Slowly increase the amplifier's gain until you hear slight distortion, then back off slightly. The remote bass knob also has a clipping indicator to assist with this setting.
Low Pass Filter (LPF): This filter allows only frequencies below the set point to pass through to the subwoofer. Adjust this between 40Hz and 180Hz to blend with your front speakers. A common starting point is 80Hz.
Subsonic Filter: This filter removes extremely low frequencies that are inaudible and can damage your subwoofer. Set this typically between 20Hz and 30Hz, depending on your subwoofer and enclosure characteristics.
Bass Boost: This control provides an increase in bass output at a specific frequency. Use sparingly to avoid distortion and potential speaker damage. Start at minimum and increase only if desired.
Remote Level Control: The wired remote allows you to adjust the subwoofer output level from the driver's seat. It also features a clipping indicator to help prevent overdriving the amplifier.
Maintenance
- Keep the amplifier clean and free of dust. Use a soft, dry cloth for cleaning.
- Ensure that the amplifier's cooling fins are not obstructed to maintain proper heat dissipation.
- Periodically check all wiring connections for tightness and corrosion.
Troubleshooting
| Problem | Possible Cause | Solution |
|---|---|---|
| Amplifier does not turn on (no power light) |
|
|
| No sound output |
|
|
| Distorted sound |
|
|
| Amplifier goes into protection mode (protection light on) |
|
|
Specifications
- Model: VFL-STEALTH-ST-4500.1D
- Output Power: 2250 Watts (RMS, typical)
- Number of Channels: 1 (Monoblock)
- Voltage: 6 Volts (Operating Range)
- Maximum Supply Voltage: 16 Volts
- Item Dimensions (L x W x H): 18 x 7.75 x 2.3 inches
- Item Weight: 2.72 Kilograms
- Material Type: Printed Circuit Board
- Mounting Type: Surface Mount
Warranty and Support
American Bass products are designed for reliability and performance. This product is covered by a manufacturer's warranty against defects in materials and workmanship. For specific warranty terms and conditions, please refer to the warranty card included with your product or visit the official American Bass website.
For technical support or assistance with installation and troubleshooting, please contact American Bass customer service through their official channels. Keep your purchase receipt as proof of purchase for any warranty claims.


