Introduction
Thank you for choosing the PowerA Pokémon Wireless GameCube Style Controller for Nintendo Switch - Espeon Edition. This manual provides essential information for setting up, operating, maintaining, and troubleshooting your new controller. Designed for comfort and precision, this officially licensed controller enhances your Nintendo Switch gaming experience with a classic GameCube feel and modern wireless capabilities.
Product Overview
The PowerA Pokémon Wireless GameCube Style Controller combines the nostalgic design of the GameCube controller with features optimized for the Nintendo Switch. Key features include:
- Classic GameCube design featuring Espeon artwork.
- Larger D-pad for improved control.
- Added left shoulder button and system buttons for full Nintendo Switch compatibility.
- Wireless freedom via Bluetooth 5.0 technology.
- Motion controls for immersive gameplay.
- Player indicator and low battery warning LED.
Controller Components

Image Description: A top-down view of the purple PowerA Pokémon Wireless GameCube Style Controller, Espeon Edition. Various components are labeled with arrows: 'Added left Shoulder Button', 'Added System Buttons', 'Larger D-Pad', 'Low Battery Indicator (Two AA Batteries Included)', 'Larger Shoulder Buttons', 'Game Cube Button Layout', 'Octagonal Gated C-Stick', and 'Preferred Wireless Controller for Super Smash Bros.™ Ultimate'. The Espeon Pokémon is prominently featured in the center of the controller.
Setup
1. Battery Installation
Your controller requires two (2) AA batteries (included). To install:
- Locate the battery compartment on the back of the controller.
- Gently slide the battery cover downwards to remove it.
- Insert two AA batteries, ensuring correct polarity (+/-).
- Replace the battery cover by sliding it back into place until it clicks.
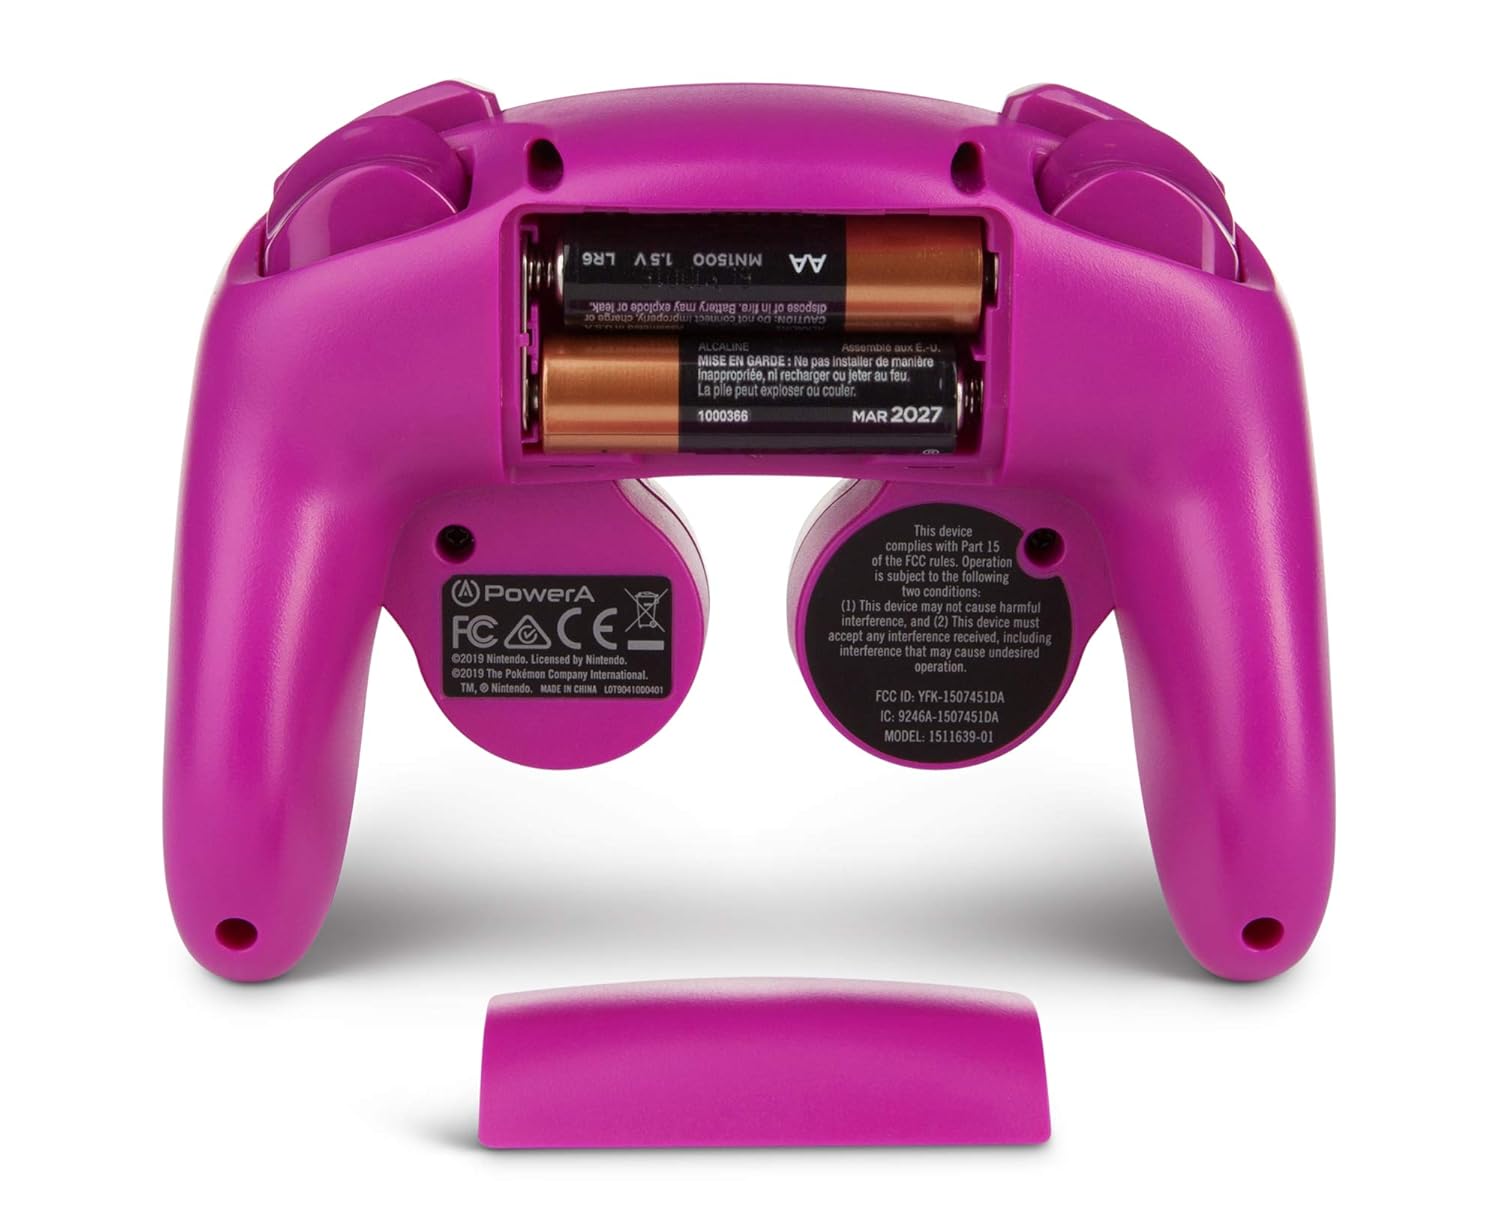
Image Description: A view of the back of the purple PowerA Pokémon Wireless GameCube Style Controller, Espeon Edition, with the battery compartment open. Two AA batteries are visible inside the compartment, ready for installation. The battery cover is shown detached below the controller.
2. Pairing with Nintendo Switch
To pair your wireless controller with your Nintendo Switch console:
- Ensure your Nintendo Switch console is powered on and updated to the latest system software.
- From the HOME Menu, select 'Controllers' > 'Change Grip/Order'.
- On the controller, press and hold the SYNC Button (small circular button on the top edge of the controller, between the shoulder buttons) for at least three seconds. The player indicator LEDs on the bottom of the controller will begin to flash.
- Once the controller successfully pairs, the player indicator LED(s) corresponding to the controller number will remain lit.
- Press the A button to confirm the connection.
The controller will automatically reconnect to your Nintendo Switch console when powered on and within range.
Operating Instructions
Basic Controls
This controller features a layout inspired by the classic GameCube controller, adapted for Nintendo Switch functionality:
- Left Analog Stick: For movement and navigation.
- D-Pad: Larger and more responsive for directional input.
- A, B, X, Y Buttons: Standard action buttons, arranged in the GameCube style.
- C-Stick: Octagonal gated for precise control, typically used for camera or secondary actions.
- L/R Shoulder Buttons: Standard shoulder buttons.
- ZL/ZR Triggers: Digital triggers for quick response.
- Plus (+) / Minus (-) Buttons: For in-game menus and options.
- Home Button: Returns to the Nintendo Switch HOME Menu.
- Capture Button: Takes screenshots or video clips.
Motion Controls
The controller supports motion controls, allowing for intuitive gameplay in compatible Nintendo Switch titles. These controls are integrated seamlessly, providing an enhanced gaming experience.
Player Indicator and Low Battery Warning
The LEDs on the bottom of the controller indicate the assigned player number. These LEDs will also flash to warn you when the battery level is low, prompting you to replace the AA batteries.

Image Description: A pair of hands holding the purple PowerA Pokémon Wireless GameCube Style Controller, Espeon Edition, demonstrating its ergonomic design and button placement during use. The controller's face buttons, analog sticks, and D-pad are clearly visible.
Maintenance
Cleaning
To clean your controller, use a soft, dry cloth. Avoid using harsh chemicals or abrasive materials, as these can damage the controller's finish or internal components.
Battery Care
- Always use high-quality AA alkaline batteries for optimal performance.
- Remove batteries if the controller will not be used for an extended period to prevent leakage.
- Do not mix old and new batteries, or different types of batteries.
- Dispose of used batteries responsibly according to local regulations.
Troubleshooting
Controller Not Connecting/Pairing
- Ensure the batteries are correctly installed and have sufficient charge. Replace with fresh batteries if necessary.
- Verify that your Nintendo Switch console is powered on and within range (approximately 30 feet or 9 meters).
- Repeat the pairing process as described in the 'Setup' section.
- If multiple controllers are connected, try disconnecting others temporarily to isolate the issue.
- Restart your Nintendo Switch console and try pairing again.
Buttons/Sticks Not Responding
- Check battery levels and replace if low.
- Ensure the controller is properly paired and connected to the console.
- Clean any visible debris around the buttons or sticks.
- Test the controller with a different game or application to determine if the issue is specific to one title.
Lag or Disconnection Issues
- Reduce the distance between the controller and the Nintendo Switch console.
- Minimize interference from other wireless devices (e.g., Wi-Fi routers, other Bluetooth devices).
- Ensure there are no physical obstructions between the controller and the console.
Specifications
| Feature | Detail |
|---|---|
| Model Number | 1511639-01 |
| Connectivity | Bluetooth 5.0 Wireless |
| Power Source | 2 AA Batteries (included) |
| Compatibility | Nintendo Switch |
| Dimensions | 2.6 x 6.3 x 6.4 inches |
| Weight | 9.44 ounces |
| Manufacturer | PowerA |
Warranty and Support
PowerA products are built to high standards of quality and performance. For warranty information, technical support, or further assistance, please visit the official PowerA website or contact their customer support directly. Keep your proof of purchase for any warranty claims.


