1. Introduction
Thank you for choosing the WAVLINK Thunderbolt 3 Docking Station. This device is designed to expand the connectivity of your Thunderbolt 3 enabled laptop, providing a wide array of ports for peripherals, external displays, and network access, all while delivering power to your host device. This manual provides essential information for setting up, operating, and maintaining your docking station.

Image 1: WAVLINK Thunderbolt 3 Docking Station (Front View)
The WAVLINK Thunderbolt 3 Docking Station is a compact and powerful solution for expanding your laptop's capabilities. It features a sleek black design and provides multiple ports for enhanced productivity.
2. Key Features
- Thunderbolt 3 Connectivity: Two Thunderbolt 3 ports offering up to 40Gb/s data transfer speeds.
- Power Delivery: Provides 85W power delivery to charge your host laptop and 15W to downstream Thunderbolt 3 devices.
- Display Output: One DisplayPort 1.2 supporting up to 4K@60Hz (4096 x 2160@60Hz) resolution. The second Thunderbolt 3 port can also support a second 4K@60Hz display via a USB-C Alt Mode video adapter.
- USB Expansion: Four USB 3.0 Type-A ports with data transfer speeds up to 5Gb/s and 900mA power output.
- Network Connectivity: Gigabit Ethernet RJ-45 port (10/100/1000Mbps) for stable wired internet connection.
- Memory Card Reader: Integrated SD and Micro SD card slots supporting capacities up to 2TB.
- Audio Jack: One 4-pole audio jack for headset and microphone functionality.
- Security: Features a Kensington lock slot for physical security.
3. Package Contents
Ensure all items are present in the package:
- WAVLINK Thunderbolt 3 Docking Station
- 180W DC Power Adapter
- Intel Certified Thunderbolt 3 Cable (28 inches)
- Quick Start Guide

Image 2: Contents of the WAVLINK Thunderbolt 3 Docking Station package, including the docking station, power adapter, Thunderbolt 3 cable, and documentation.
4. Product Overview
4.1 Front Panel

Image 3: Front panel of the docking station, showing the Thunderbolt 3 port (85W Max Charging), Phone Jack, Micro SD/SD Card slots, and a USB 3.0 port.
- Thunderbolt 3 Port (Host): Connects to your laptop for data, video, and 85W power delivery.
- Phone Jack: 4-pole audio jack for connecting a headset with microphone.
- Micro SD/SD Card Slots: For reading and writing to SD and Micro SD memory cards.
- USB 3.0 Port: For connecting USB peripherals.
4.2 Rear Panel
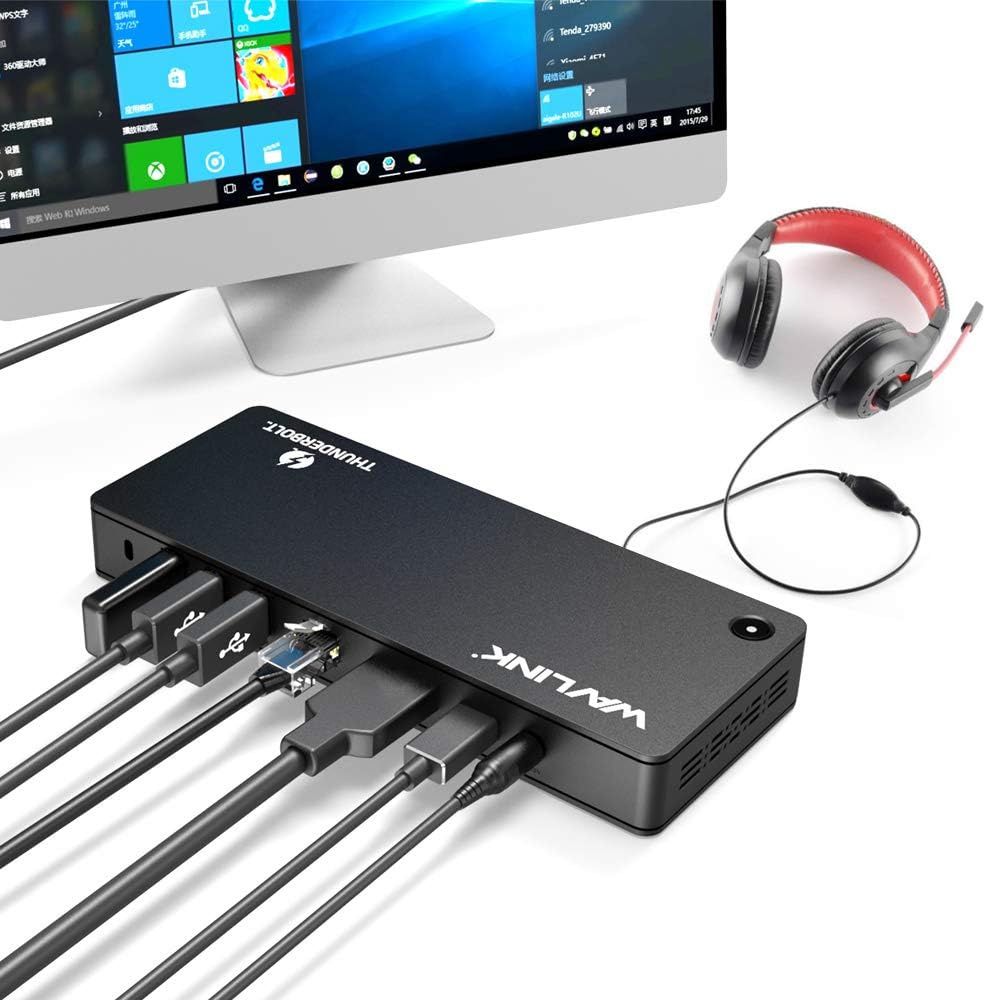
Image 4: Rear panel of the docking station, displaying the Lock slot, three USB 3.0 ports, Gigabit Ethernet port, DisplayPort, a second Thunderbolt 3 port (40Gbps), and the DC 20V power input.
- Lock Slot: For securing the docking station with a Kensington lock.
- USB 3.0 Ports (x3): Additional ports for connecting USB peripherals.
- Gigabit Ethernet Port: For wired network connection.
- DisplayPort: For connecting an external display (up to 4K@60Hz).
- Thunderbolt 3 Port (Downstream): For connecting other Thunderbolt 3 devices or a second external display via a compatible adapter.
- DC 20V Power Input: Connect the included 180W power adapter here.
5. Setup Instructions
Follow these steps to set up your WAVLINK Thunderbolt 3 Docking Station:
- Connect Power: Connect the 180W DC power adapter to the 'DC 20V' input port on the rear of the docking station, then plug the power adapter into a wall outlet.
- Connect to Host Laptop: Use the provided Intel Certified Thunderbolt 3 cable to connect the Thunderbolt 3 port on the front of the docking station to a Thunderbolt 3 port on your laptop.
- Connect Peripherals:
- Displays: Connect your primary monitor to the DisplayPort on the rear of the docking station. If using a second monitor, connect it to the downstream Thunderbolt 3 port using a compatible USB-C Alt Mode video adapter.
- USB Devices: Connect your USB peripherals (keyboard, mouse, external drives) to the available USB 3.0 ports.
- Ethernet: Connect an Ethernet cable from your router or modem to the Gigabit Ethernet port on the rear.
- Audio: Plug your headset or speakers into the 4-pole audio jack on the front.
- Memory Cards: Insert SD or Micro SD cards into the respective slots as needed.

Image 5: The docking station fully connected to a laptop, external monitor, headphones, and other devices, illustrating a complete setup.

Image 6: A laptop receiving 85W power from the docking station, indicated by a charging icon on the laptop screen.
6. Operating Instructions
Once connected, your operating system should automatically detect the docking station and its connected devices. Drivers may be required for specific operating systems or devices; refer to your laptop's manufacturer or WAVLINK's support website for driver downloads if necessary.
6.1 Display Configuration
The docking station supports various display modes:
- Extend Mode: Each display shows different content, expanding your desktop workspace.
- Mirror Mode: All displays show the same content.
- Primary or Replace Mode: Use your laptop with the lid closed, displaying content only on external monitors.

Image 7: Illustration of various display modes including Primary/Replace, Mirror, and Extend modes, showing how a laptop and external monitor can be configured.
Note on Display Compatibility: Some computers may only support a single video output over a Thunderbolt 3 port. Verify your computer's specifications. Apple M1 processors typically support only one external display. Compatible with MacBook Pro 2016+, iMac Pro 2017+, Dell XPS 7390/9250/9350/9360/9370/9380/9550/9560, Lenovo Yoga C930/Lenovo X1 Carbon 7th Gen.
6.2 Video Overview
Video 1: An animated overview demonstrating the features and connectivity of the WAVLINK Thunderbolt 3 Docking Station, including data transfer speeds, power delivery, and various port functionalities.
7. Specifications
| Feature | Detail |
|---|---|
| Model Number | AMZWL-UTD01-US |
| Brand | WAVLINK |
| Item Weight | 1.98 pounds (900 Grams) |
| Total USB Ports | 6 (4x USB 3.0 Type-A, 2x Thunderbolt 3) |
| Number of Ports | 11 (including all I/O) |
| Wattage | 180 watts (Power Adapter Output) |
| Power Delivery to Host | 85W Max |
| Thunderbolt 3 Data Speed | Up to 40Gb/s |
| USB 3.0 Data Speed | Up to 5Gb/s |
| Display Output | 1x DisplayPort 1.2 (4K@60Hz) |
| Ethernet | Gigabit (10/100/1000Mbps) |
| Card Reader | SD / Micro SD (up to 2TB) |
| Audio | 4-pole Headset/Microphone Jack |
| Compatible Devices | MacBook Pro 2016+, iMac Pro 2017+, Dell XPS 7390/9250/9350/9360/9370/9380/9550/9560, Lenovo Yoga C930/Lenovo X1 Carbon 7th Gen. |
8. Maintenance
- Cleaning: Use a soft, dry cloth to clean the surface of the docking station. Avoid liquid cleaners or solvents.
- Ventilation: Ensure the docking station is placed in a well-ventilated area to prevent overheating. Do not block the ventilation holes.
- Cable Management: Organize cables to prevent strain on ports and accidental disconnections.
- Storage: When not in use for extended periods, disconnect the power adapter and store the device in a cool, dry place.
9. Troubleshooting
- No Power/Charging: Ensure the 180W power adapter is securely connected to both the docking station and a working power outlet. Verify the Thunderbolt 3 cable is firmly connected to your laptop.
- No Display Output:
- Check all display cable connections (DisplayPort, USB-C Alt Mode adapter).
- Ensure your laptop's display settings are configured correctly for extended or mirrored displays.
- Verify your laptop's Thunderbolt 3 port supports video output. Note that Apple M1 processors typically support only one external display.
- Some older monitors may not be compatible; try with a different monitor if possible.
- USB Devices Not Recognized: Disconnect and reconnect the USB device. Try a different USB 3.0 port on the dock. Ensure necessary drivers for the USB device are installed on your laptop.
- Intermittent Connections/Disconnects:
- Ensure the Thunderbolt 3 cable is the original Intel Certified cable provided and is not excessively long (the included 28-inch cable is recommended). Longer or non-certified cables can cause instability.
- Check for overheating; ensure proper ventilation around the dock.
- Update your laptop's Thunderbolt 3 drivers and firmware.
- Ethernet Not Working: Check the Ethernet cable connection. Verify network settings on your laptop. Ensure your router/modem is functioning correctly.
- SD/Micro SD Card Not Detected: Ensure the card is fully inserted and oriented correctly. Try a different card or slot.
10. Warranty and Support
WAVLINK products are designed for reliability and performance. For warranty information, please refer to the documentation included with your product or visit the official WAVLINK website. If you encounter any issues or require technical assistance, please contact WAVLINK support:
- Phone Support: +1 8889730883 (UTC-5) Mon - Fri 9AM - 6PM
- Email Support: Contact@wavlink.com
Please have your product model number (AMZWL-UTD01-US) and purchase details ready when contacting support.


