1. Product Overview
The Audio-Technica AT-LPW40WN is a fully manual, belt-drive turntable engineered for high-fidelity audio reproduction from vinyl records. It features a stylish anti-resonance MDF plinth with a simulated walnut wood veneer, designed to minimize low-frequency acoustic feedback. A sensor-monitored motor ensures precise platter rotation speeds at both 33-1/3 and 45 RPM.
This turntable is equipped with a straight carbon-fiber tonearm, offering adjustable tracking force and an AT-HS4 universal ½"-mount headshell. The included AT-VM95E Dual Moving Magnet phono cartridge features a 0.3 x 0.7 mil elliptical stylus, compatible with various VM95 Series replacement styli for diverse audio preferences. The AT-LPW40WN also includes a built-in selectable phono preamplifier and a detachable dual RCA output cable, allowing direct connection to audio components with or without a dedicated phono input.
Key Features:
- Fully manual belt-drive operation with two speeds: 33-1/3 and 45 RPM.
- Motor with speed-sensor system for accurate platter rotation.
- Adjustable dynamic anti-skate control.
- Straight carbon-fiber tonearm with AT-HS4 universal ½"-mount headshell.
- Pre-mounted AT-VM95E Dual Moving Magnet phono cartridge.
- Professional anti-resonance die-cast aluminum platter with rubber mat.
- Built-in selectable phono preamplifier.
- Detachable dual RCA output cable.
2. Package Contents
Verify that all items are present in the package:
- AT-LPW40WN Turntable Unit
- Dual RCA (male) to dual RCA (male) stereo cable
- 45 RPM adapter
- Rubber mat
- Removable hinged dust cover
3. Setup Instructions
Carefully unpack all components and place the turntable on a stable, level surface away from direct sunlight, heat sources, or excessive vibration.
3.1 Turntable Assembly
- Install the Platter: Gently place the die-cast aluminum platter onto the center spindle. Ensure it sits flush.
- Install the Drive Belt: Locate the drive belt (usually pre-installed on the platter's underside or provided separately). Carefully stretch the belt around the motor pulley (a small brass or plastic cylinder near the platter).
- Place the Rubber Mat: Position the rubber mat on top of the platter.
- Attach the Dust Cover: Insert the hinges of the dust cover into the corresponding slots at the rear of the turntable base.

Image 1: The Audio-Technica AT-LPW40WN turntable with its clear dust cover in place, showcasing the walnut wood veneer base, black platter, and carbon-fiber tonearm.
3.2 Tonearm and Cartridge Setup
The AT-VM95E cartridge is pre-mounted on the AT-HS4 headshell. Follow these steps to balance the tonearm and set tracking force:
- Remove Stylus Protector: Carefully remove the clear plastic stylus protector from the cartridge.
- Balance the Tonearm: While holding the tonearm, rotate the counterweight at the rear of the tonearm until the tonearm is perfectly balanced (floating horizontally).
- Set Tracking Force: Once balanced, hold the counterweight steady and rotate the tracking force ring (the numbered ring on the counterweight) to '0'. Then, rotate the entire counterweight counter-clockwise until the desired tracking force (typically 2.0 grams for the AT-VM95E) is indicated on the ring.
- Set Anti-Skate: Adjust the anti-skate dial to match the tracking force setting (e.g., 2.0).
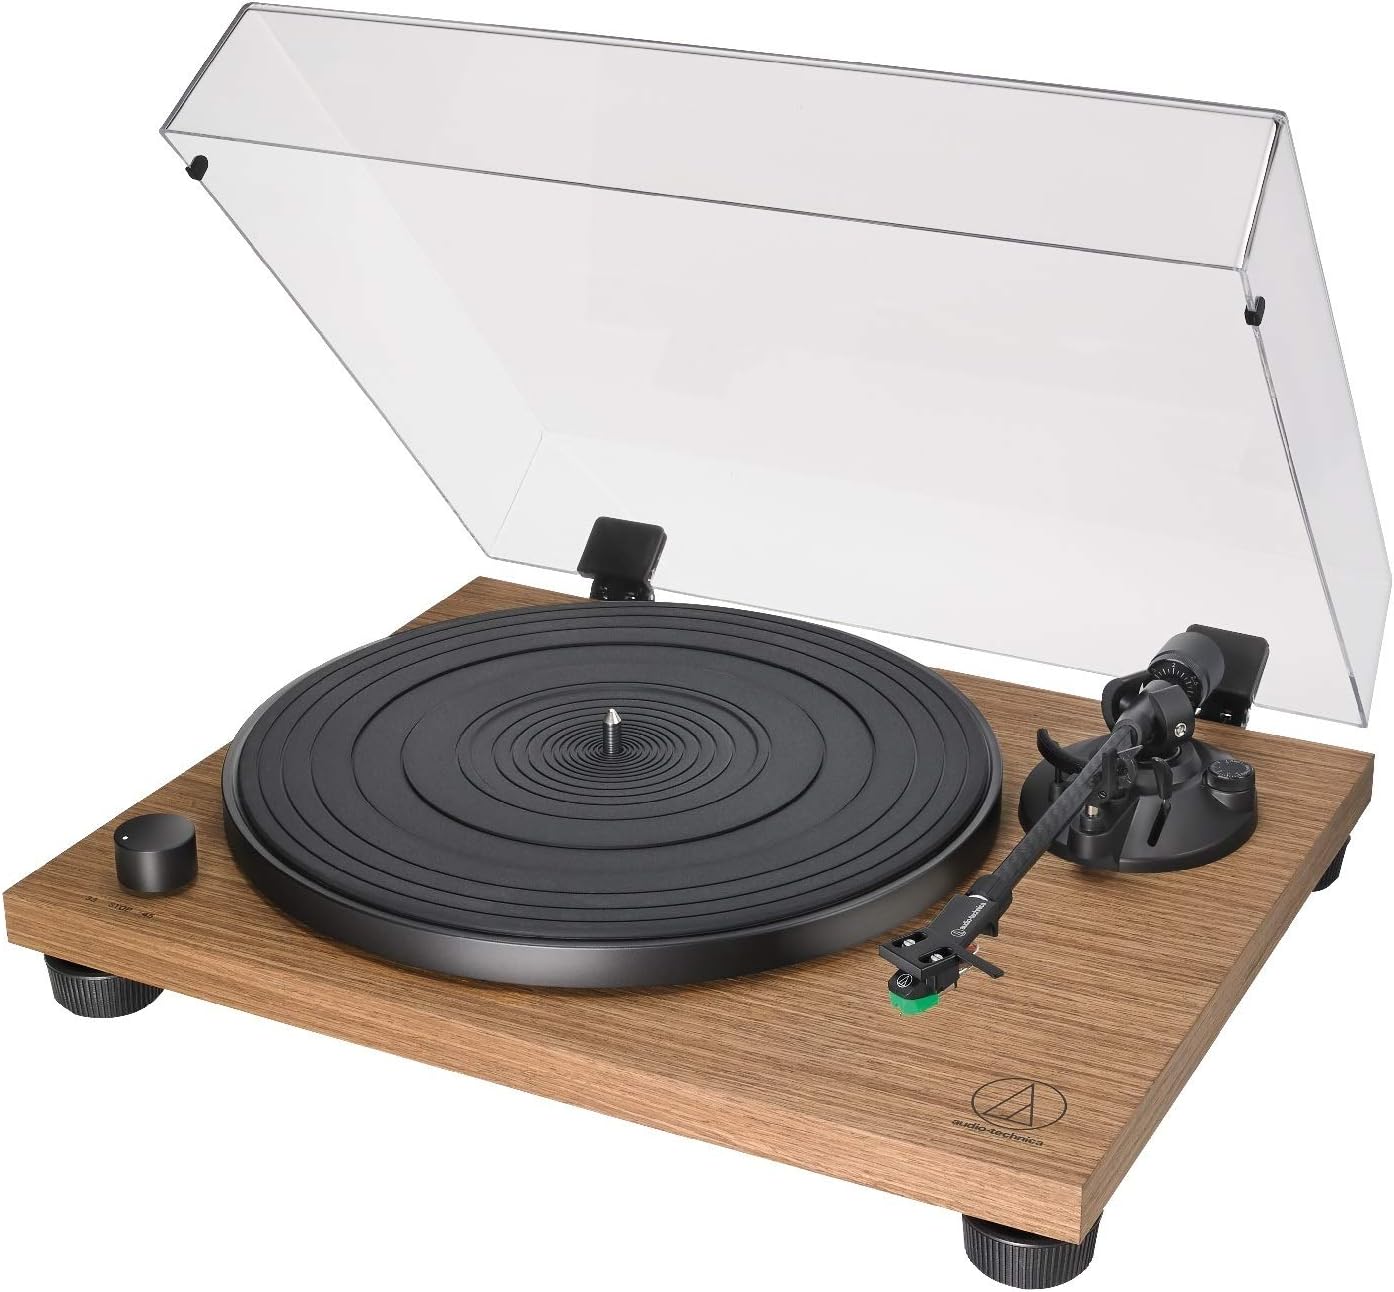
Image 2: A detailed view of the turntable's carbon-fiber tonearm, headshell with green stylus, and the black platter, highlighting the precision components.
3.3 Audio Connection
Connect the turntable to your audio system using the supplied RCA cable.
- Phono Preamp Selection: The turntable has a built-in phono preamplifier. Use the PHONO/LINE switch on the rear of the turntable to select the appropriate output:
- Set to PHONO if connecting to an amplifier with a dedicated PHONO input.
- Set to LINE if connecting to an amplifier or powered speakers without a PHONO input.
- Connect RCA Cable: Connect the red and white plugs of the RCA cable to the corresponding input jacks on your amplifier or powered speakers.
- Ground Connection: If your amplifier has a ground terminal, connect the ground wire from the turntable to it to reduce hum.
4. Operating the Turntable
The AT-LPW40WN is a fully manual turntable, requiring user interaction for playback.
4.1 Playing a Record
- Place Record: Place a vinyl record on the platter, ensuring it is centered. If playing a 45 RPM single with a large center hole, use the included 45 RPM adapter.
- Select Speed: Rotate the speed selector knob (located on the front left of the turntable) to either 33 (for LPs) or 45 (for singles), depending on the record.
- Start Platter Rotation: Turn the speed selector knob from 'STOP' to the desired speed (33 or 45). The platter will begin to rotate.
- Lift Tonearm: Gently raise the tonearm using the tonearm lift lever.
- Position Tonearm: Manually move the tonearm over the desired starting groove of the record.
- Lower Tonearm: Slowly lower the tonearm using the tonearm lift lever. The stylus will gently descend onto the record, and playback will begin.

Image 3: A top-down perspective of the turntable, showing the black platter, speed selector knob, and the carbon-fiber tonearm positioned for playback.
4.2 Stopping Playback
- Lift Tonearm: Gently raise the tonearm using the tonearm lift lever.
- Return Tonearm: Manually move the tonearm back to its rest position.
- Lower Tonearm: Lower the tonearm lift lever to secure the tonearm in its rest clip.
- Stop Platter Rotation: Rotate the speed selector knob to 'STOP'.
5. Maintenance and Care
Regular maintenance ensures optimal performance and longevity of your turntable.
5.1 Cleaning the Stylus
Use a soft brush, designed for stylus cleaning, and gently brush from back to front. Do not brush from side to side or front to back, as this can damage the stylus.
5.2 Cleaning the Turntable
- Dust Cover: Wipe the dust cover gently with a soft, dry cloth. Avoid using abrasive cleaners or solvents.
- Plinth and Platter: Use a soft, dry cloth to wipe the turntable base and platter. For stubborn marks, a slightly damp cloth can be used, followed by immediate drying.
- Records: Always handle records by their edges. Use a record brush before each play to remove dust and static.
6. Troubleshooting
If you encounter issues, refer to the following common problems and solutions:
- No Power: Ensure the power adapter is securely connected to both the turntable and a working power outlet.
- No Sound or Low Volume:
- Check all audio cable connections between the turntable and your amplifier/speakers.
- Verify the PHONO/LINE switch setting on the turntable matches your amplifier's input type.
- Ensure your amplifier/speakers are powered on and the volume is adjusted.
- Sound is Distorted or Skipping:
- Clean the record and stylus.
- Re-check tonearm balance and tracking force settings.
- Ensure the turntable is on a stable, level surface to prevent vibrations.
- Incorrect Playback Speed: Verify the speed selector knob is set to the correct RPM (33 or 45) for the record being played.
- Humming Noise: Ensure the ground wire is properly connected between the turntable and your amplifier (if applicable). Check for loose connections.
7. Technical Specifications
| Feature | Specification |
|---|---|
| Product Dimensions | 19 x 16 x 8 inches |
| Item Weight | 10.4 pounds |
| Item Model Number | AT-LPW40WN |
| Brand | Audio-Technica |
| Maximum Rotational Speed | 9200 RPM (Motor speed, not playback speed) |
| Playback Speeds | 33 1/3, 45 RPM |
| Material | Engineered Wood, Wood |
| Color | Walnut |
| Compatible Devices | Headphone, Speaker |
8. Warranty and Support
For warranty information, technical support, or service inquiries, please refer to the official Audio-Technica website or contact their customer service department.
You can also visit the Audio-Technica Store on Amazon for additional product information and resources.


