
1. Introduction
This manual provides detailed instructions for the installation, operation, and maintenance of your Barlus SK8-3PX10 8MP Underwater IP Waterproof Camera. Designed for robust performance in both freshwater and saltwater environments, this camera features a 316L stainless steel housing, IP68 waterproofing, and high-speed video recording capabilities. Please read this manual thoroughly before using the product to ensure proper function and longevity.

Figure 1.1: Barlus SK8-3PX10 Underwater IP Camera with its integrated cable and network adapter.

Figure 1.2: Overview of key features including HD video, 100-degree lens, IP68 rating, RJ45 connectivity, LED illumination, and 316L stainless steel construction.
2. Key Features
- Durable Construction: 316L Stainless Steel housing suitable for both seawater and freshwater environments.
- Advanced Illumination: White light and infrared fill lights provide versatile lighting modes for various environmental conditions.
- High-Speed Video: Supports 50FPS/60FPS/120FPS high-speed video recording for capturing fast-moving objects with clarity.
- Integrated Cable: Tensile, wear-resistant, and corrosion-resistant integrated cable for reliable underwater deployment.
- Network Protocol Support: Compatible with RTSP (Real-Time Streaming Protocol) for seamless integration with third-party software like OBS.
- IP68 Waterproof Rating: Ensures complete protection against dust and prolonged immersion in water.
- Wide Field of View: 140-degree field of view to capture a broad area.

Figure 2.1: Visual representation of camera capabilities including lighting options, device compatibility, streaming protocols, and image processing.

Figure 2.2: Demonstration of different frame rates (30FPS, 60FPS, 120FPS) and their effect on video smoothness.
3. Setup and Installation
3.1 Physical Installation
The Barlus SK8-3PX10 camera can be installed in various underwater settings. Ensure the mounting surface is stable and secure. The camera comes with an integrated bracket for easy attachment.
- Mounting: Use the provided bracket to secure the camera. Common installation methods include using floats, attaching to a fish pond structure, fixing to a boat hull, or using a pole for deployment.
- Cable Management: Carefully uncoil the integrated 32ft cable. Avoid sharp bends or kinks that could damage the cable.
- Power Connection: Connect the power adapter to the camera's cable and then to a suitable power source.

Figure 3.1: Examples of camera installation methods for different underwater applications.
3.2 Network Connection
The camera connects to your network via an Ethernet cable. It supports standard IP networking protocols.
- Direct Connection to PC: Connect the camera's Ethernet cable to your computer's network port. You may need to configure your computer's IP address to be in the same subnet as the camera for initial setup.
- Connection to NVR/Router: For continuous monitoring or remote access, connect the camera to a Network Video Recorder (NVR) or a network router.
- IP Address Configuration: The camera typically comes with a default IP address (e.g., 192.168.1.88). You will need to use specific software provided by Barlus to discover and configure the camera's network settings, including changing its IP address, subnet mask, and default gateway if necessary.
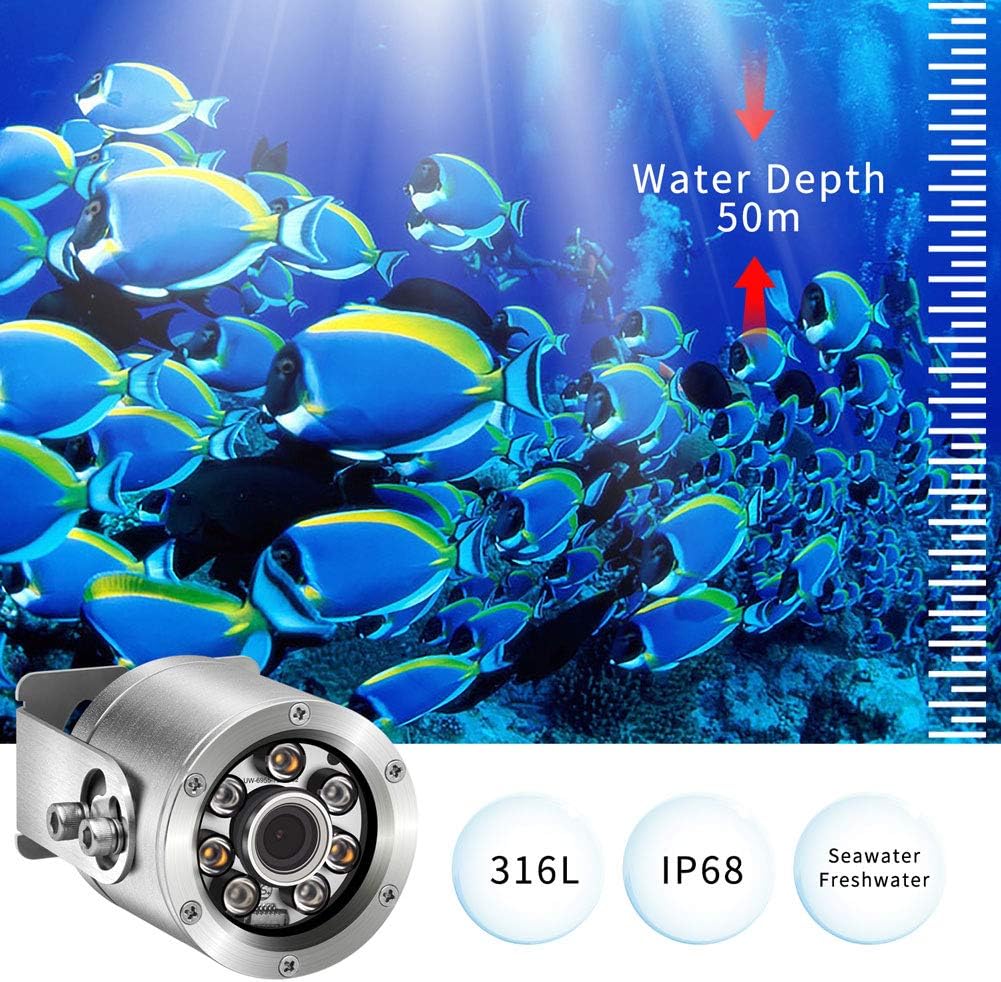
Figure 3.2: Network connection options for the camera, including direct PC connection and integration with a router or NVR.
3.3 Software Configuration
To access and configure the camera, you must download and install the appropriate software from the Barlus website or provided media. This software allows you to:
- Discover the camera on your network.
- Modify network settings (IP address, port, etc.).
- Adjust image and video parameters (resolution, frame rate, brightness, contrast).
- Control the white light and infrared fill lights (manual, auto, timed modes).
- Access the RTSP stream URL for integration with third-party viewing software (e.g., OBS Studio, VLC Media Player).
4. Operating Instructions
4.1 Powering On and Initial Access
- Ensure the camera is securely installed and connected to power and network.
- Power on the camera. Allow a few moments for it to boot up and connect to the network.
- Use the Barlus configuration software to locate the camera on your network.
- Access the live video feed through the software or a compatible third-party application using the camera's RTSP stream.
4.2 Adjusting Illumination
The camera is equipped with both white light and infrared (IR) LEDs to provide optimal visibility in varying underwater conditions. These can be controlled via the camera's software:
- Manual Mode: Turn white or IR lights on/off as needed.
- Auto Mode: The camera automatically adjusts lighting based on ambient light levels.
- Timed Mode: Schedule specific times for the lights to activate or deactivate.
4.3 Video Recording and Streaming
The camera supports high-resolution video capture and live streaming:
- Resolution: The camera is advertised as 8MP. For video capture, the resolution is 720p, and effective still resolution is 2MP as per specifications. Please verify actual output based on your specific setup.
- Frame Rate: Selectable between 30FPS, 60FPS, and 120FPS for smooth video capture, especially useful for observing fast-moving marine life.
- Live Streaming: Utilize the RTSP protocol to stream live video to compatible software or platforms.

Figure 4.1: The camera's IP68 rating ensures it remains fully functional even when submerged.

Figure 4.2: The camera is designed for use in water depths up to 50 meters, suitable for both seawater and freshwater.
5. Maintenance
Proper maintenance ensures the longevity and optimal performance of your Barlus underwater camera.
- Cleaning: After each use, especially in saltwater, rinse the camera and cable thoroughly with fresh water to remove salt and debris. Use a soft cloth to gently wipe the lens and housing. Avoid abrasive cleaners or tools that could scratch the stainless steel or lens.
- Corrosion Prevention: While the 316L stainless steel is highly corrosion-resistant, regular rinsing helps prevent buildup that could lead to localized corrosion over time. Inspect the housing and cable for any signs of wear or damage.
- Cable Inspection: Periodically check the integrated cable for cuts, abrasions, or signs of stress, particularly near connection points. Ensure the cable remains free of tight bends during storage and deployment.
- Storage: Store the camera in a cool, dry place away from direct sunlight and extreme temperatures when not in use.
6. Troubleshooting
This section addresses common issues you might encounter with your Barlus SK8-3PX10 camera.
6.1 No Video Feed
- Check Power: Ensure the camera is properly powered on and the power adapter is functioning.
- Network Connection: Verify that the Ethernet cable is securely connected to both the camera and your network device (PC, router, NVR). Check network indicator lights if available.
- IP Address: Confirm the camera's IP address is correctly configured and accessible within your network. Use the Barlus configuration software to verify or reconfigure.
- Software Compatibility: Ensure your viewing software (e.g., OBS, VLC) is correctly configured with the camera's RTSP stream URL and credentials.
6.2 Poor Image Quality
- Lens Cleanliness: Clean the camera lens gently with a soft, damp cloth to remove any smudges or debris.
- Lighting Conditions: Adjust the white light or infrared fill lights via the software to suit the underwater environment. Ensure sufficient illumination.
- Water Clarity: Image quality is highly dependent on water clarity. In turbid water, visibility will naturally be reduced.
- Software Settings: Check the camera's image settings (brightness, contrast, saturation, resolution) in the configuration software and adjust as needed.
6.3 Camera Not Detected by Software
- Network Subnet: Ensure your computer's IP address is in the same subnet as the camera's default IP address for initial detection.
- Firewall: Temporarily disable any firewall software on your computer to check if it's blocking communication with the camera.
- Software Installation: Reinstall the Barlus configuration software to ensure it's not corrupted.
- Direct Connection Test: Try connecting the camera directly to a computer with a known working Ethernet port to rule out network infrastructure issues.
7. Specifications
| Feature | Specification |
|---|---|
| Model Number | SK8-3PX10 |
| Brand | Barlus |
| Connectivity Protocol | RTSP |
| Controller Type | Iris |
| Mounting Type | Wall Mount (via bracket) |
| Video Capture Resolution | 720p |
| Effective Still Resolution | 2 MP |
| Color | Silver |
| Wireless Communication Technology | Infrared |
| Form Factor | Compact |
| Night Vision Range | 32 Feet |
| Frame Rate | 30 fps, 60 fps, 120 fps |
| Item Dimensions (L x W x H) | 5.51 x 2.76 x 2.76 inches |
| Water Resistance Level | Waterproof (IP68) |
| Batteries Required? | No |
| Flash Memory Type | SD |
| Focus Type | Manual Focus |
| Field Of View | 140 Degrees |
| International Protection Rating | IP68 |
| Item Weight | 6.6 pounds |
| Manufacturer | Barlus |
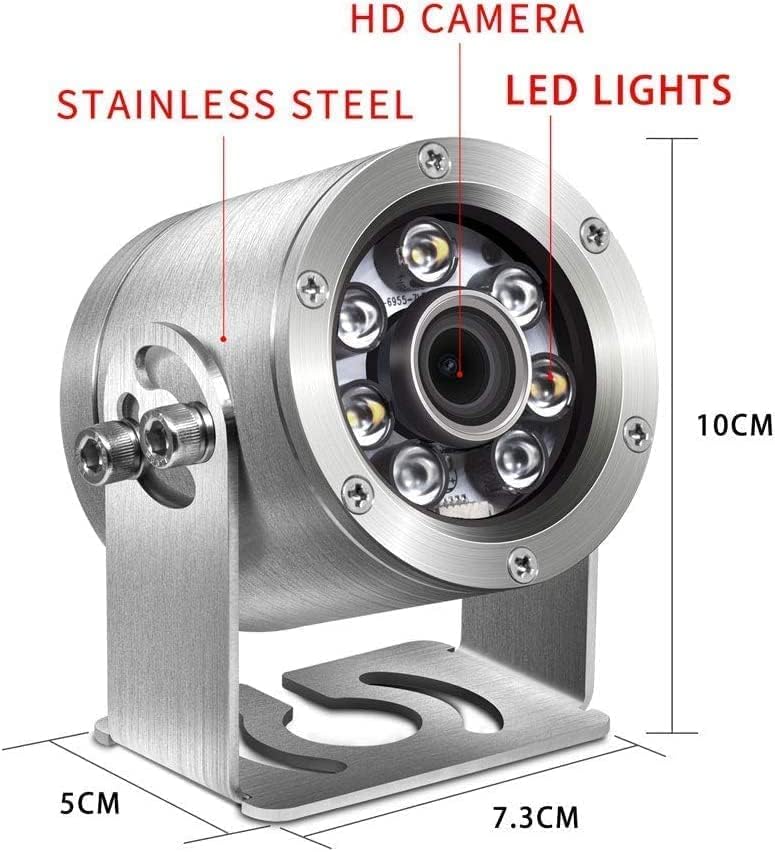
Figure 7.1: Physical dimensions and key components of the camera.
8. Warranty and Support
For warranty information and technical support, please refer to the official Barlus website or contact their customer service directly. Keep your purchase receipt as proof of purchase for any warranty claims.
Manufacturer: Barlus
Website: Barlus Official Store on Amazon


