1. Introduction
Thank you for choosing the electriQ Portable Slimline Air Cooler. This 3-in-1 appliance functions as an air cooler, air purifier, and humidifier, designed to enhance your indoor comfort. This manual provides essential information for the safe and efficient operation, setup, and maintenance of your new air cooler. Please read it thoroughly before use and retain it for future reference.
2. Safety Information
To reduce the risk of fire, electric shock, or injury, always follow basic safety precautions when using this appliance.
- Read all instructions carefully before operating the unit.
- Ensure the power supply matches the voltage specified on the rating label.
- Do not operate the unit with a damaged cord or plug. If the cord is damaged, it must be replaced by the manufacturer, its service agent, or similarly qualified persons to avoid a hazard.
- Always unplug the appliance from the power outlet before cleaning, servicing, or moving.
- Do not immerse the unit, power cord, or plug in water or other liquids.
- This appliance is for indoor use only. Do not use it outdoors or in wet conditions.
- Keep the unit away from heat sources, direct sunlight, and flammable materials.
- Ensure the unit is placed on a stable, level surface to prevent tipping.
- Do not block the air inlets or outlets. Maintain at least 20cm clearance around the unit.
- Do not insert fingers or foreign objects into the air grille.
- Supervise children and ensure they do not play with the appliance.
- Only use clean tap water in the water tank. Do not add chemicals or other substances.
- Empty the water tank when the unit is not in use for an extended period.
3. Package Contents
Please check the contents of your package:
- electriQ Portable Slimline Air Cooler Unit
- Remote Control
- 2 x Ice Packs
- User Manual (this document)
4. Product Overview

Front view of the air cooler, showing the air outlet louvres and water level indicator.

Detailed view of the top control panel, indicating buttons for Oscillation, Cool, Ioniser, Timer, Mode, Fan Speed, and Power.
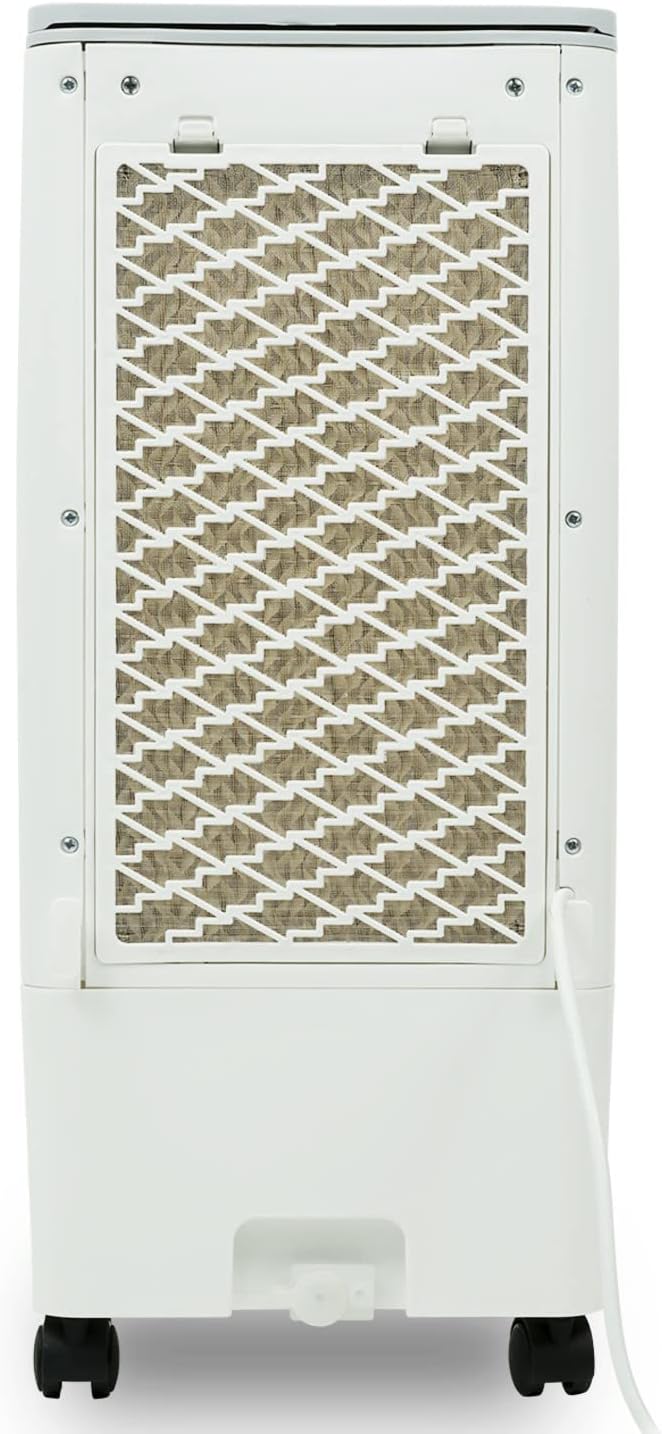
Rear view of the air cooler, highlighting the removable honeycomb cooling pad and air filter.
Key Components:
- Control Panel: Touch-sensitive buttons for all functions.
- Air Outlet Louvres: Adjustable for directing airflow.
- Water Tank: 6-liter capacity with MAX/MIN indicators for water level.
- Honeycomb Cooling Pads: Located at the rear, essential for evaporative cooling and air filtration.
- Air Inlet Filter: Protects internal components from dust.
- Castor Wheels: For easy mobility of the unit.
- Carry Handle: Integrated for convenient lifting.
5. Setup
- Unpacking: Carefully remove the air cooler from its packaging. Retain the packaging for future storage or transport.
- Placement: Place the unit on a firm, level surface. Ensure there is adequate ventilation around the unit, at least 20cm from walls or furniture, to allow for proper airflow. For optimal cooling, ensure good air circulation in the room (e.g., open a window slightly).
- Filling the Water Tank:
- Open the water tank cover located on the top of the unit.
- Pour clean tap water into the tank, ensuring the water level is between the 'MIN' and 'MAX' indicators on the front of the unit. Do not overfill.
- For enhanced cooling, place the two included ice packs (or ice cubes) directly into the water tank.

Adding the included ice packs to the water tank for improved cooling performance.
- Connecting Power: Plug the power cord into a suitable electrical outlet. The unit will enter standby mode.
6. Operation
The air cooler can be operated using the touch control panel on top of the unit or the supplied remote control.
Control Panel Functions:
- Power Button (⏻): Press to turn the unit ON or OFF.
- Mode Button: Cycles through different operating modes: Normal, Natural, and Sleep.
- Speed Button: Adjusts fan speed (Low, Medium, High). There are 3 fan speeds available.
- Timer Button: Sets the operating timer from 1 to 7 hours. Each press adds 1 hour.
- Cooler Button: Activates or deactivates the evaporative cooling function. Ensure water is in the tank when using this mode.
- Ioniser Button: Activates or deactivates the air ioniser for improved air quality.
- Swing Button: Activates or deactivates the automatic oscillation of the vertical louvres for wider air distribution.
Operating Modes:
- Normal Mode: Provides a constant airflow at the selected fan speed.
- Natural Mode: Simulates a natural breeze by varying the fan speed intermittently.
- Sleep Mode: Reduces fan speed and noise level for quiet operation, ideal for nighttime use.
Cooling Function:
The unit uses evaporative cooling. Water from the tank is pumped over the honeycomb cooling pads. As air passes through these wet pads, water evaporates, absorbing heat from the air and lowering its temperature. This process also adds humidity to the air and acts as an air filter. For best results, ensure the water tank is filled and consider adding ice packs.
7. Maintenance
Regular cleaning and maintenance will ensure the longevity and optimal performance of your air cooler. Always unplug the unit before performing any maintenance.
Cleaning the Exterior:
- Wipe the exterior surfaces with a soft, damp cloth.
- Do not use abrasive cleaners, waxes, or solvents as they may damage the finish.
Cleaning the Water Tank:
- Empty the water tank regularly, especially if the unit will not be used for a few days.
- Remove the water tank (if detachable) or access the inside through the top opening.
- Clean the tank with a mild detergent and rinse thoroughly with clean water.
- Ensure the tank is completely dry before refilling or storing.
Cleaning the Honeycomb Cooling Pads and Air Filter:
- The honeycomb cooling pads and air filter are located behind the rear grille.
- Carefully remove the rear grille and then slide out the cooling pads and filter.
- Rinse the cooling pads and filter under running water to remove dust and mineral deposits. For stubborn dirt, use a soft brush.
- Allow them to air dry completely before reinserting them into the unit.
- Clean these components at least once a month, or more frequently depending on usage and air quality.
Storage:
- If storing the unit for an extended period, ensure the water tank is empty and clean, and the cooling pads are dry.
- Store the unit in a cool, dry place, preferably in its original packaging.
8. Troubleshooting
Before contacting support, please refer to the following common issues and solutions:
| Problem | Possible Cause | Solution |
|---|---|---|
| Unit does not turn on | No power supply; Power cord not plugged in; Power button not pressed. | Check power outlet; Ensure power cord is securely plugged in; Press the Power button. |
| No cooling effect | Water tank empty; Cooler function not activated; Honeycomb pads are dry or dirty. | Fill water tank; Press the Cooler button; Clean or wet the honeycomb pads. |
| Weak airflow | Air inlet/outlet blocked; Fan speed too low; Filter dirty. | Clear obstructions; Increase fan speed; Clean the air filter. |
| Unusual noise | Unit not on a level surface; Water pump issue (if gurgling); Foreign object inside. | Place on a flat surface; Check water level (if pump noise); Unplug and inspect for obstructions. |
| Water leakage | Water tank overfilled; Unit tilted; Drain plug loose. | Do not overfill; Ensure unit is level; Check drain plug is secure. |
9. Specifications
| Feature | Specification |
|---|---|
| Model Number | AC60E |
| Dimensions (W x H x D) | 26 cm x 56.5 cm x 23.5 cm |
| Weight | 3.51 kg (empty) / 3.95 kg (packaged) |
| Water Tank Capacity | 6 Liters |
| Fan Speeds | 3 (Low, Medium, High) |
| Max. Air Flow | 216 m³/h |
| Timer | Up to 7 hours |
| Power | 180W |
| Power Supply (V) | 200-240V |
| Special Features | Air Purification Filter, Humidifier, Digital Controls, Remote Control, Castor Wheels |

Dimensional overview of the electriQ Portable Slimline Air Cooler.

The unit features built-in castor wheels for easy movement and portability.
10. Warranty and Support
For warranty information or technical support, please refer to the purchase documentation or contact your retailer. Keep your proof of purchase for any warranty claims.


