Introduction
This manual provides detailed instructions for the installation, operation, and maintenance of your ARREGUI Forma Evolution 150020 furniture safe. Designed for both home and commercial use, this safe offers enhanced security with its electronic lock and key system. Please read this manual thoroughly before using the safe to ensure proper function and security.
Product Overview
The ARREGUI Forma Evolution 150020 is a compact and secure furniture safe, ideal for protecting valuables. It features a robust construction with a double-walled drill-resistant front and a two-factor security lock (electronic code + key) for enhanced protection.
Key Features:
- Dimensions: 25 x 35 x 25 cm (H x W x D), 16 L capacity.
- Double-Walled Drill-Resistant Front: 6 mm strong front + 3 mm steel drill protection plate.
- Body Thickness: 3 mm.
- Locking Mechanism: Two 22 mm diameter saw and pry-resistant rotating bolts.
- Two-Factor Security Lock: Electronic code and key for opening.
- Digital Display: For displaying messages and codes.
- Internal Lighting: Automatically activates upon opening.
- Easy Anchoring: Pre-drilled holes in the base and back for wall or floor mounting.
Package Contents:
- ARREGUI Forma Evolution 150020 Safe
- User Manual
- 2 Standard Keys
- 1 Emergency Key
- External Micro-USB Power Supply
- Anchoring Screws
- 4 AA Batteries (pre-installed)
Setup
1. Unboxing and Initial Inspection
Carefully remove the safe from its packaging. Inspect the safe for any signs of damage. Ensure all package contents listed above are present.
2. Battery Installation (if not pre-installed)
The safe requires 4 AA alkaline batteries. The battery compartment is located on the inside of the door. If batteries are not pre-installed, open the battery cover and insert the batteries, observing the correct polarity (+/-). Close the cover securely.

Image: Inside view of the safe door, highlighting the battery compartment for 4 AA batteries.
3. Initial Opening and Code Setting
Upon first use, the safe can be opened using the emergency key. Insert the emergency key into the keyhole on the electronic panel and turn it while simultaneously turning the handle to open the door.

Image: The safe door is open, showing the emergency key inserted into the keyhole on the electronic panel, ready for initial access.
Once open, you can set your personal user code. Refer to the "Operating" section for detailed instructions on setting and changing codes.
4. Anchoring the Safe
For maximum security, it is highly recommended to anchor the safe to a wall, floor, or sturdy furniture. The safe has pre-drilled holes (2 in the base, 2 in the back) for this purpose. Use the provided anchoring screws.
- Choose a suitable location for the safe.
- Mark the drilling points through the pre-drilled holes on the desired surface.
- Drill holes of appropriate size and depth.
- Position the safe and secure it using the anchoring screws.

Image: Front view of the ARREGUI Forma Evolution safe, showing the electronic keypad and keyhole. This image represents the safe ready for installation.

Image: The ARREGUI Forma Evolution safe securely installed within a wooden cabinet, demonstrating a typical anchoring scenario.
Operating Instructions
1. Setting the User Code
With the safe door open:
- Press the red reset button located on the inside of the door, near the hinge. The display will show "PROG".
- Enter your desired user code (3 to 8 digits) on the keypad.
- Press the "E" (Enter) button to confirm. The display will show "GOOD" indicating successful programming.
- Test the new code with the door open before closing it.
Note: There are two possible codes: one Master code and one User code. The initial code is usually a default Master code. It is highly recommended to change both codes upon first use.
2. Setting the Master Code
With the safe door open:
- Press "00" then the red reset button. The display will show "PROG".
- Enter your desired Master code (3 to 8 digits) on the keypad.
- Press the "E" (Enter) button to confirm. The display will show "GOOD".
3. Opening the Safe with Electronic Code
- Enter your user code (or Master code) on the keypad. The display will show the entered digits.
- Press the "E" (Enter) button. If the code is correct, the display will show "OPEN" and the lock will disengage for a few seconds.
- Within this time, insert the standard key into the keyhole on the electronic panel and turn it clockwise while simultaneously turning the handle to open the door.

Image: A close-up view of the electronic keypad and digital display, illustrating the interface for code entry.
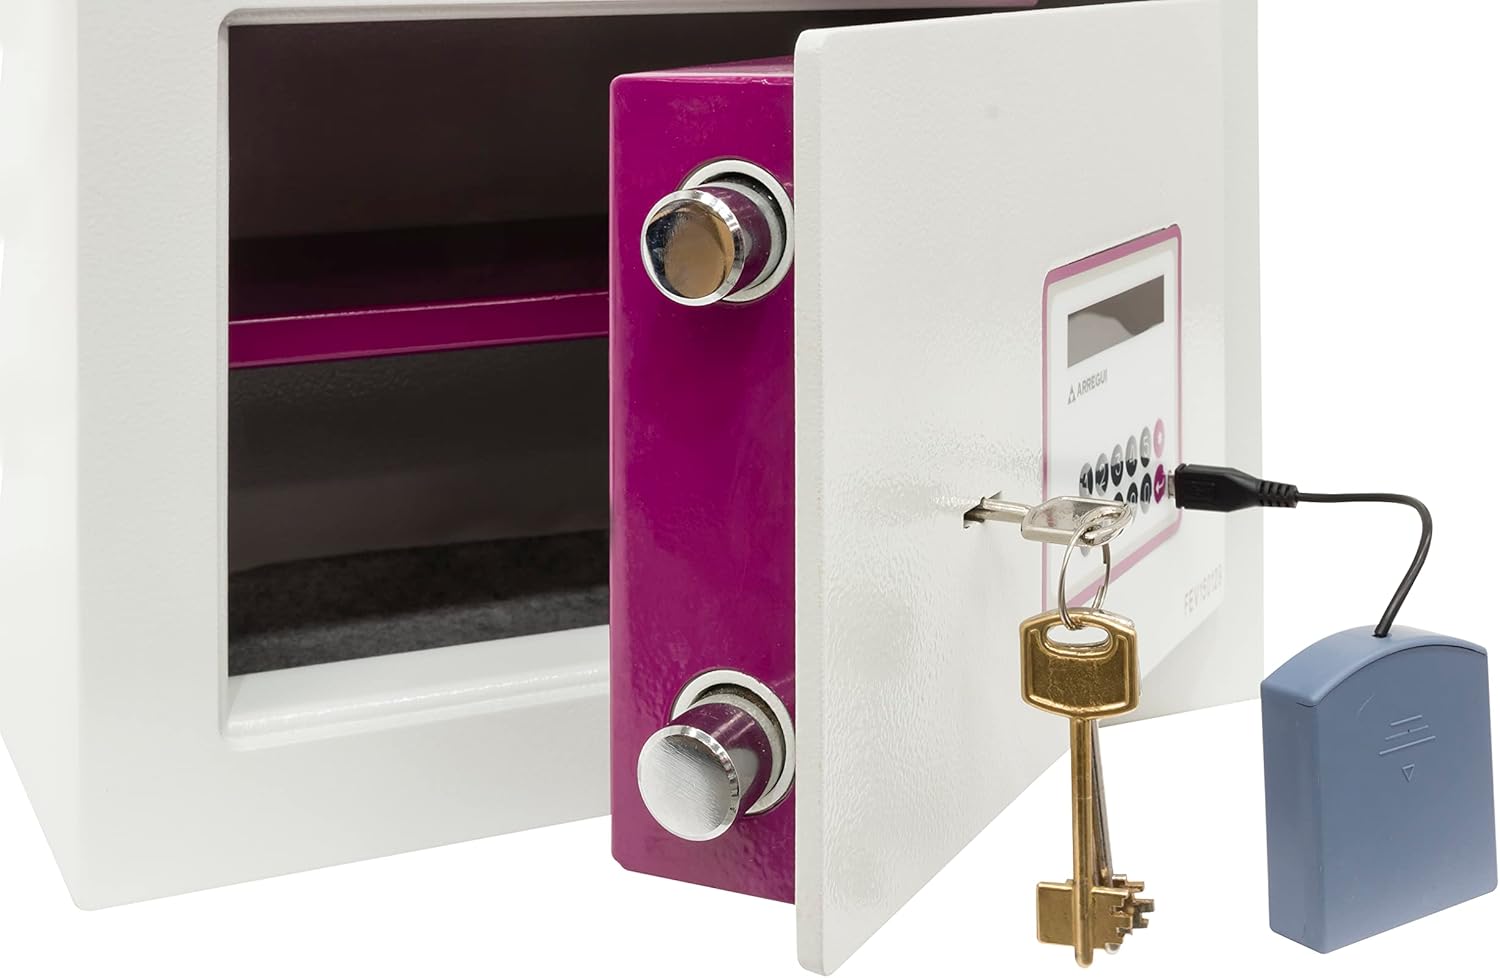
Image: The safe door is partially open, with a key inserted into the electronic panel, illustrating the two-factor security system in action.
4. Closing and Locking the Safe
Close the safe door and turn the handle counter-clockwise until it is fully engaged. The safe will automatically lock. No code entry is required to lock the safe.
Image: The safe door is open, showing the interior and the locking bolts, ready to be closed and secured.
Maintenance
1. Battery Replacement
When the batteries are low, the red light above the keypad will illuminate, or the display may show "LOW BATT". Replace all 4 AA alkaline batteries promptly to ensure continued operation. Use only new, high-quality alkaline batteries.
Image: Inside view of the safe door, indicating the location of the battery compartment for replacement.
2. Using External Power Supply
If the batteries are completely depleted and you cannot open the safe, you can use the external micro-USB power supply. Connect the power supply to the micro-USB port on the electronic panel. This will temporarily power the keypad, allowing you to enter your code and open the safe. Replace the internal batteries immediately after opening.
Image: A hand connecting the external micro-USB power supply to the safe's electronic panel, demonstrating how to provide temporary power.
3. Cleaning
Clean the exterior of the safe with a soft, damp cloth. Do not use abrasive cleaners or solvents, as these can damage the finish or electronic components. Ensure no moisture enters the electronic keypad or keyhole.
Troubleshooting
| Problem | Possible Cause | Solution |
|---|---|---|
| Safe does not open with code. | Incorrect code entered; Low batteries; Electronic malfunction. | Re-enter code carefully. Replace batteries or use external power supply. If problem persists, use emergency key and contact support. |
| Red light flashes or "LOW BATT" on display. | Batteries are low. | Replace all 4 AA alkaline batteries immediately. |
| Safe cannot be locked. | Door not fully closed; Obstruction in door frame. | Ensure door is completely closed and clear of obstructions. Turn handle firmly. |
| Keys are lost. | Keys misplaced. | Use the emergency key. Contact ARREGUI support for key replacement options, providing proof of ownership. |
Specifications
| Feature | Detail |
|---|---|
| Model Number | Forma Evolution 150020 |
| External Dimensions (H x W x D) | 25 x 35 x 25 cm |
| Capacity | 16 Liters |
| Weight | 18.5 Kilograms |
| Material | Alloy Steel |
| Front Thickness | 6 mm (front) + 3 mm (drill protection) |
| Body Thickness | 3 mm |
| Locking Bolts | 2 x 22 mm diameter rotating bolts |
| Lock Type | Electronic Keypad + Key (2-Factor Security) |
| Power Source | 4 AA Alkaline Batteries (included) |
| Emergency Power | External Micro-USB connection |
| Mounting Type | Floor Mount, Wall Mount |
Warranty and Support
ARREGUI products are manufactured to high-quality standards. For warranty information and customer support, please refer to the warranty card included with your product or visit the official ARREGUI website. Keep your purchase receipt as proof of purchase for any warranty claims.
For technical assistance or inquiries, please contact ARREGUI customer service directly. Contact details can typically be found on the manufacturer's website or on the product packaging.
ARREGUI Official Website: www.arregui.es (Please note: This link is provided as a general reference and may not be specific to your region or product support page. Always check your product documentation for the most accurate contact information.)


