1. Introduction
Thank you for choosing the Vacmaster 10 Gallon 4 Peak HP Wet/Dry Vacuum with Detachable Blower, model VBVA1010PF. This manual provides essential information for the safe assembly, operation, maintenance, and troubleshooting of your new appliance. Please read all instructions carefully before use and retain this manual for future reference.
2. Important Safety Instructions
WARNING: To reduce the risk of fire, electric shock, or injury, read and understand all instructions before using this appliance.
- Do not leave the appliance unattended when plugged in. Unplug from outlet when not in use and before servicing.
- Do not use outdoors or on wet surfaces.
- Do not allow to be used as a toy. Close attention is necessary when used by or near children.
- Use only as described in this manual. Use only manufacturer’s recommended attachments.
- Do not use with damaged cord or plug. If appliance is not working as it should, has been dropped, damaged, left outdoors, or dropped into water, return it to a service center.
- Do not pull or carry by cord, use cord as a handle, close a door on cord, or pull cord around sharp edges or corners. Do not run appliance over cord. Keep cord away from heated surfaces.
- Do not unplug by pulling on cord. To unplug, grasp the plug, not the cord.
- Do not handle plug or appliance with wet hands.
- Do not put any object into openings. Do not use with any opening blocked; keep free of dust, lint, hair, and anything that may reduce air flow.
- Keep hair, loose clothing, fingers, and all parts of body away from openings and moving parts.
- Do not pick up anything that is burning or smoking, such as cigarettes, matches, or hot ashes.
- Do not use to pick up flammable or combustible liquids, such as gasoline, or use in areas where they may be present.
- Do not use without filters in place.
- Turn off all controls before unplugging.
- Use extra care when cleaning on stairs.
- Do not use to pick up toxic, carcinogenic, combustible or other hazardous materials like asbestos, arsenic, barium, beryllium, lead, pesticides or other health endangering materials.
- Do not use to pick up soot, cement, plaster or drywall dust without a cartridge filter and filter bag in place. These are very fine particles that may affect the performance of the motor or be exhausted back into the air.
- To reduce the risk of electric shock, this appliance has a polarized plug (one blade is wider than the other). This plug will fit in a polarized outlet only one way. If the plug does not fit fully in the outlet, reverse the plug. If it still does not fit, contact a qualified electrician to install the proper outlet. Do not change the plug in any way.
3. Package Contents
Verify that all components listed below are included in your package. If any parts are missing or damaged, please contact customer support.
- Vacmaster Wet/Dry Vacuum Unit (10 Gallon Tank, Motor Head)
- Detachable Blower Unit
- Flexible Hose (7 ft)
- Extension Wands (2 pieces)
- Floor Nozzle
- Crevice Tool
- Utility Nozzle
- Cartridge Filter (for dry pickup)
- Foam Filter (for wet pickup)
- User Manual (this document)
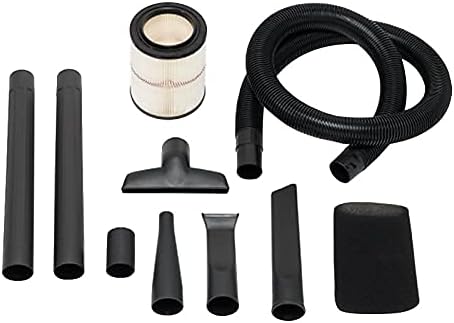
Image: Various accessories for the Vacmaster Wet/Dry Vacuum, including the flexible hose, two extension wands, a floor nozzle, a crevice tool, a utility nozzle, and both cartridge and foam filters.
4. Setup Instructions
4.1 Unpacking
- Remove all contents from the packaging.
- Ensure all parts are present and undamaged.
4.2 Attaching Casters
- Invert the tank.
- Insert the four caster feet into the slots on the bottom of the tank.
- Press firmly until each caster foot clicks securely into place.
4.3 Filter Installation
The correct filter must be installed for the type of cleaning you are performing.
For Dry Vacuuming: Cartridge Filter
- Ensure the foam filter is removed.
- Slide the cartridge filter over the filter cage on the motor head.
- Secure the filter with the filter cap by twisting it clockwise until tight.
For Wet Vacuuming: Foam Filter
- Remove the cartridge filter and filter cap.
- Slide the foam filter over the filter cage on the motor head.
- Ensure the foam filter completely covers the filter cage.
4.4 Attaching the Hose and Accessories
- Insert the large end of the flexible hose into the vacuum port on the tank and twist to lock.
- Attach desired accessories (extension wands, floor nozzle, crevice tool, utility nozzle) to the other end of the hose.

Image: The Vacmaster Wet/Dry Vacuum fully assembled, showing the main unit, flexible hose, and floor nozzle ready for use.
5. Operating Instructions
5.1 General Operation
- Ensure the vacuum is properly assembled with the correct filter for your task.
- Plug the power cord into a suitable 120V grounded outlet.
- Turn the power switch located on the motor head to the 'ON' position to start the vacuum.
- To stop operation, turn the power switch to the 'OFF' position.
5.2 Dry Vacuuming
Use the cartridge filter for dry debris pickup.
- Ensure the cartridge filter is securely installed.
- Use appropriate accessories for the type of dry debris (e.g., floor nozzle for large areas, crevice tool for tight spaces).
- Regularly check and clean the cartridge filter to maintain optimal suction.
5.3 Wet Vacuuming
Use the foam filter for liquid pickup.
- Ensure the foam filter is securely installed and the cartridge filter is removed.
- Do not overfill the tank. The vacuum is equipped with an automatic shut-off float mechanism that will stop suction when the tank is full. If suction stops, turn off the vacuum, unplug it, and empty the tank.
- After wet pickup, always empty and clean the tank thoroughly to prevent mold and odors.
5.4 Detachable Blower Function
Your Vacmaster unit features a detachable blower for versatile use.
- Detaching the Blower: Locate the release latches on the motor head. Unlatch them and lift the motor head from the tank. The motor head itself functions as the blower unit.
- Attaching Blower Nozzle: Attach the desired blower nozzle to the air outlet port on the motor head.
- Operation: Plug the blower unit into a 120V grounded outlet. Turn the power switch to 'ON' to operate the blower.
- Reattaching to Vacuum: To convert back to a vacuum, place the blower unit (motor head) back onto the tank, aligning the latches, and secure them.

Image: A person demonstrating the detachment of the blue blower unit from the main vacuum tank, highlighting the versatility of the product.
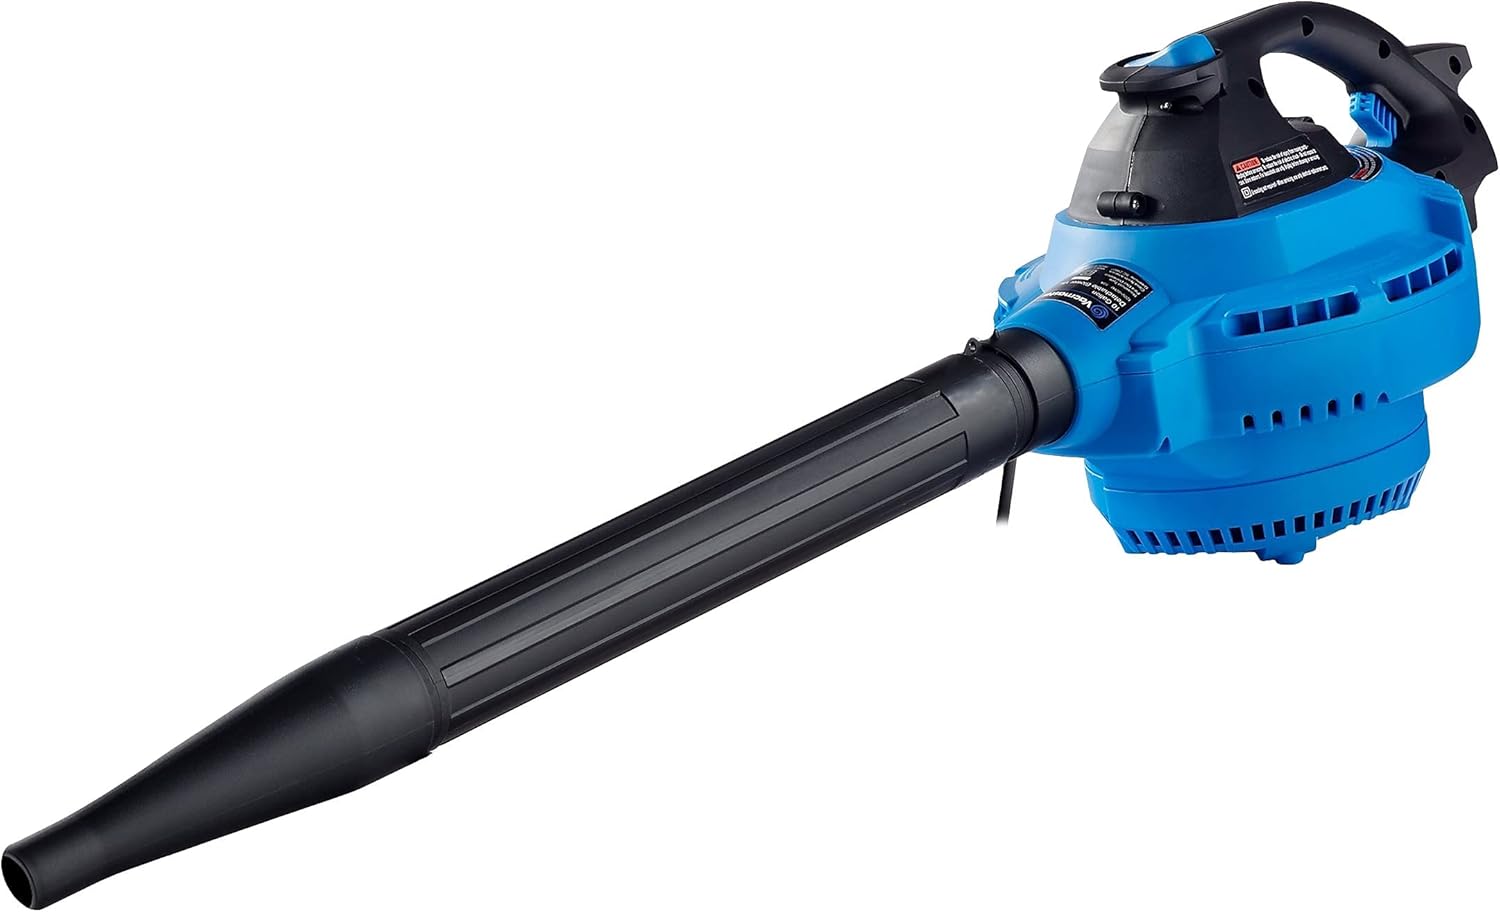
Image: The detached blower unit, a compact blue device with a black handle and a long black nozzle, ready for use as a standalone blower.
6. Maintenance
Regular maintenance ensures optimal performance and extends the life of your Vacmaster wet/dry vacuum.
6.1 Filter Cleaning and Replacement
Always unplug the vacuum before performing any maintenance.
Cartridge Filter (Dry Pickup)
- Remove the filter cap and cartridge filter from the filter cage.
- Gently tap the filter against the inside of a trash can to remove loose dirt.
- For thorough cleaning, rinse the filter under running water. Allow it to air dry completely before reinstallation. Do not use the filter if it is still wet.
- Replace the cartridge filter if it is damaged or if suction performance significantly decreases after cleaning.
Foam Filter (Wet Pickup)
- Remove the foam filter from the filter cage.
- Rinse the foam filter under running water to remove debris.
- Squeeze out excess water and allow it to air dry completely before storage or reinstallation.
6.2 Tank Cleaning
- After each use, especially wet pickup, empty the tank of all debris and liquids.
- Rinse the inside of the tank with water and mild detergent if necessary.
- Wipe the tank dry or allow it to air dry completely before storing to prevent odors and mildew.
6.3 Hose and Accessory Care
- Inspect the hose and accessories for blockages or damage before and after each use.
- Clean accessories with water and mild detergent as needed.
- Store the hose and accessories neatly to prevent kinking or damage. The vacuum unit has integrated storage for the hose and some accessories.

Image: The Vacmaster Wet/Dry Vacuum with its hose wrapped around the top and accessories stored in designated slots, demonstrating compact storage.
7. Troubleshooting
If you encounter issues with your Vacmaster wet/dry vacuum, refer to the following common problems and solutions:
| Problem | Possible Cause | Solution |
|---|---|---|
| Vacuum does not start. | No power to outlet. Power cord not plugged in. Defective power switch. | Check circuit breaker/fuse. Ensure cord is firmly plugged into a working outlet. Contact customer support. |
| Loss of suction. | Hose or accessory clogged. Filter is dirty or clogged. Tank is full (wet pickup). Lid not sealed properly. | Clear any blockages from hose or accessories. Clean or replace the filter. Empty the tank. Ensure motor head latches are securely fastened. |
| Motor runs, but no suction. | Hose not connected to inlet. Hose or accessory clogged. Tank is full (wet pickup). | Ensure hose is securely attached to the vacuum port. Clear any blockages. Empty the tank. |
| Dust escapes from exhaust. | Filter is missing or damaged. Filter not installed correctly. | Install or replace the correct filter. Ensure filter is properly seated and secured. |
8. Specifications
| Feature | Detail |
|---|---|
| Brand | Vacmaster |
| Model | VBVA1010PF |
| Capacity | 10 Gallons |
| Motor | 4 Peak HP, 120V |
| Wattage | 270 watts |
| Amperage | 10 Amps |
| Hose Length | 7 Feet |
| Cord Length | 10 Feet |
| Product Dimensions (L x W x H) | 18 x 18 x 24 inches |
| Item Weight | 26.2 pounds |
| Filter Type | Cartridge (Dry), Foam (Wet) |
| Special Features | Wet/Dry Functionality, Detachable Blower |
| Global Trade Identification Number (GTIN) | 00814953015406 |
| Universal Product Code (UPC) | 814953015406 |
9. Warranty Information
This Vacmaster product is covered by a 1-year manufacturer's warranty from the date of purchase. This warranty covers defects in materials and workmanship under normal use. It does not cover damage resulting from misuse, abuse, accident, commercial use, or unauthorized repairs. Please retain your proof of purchase for warranty claims.
10. Customer Support
For technical assistance, replacement parts, or warranty inquiries, please contact Vacmaster customer support. Refer to the official Vacmaster website or your product packaging for the most current contact information.
When contacting support, please have your model number (VBVA1010PF) and proof of purchase readily available.


