
Introduction
This manual provides essential information for the safe and efficient operation of your Kärcher 18 V WD 1 Compact cordless wet and dry vacuum cleaner. Please read these instructions carefully before first use and keep them for future reference. This versatile vacuum is designed for cleaning various surfaces, offering both wet and dry vacuuming capabilities, along with a convenient blower function.
Safety Instructions
Always observe the following safety precautions to prevent accidents and damage to the appliance:
- Ensure the appliance is used only for its intended purpose as described in this manual.
- Do not vacuum flammable or explosive liquids, hot ash, or sharp objects.
- Keep children and unauthorized persons away from the appliance during operation.
- Always remove the battery before cleaning, maintenance, or when the appliance is not in use.
- Use only Kärcher 18 V Battery Power batteries and chargers.
- Do not immerse the appliance in water.
Package Contents
Verify that all components are present upon unpacking:
- Kärcher 18 V WD 1 Compact Multi-purpose Vacuum Cleaner
- Suction Hose (1.2 m, 35 mm diameter)
- Crevice Nozzle
- Upholstery Nozzle
- Cartridge Filter
- Filter Bag

This image displays the Kärcher 18 V WD 1 Compact vacuum cleaner in its bright yellow and black design, alongside its essential accessories: a flexible suction hose, a crevice nozzle, an upholstery nozzle, a cartridge filter, and a filter bag. The vacuum features a top handle and a slot for an 18V battery (not included).
Setup
1. Battery Installation
The Kärcher WD 1 Compact operates with an 18 V Kärcher Battery Power battery (not included). To install, slide the fully charged battery into the battery compartment on top of the unit until it clicks into place.
2. Filter Installation
The innovative cartridge filter allows for both wet and dry vacuuming without needing to change the filter. To install:
- Open the container by releasing the 'Pull & Push' locking system.
- Place the cartridge filter onto the filter cage, ensuring it is seated correctly.
- Close the container securely.
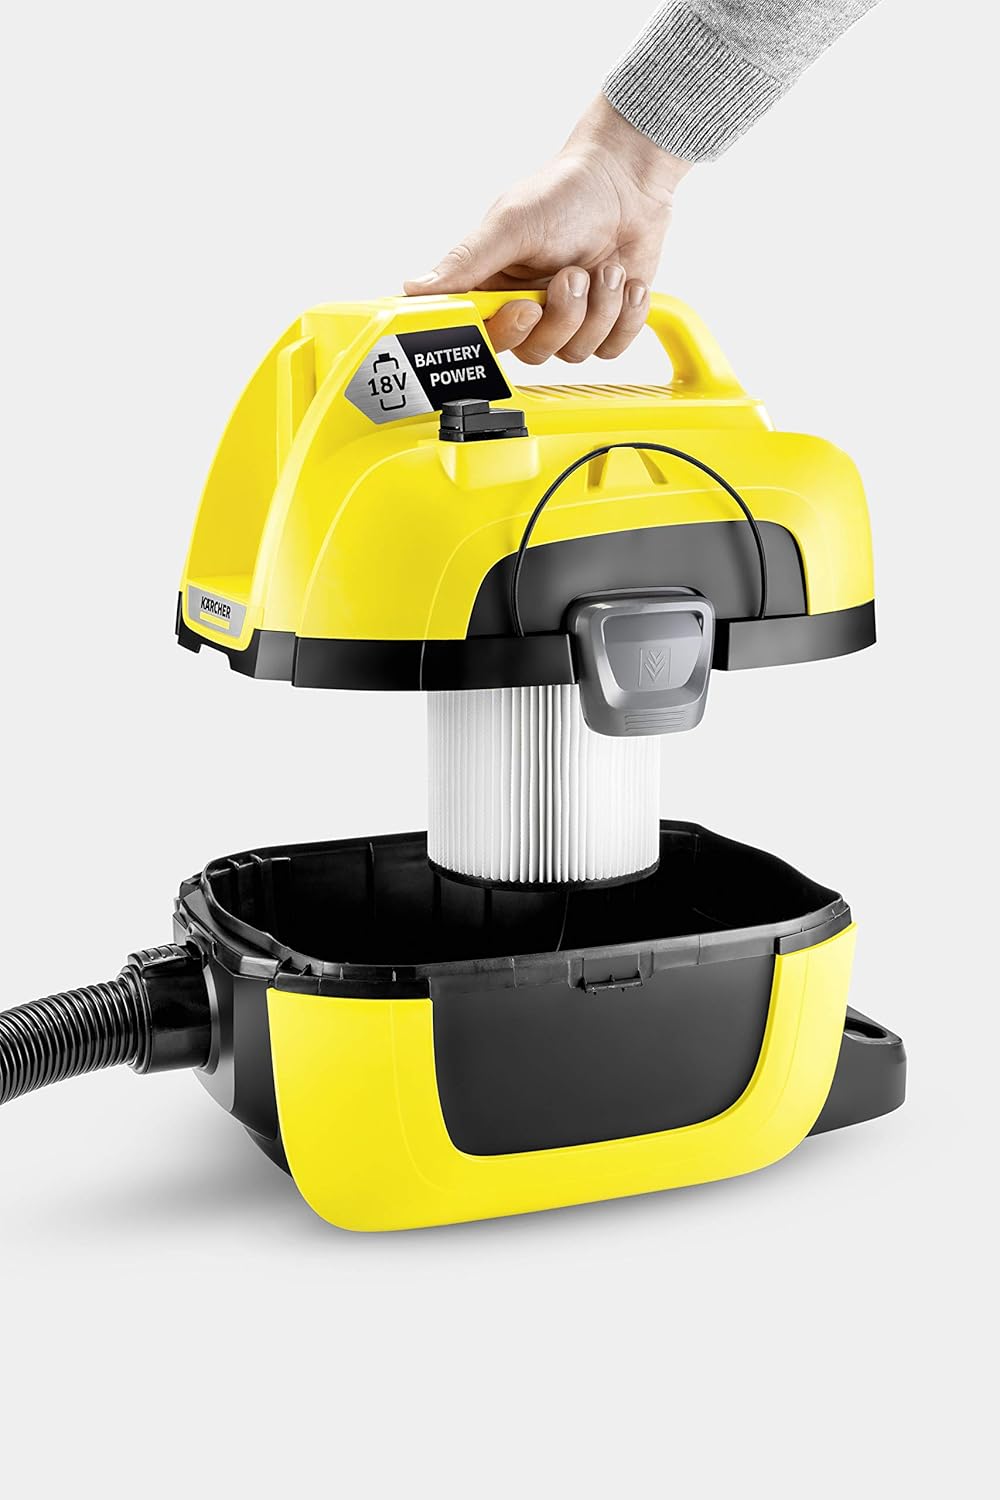
A hand is shown lifting the top section of the Kärcher WD 1 Compact vacuum cleaner, revealing the internal compartment where the cartridge filter is being inserted or removed. The filter is cylindrical and designed for both wet and dry applications.
3. Hose and Accessory Attachment
Attach the flexible suction hose to the suction port on the front of the unit. Select the appropriate nozzle (crevice or upholstery) for your cleaning task and firmly attach it to the end of the hose.
Operating Instructions
1. Powering On/Off
To turn the vacuum cleaner on, press the power switch located on the top of the unit. To turn it off, press the switch again.
2. Wet Vacuuming
For wet vacuuming, ensure the cartridge filter is correctly installed. The vacuum can effectively pick up liquids from various surfaces. Empty the container promptly after vacuuming liquids to prevent spills and maintain performance.

A man is shown using the Kärcher WD 1 Compact vacuum cleaner to clean up a liquid spill on an outdoor patio. The vacuum's hose and nozzle are directed at the puddle, illustrating its wet vacuuming capability for outdoor or garage use.
3. Dry Vacuuming
For dry vacuuming, ensure the filter bag is inserted into the container in addition to the cartridge filter. This helps to collect fine dust and debris efficiently. Use the appropriate nozzle for the surface you are cleaning.

A man is actively cleaning the trunk of a car using the Kärcher WD 1 Compact vacuum cleaner. The vacuum is placed on the ground outside the car, and the flexible hose with an attached nozzle is used to remove dry debris from the car's carpeted surface. This demonstrates the vacuum's utility for vehicle cleaning.
4. Blower Function
To use the blower function, detach the suction hose from the front suction port and attach it to the blower port located on the rear of the unit. This function is ideal for clearing leaves or debris from hard-to-reach areas.

A man is operating the Kärcher WD 1 Compact vacuum cleaner in blower mode, directing the air flow to clear dry leaves from a paved area next to a building. The vacuum is held by its handle, showcasing its portability and effectiveness for outdoor debris management.
Maintenance
1. Emptying the Container
Regularly empty the 7-liter container, especially after wet vacuuming. Release the 'Pull & Push' locking system, remove the top section, and dispose of the collected debris. Clean the container with water if necessary.
2. Cleaning the Filter
The cartridge filter should be cleaned periodically to maintain optimal suction performance. Remove the filter and tap it gently to dislodge dry dust. For more thorough cleaning, rinse the filter under running water and allow it to dry completely before reinstallation.
3. Storage
Store the vacuum cleaner and its accessories in a dry, frost-free place. The unit features integrated storage for nozzles and an elastic band to secure the hose for compact and safe transport.
Troubleshooting
Refer to the table below for common issues and their solutions:
| Problem | Possible Cause | Solution |
|---|---|---|
| Low suction power | Filter clogged, container full, hose/nozzle blocked, battery low. | Clean/replace filter, empty container, clear blockages, charge/replace battery. |
| Appliance does not start | Battery not inserted correctly, battery discharged, power switch faulty. | Insert battery correctly, charge battery, contact customer support. |
| Water leaks during wet vacuuming | Container not properly closed, seals damaged. | Ensure container is securely closed, check seals for damage and replace if necessary. |
Specifications
| Feature | Specification |
|---|---|
| Manufacturer | Kärcher |
| Model Number | 1.198-300.0 |
| Power | 230 Watts |
| Container Volume | 7 Liters |
| Hose Length | 1.2 Meters |
| Sound Level | 79.2 Decibels |
| Dimensions (L x W x H) | 38.6 x 27.9 x 31.2 cm |
| Weight | 3.63 kg |
| Battery Type | 18 V Lithium-ion (not included) |
| Filter Type | Cartridge Filter |
| Special Features | Wet and Dry Cleaning, Blower Function |
Warranty and Support
Kärcher products are manufactured to the highest quality standards. For information regarding warranty terms and conditions, please refer to the warranty card included with your product or visit the official Kärcher website. For technical support, spare parts, or service inquiries, please contact your local Kärcher service center or authorized dealer. Keep your purchase receipt as proof of purchase.


