
1. Introduction
This manual provides instructions for the Mayboos 8 Pcs Embroidery Stitching Kit. This kit is designed for various needlework projects, including punch needle embroidery and cross stitch. It includes a selection of punch needles, threaders, a handle, and embroidery threads to assist in creating diverse textile art.

Image 1.1: Overview of the Mayboos Embroidery Stitching Kit components.
2. Package Contents
Verify that all items listed below are included in your kit:
- 8 x Punch Needles (various sizes: #9, #10, #12, #14, #16, #18, #20)
- 1 x Handle
- 2 x Threaders
- 4 x Embroidery Threads (Assorted Colors)
- 1 x Storage Box

Image 2.1: Included embroidery threads.
3. Setup Instructions
Follow these steps to assemble and thread your punch needle tool:
- Select Needle: Choose the appropriate needle size for your project and thread thickness. The kit includes various sizes from #9 to #20.
- Insert Needle into Handle: Gently insert the chosen needle into the handle. Ensure it is seated firmly.
- Thread the Needle:
- Take one of the provided threaders.
- Pass the threader through the hollow shaft of the needle from the top (handle end) until it emerges from the needle tip.
- Insert your embroidery thread through the loop of the threader.
- Pull the threader back through the needle shaft, bringing the embroidery thread with it.
- Once the thread is through the shaft, pass the threader through the small eyelet at the very tip of the needle.
- Insert the embroidery thread through this small eyelet.
- Pull the thread through the eyelet, leaving a tail of a few inches.

Image 3.1: Visual guide for punch needle assembly and threading.

Image 3.2: Punch needle size guide.
4. Operating Instructions
Once your punch needle is threaded, you can begin your embroidery project:
- Prepare Fabric: Stretch your fabric tautly in an embroidery hoop. The fabric should be firm to allow the needle to pass through smoothly.
- Begin Punching: Hold the punch needle tool like a pen. Insert the needle straight down into the fabric until the handle touches the fabric surface.
- Withdraw Needle: Gently pull the needle straight up out of the fabric, but do not lift it too high. Keep the needle tip close to the fabric surface to maintain consistent loop height.
- Advance and Repeat: Move the needle a short distance (typically 2-3 stitches per inch, depending on desired density) and repeat the punching motion. This creates loops on the underside of the fabric and flat stitches on the top.
- Maintain Thread Flow: Ensure the working thread flows freely from the spool or skein. Any tension or snagging can affect loop consistency.
- Finishing: Once your design is complete, cut the thread on the back side, leaving a small tail. You can secure the loops with fabric glue if desired, especially for items that will be handled frequently.

Image 4.1: Punch needle in use on fabric.

Image 4.2: Example of a finished punch needle project.
5. Maintenance
Proper care will extend the life of your embroidery kit:
- Cleaning Needles: After use, wipe needles with a dry cloth to remove any fabric fibers or residue. If necessary, a small amount of rubbing alcohol can be used for stubborn grime. Ensure needles are completely dry before storage.
- Storage: Store all components in the provided storage box to prevent loss and protect the needles from damage or dulling. Keep in a dry place.
- Thread Care: Keep embroidery threads in their original packaging or a sealed container to prevent tangling, dust accumulation, and fading.
- Handle Care: Ensure the handle is kept clean and dry. Avoid excessive force when attaching or detaching needles to prevent damage.
6. Troubleshooting
Here are solutions to common issues you might encounter:
- Needle Falls Off Handle: Ensure the needle is fully inserted and securely seated in the handle. Some designs may require a firm push to lock into place.
- Threader Breaks or Bends: The threaders are delicate. Use gentle pressure when guiding them through the needle. If a threader breaks, use the spare or acquire a replacement.
- Thread Does Not Flow Smoothly: Check for tangles in the thread. Ensure the thread is not snagging on the spool or any part of the needle. Verify that the thread is correctly passed through both the shaft and the eyelet of the needle.
- Loops Are Uneven or Not Forming: Ensure your fabric is stretched very taut in the hoop. The needle must be inserted fully until the handle touches the fabric, and then withdrawn just enough to clear the fabric surface. Consistent depth and minimal lifting are key.
- Handle Feels Uncomfortable: The handle is designed for general use. If prolonged use causes discomfort, consider taking breaks or exploring ergonomic grips available separately.
- Needle Length Not Adjustable: This kit features fixed-length needles, meaning the loop height is determined by the needle's design and cannot be adjusted. To achieve different loop heights, you would need needles specifically designed with adjustable depth.
7. Specifications
| Feature | Detail |
|---|---|
| Brand | Mayboos |
| Model Number | DM0041 |
| Material | Stainless Steel |
| Needle Point Type | Sharp |
| Item Weight | 1.44 ounces |
| Recommended Uses | Sewing, Embroidery, Punch Needle Crafts |
| UPC | 717877779181 |
8. Warranty and Support
This product is covered by a standard manufacturer's warranty against defects in materials and workmanship. For specific warranty details or technical support, please refer to the product packaging or contact Mayboos customer service through their official channels. Keep your purchase receipt for warranty claims.
9. Project Examples
The Mayboos Embroidery Stitching Kit can be used to create a variety of textile art pieces. Here are some examples of finished projects:
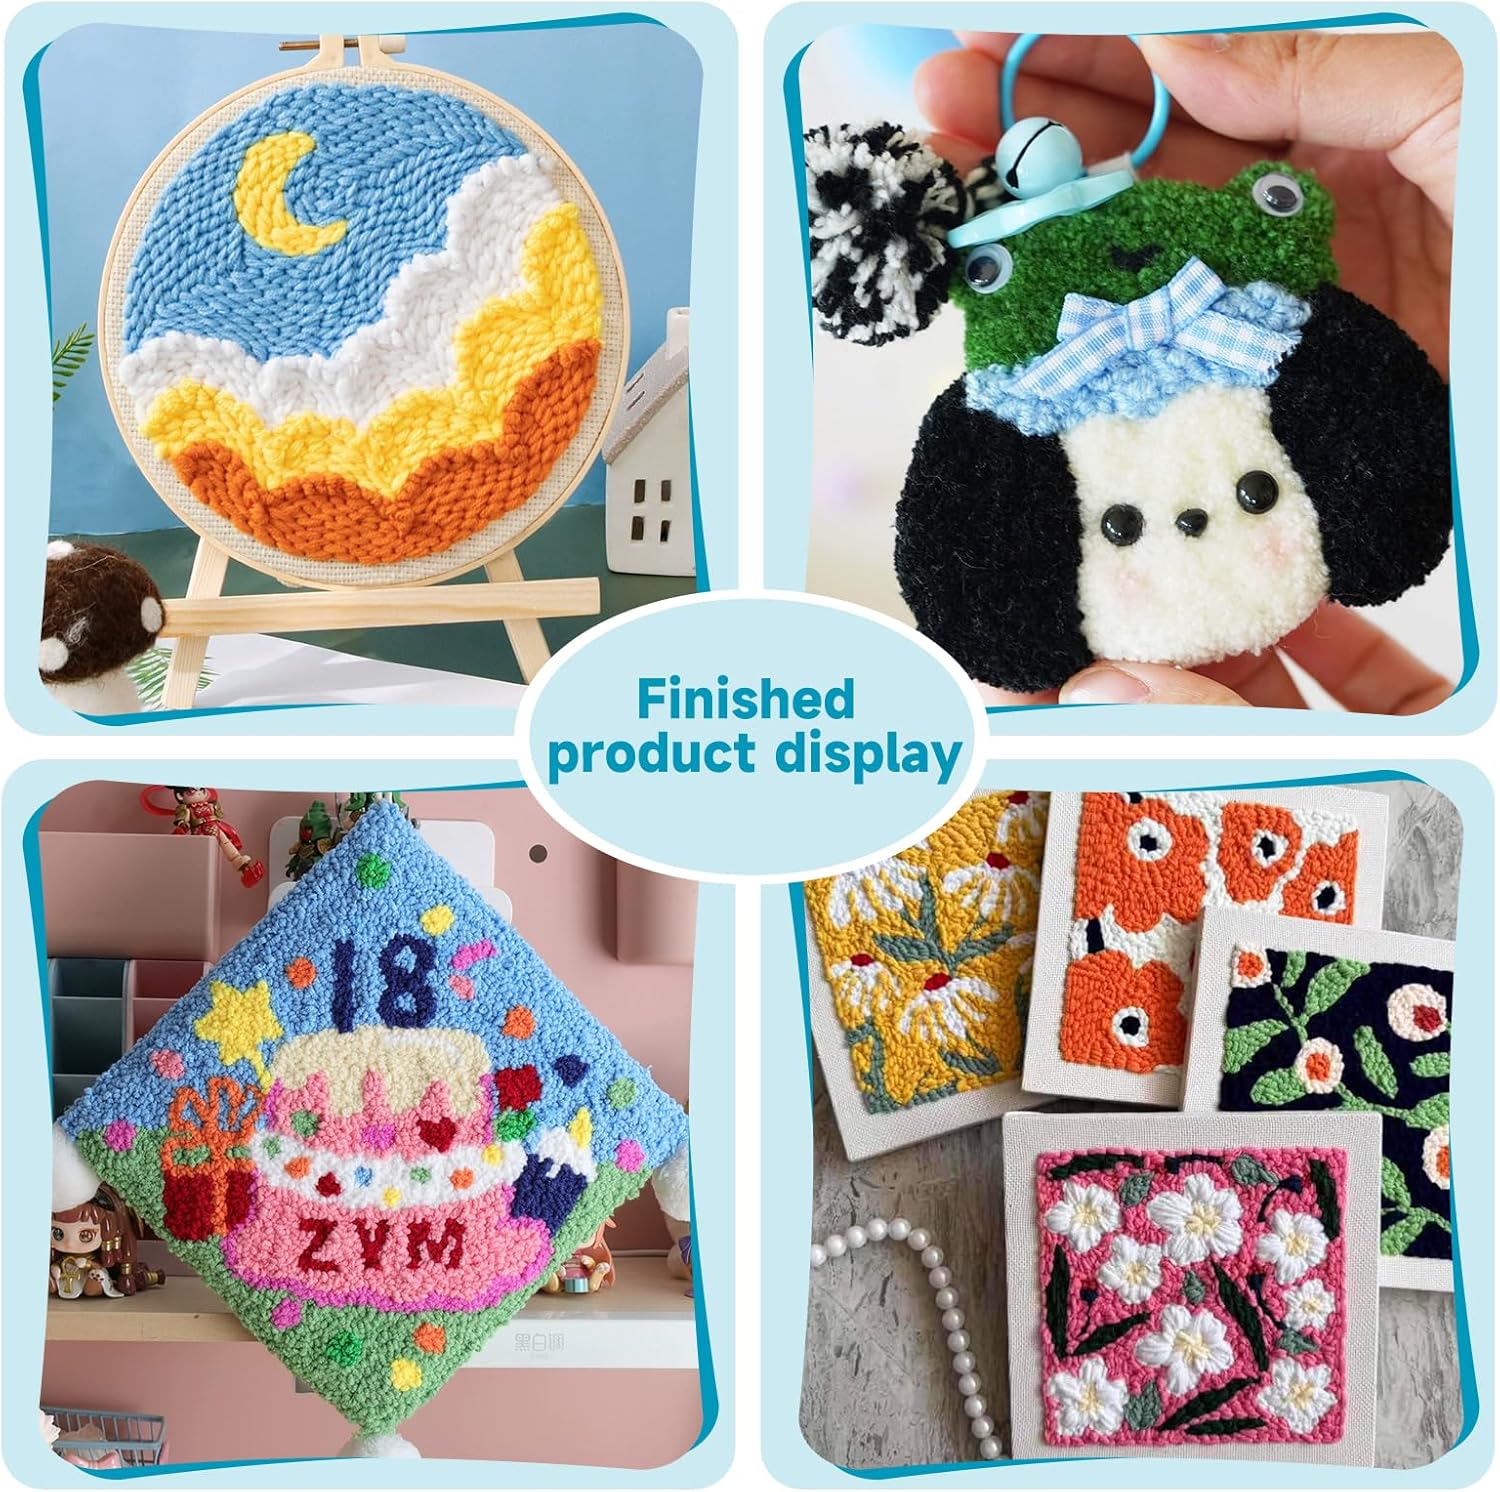
Image 9.1: Display of various finished punch needle projects.