
Image: The fully assembled Kotobukiya ZOIDS RZ-041 Liger Zero Schneider Marking Plus Ver. plastic model.
Introduction
This manual provides comprehensive instructions for assembling and maintaining your Kotobukiya ZOIDS RZ-041 Liger Zero Schneider Marking Plus Ver. 1/72 Scale Plastic Model. The Liger Zero Schneider is a specialized combat form featuring the unique "Changing Armor System." This kit allows you to recreate its distinctive appearance with vibrant orange armor and numerous blades.
Recommended Age: This model kit is recommended for individuals aged 15 years and above due to the complexity of assembly and small parts.
Parts List and Inspection
Before beginning assembly, carefully unpack all components and verify that all parts are present and undamaged. This product includes the Liger Zero (Sotai Body) and the Schneider Unit components.

Image: All components of the Liger Zero Schneider Marking Plus Ver. kit, including the Liger Zero base body and the orange Schneider armor parts, laid out for inspection prior to assembly.
Familiarize yourself with the various runners and individual pieces. Refer to the included parts diagram for detailed identification.
Assembly (Setup)
Follow the step-by-step instructions provided in the manufacturer's booklet for precise assembly. The kit is molded in multiple colors, reducing the need for painting, but careful assembly is crucial for a clean finish.
- Base Body Assembly: Begin by assembling the core Liger Zero (Sotai Body). Ensure all joints are securely fitted.
- Schneider Unit Attachment: Attach the orange Schneider armor parts to the Liger Zero base. Pay close attention to the orientation of each piece.
- Laser Blades: The laser blades on various parts of the aircraft are designed to be movable. Assemble them carefully to retain their articulation.
- E-Shield Generator: The E-Shield Generator on the head can be expanded. Ensure its mechanism is assembled correctly for proper function.
- Booster Blades: The blades on the side of the aircraft interact with the expansion to release the booster. Assemble these components to allow for this feature.
- Pilot Figure: A standard pilot figure is included and can be placed in the cockpit.
- Decals: Apply the included emblems and caution marks as desired to enhance the model's detail.
Note on Adhesion: Some smaller armor parts may benefit from the application of plastic model cement to ensure a secure and lasting connection. Test fit parts before applying adhesive.

Image: A side view of the partially assembled Liger Zero Schneider, illustrating the integration of the Schneider unit onto the base body.
Display and Posing (Operating)
Once assembled, your Liger Zero Schneider model offers various posing options due to its articulation. Carefully adjust the joints to achieve dynamic stances.
- Articulation: The model features articulated joints in its legs, body, and weapon systems, allowing for a wide range of poses.
- E-Shield Generator: The head's E-Shield Generator can be expanded to replicate combat readiness.
- Booster Deployment: The side blades can be adjusted to simulate booster deployment.
- Flying Base Compatibility: For more dynamic aerial poses, the model is compatible with Kotobukiya Flying Base and Neo stands (sold separately). Attach the model to the stand according to the stand's instructions.
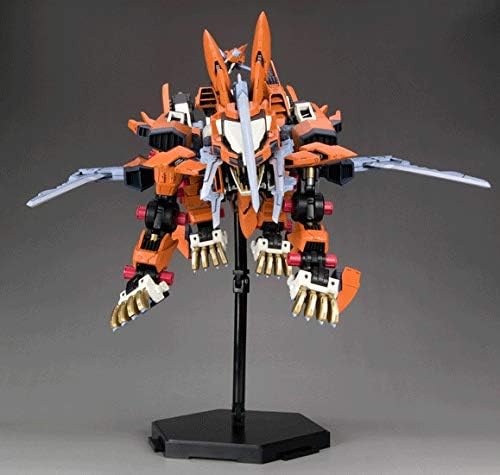
Image: Frontal view of the Liger Zero Schneider, highlighting the head's E-Shield Generator in an expanded state.
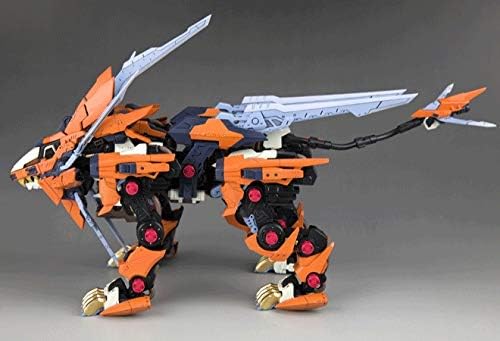
Image: The Liger Zero Schneider in a dynamic, action-oriented pose, showcasing the movable side blades and overall articulation.

Image: The Liger Zero Schneider model mounted on a display stand, allowing for an elevated and dynamic presentation.

Image: A dynamic, low-angle pose of the Liger Zero Schneider, emphasizing its predatory design and sharp features.
Maintenance
To preserve the appearance and integrity of your model, follow these maintenance guidelines:
- Cleaning: Dust the model regularly with a soft brush or a can of compressed air. Avoid using harsh chemicals or abrasive materials.
- Storage: Store the model away from direct sunlight, extreme temperatures, and high humidity to prevent material degradation and color fading.
- Handling: Handle the model carefully, especially when adjusting articulated parts, to avoid breakage.
Troubleshooting
If you encounter issues during assembly or with the finished model, consider the following:
- Loose Parts: If parts do not fit snugly, a small amount of plastic model cement can be used to secure them.
- Tight Fits: For parts that are too tight, gently sand or trim the connecting pegs slightly. Do not force parts together, as this can cause breakage.
- Missing or Damaged Parts: Refer to the manufacturer's contact information for assistance with missing or damaged components.
For further assistance, consult the official Kotobukiya support resources.
Specifications
| Brand: | Kotobukiya |
| Model Number: | ZD123 (RZ-041 Liger Zero Schneider Marking Plus Ver.) |
| Scale: | 1/72 Scale |
| Total Length: | Approx. 12.6 inches (320 mm) |
| Dimensions (L x W x H): | 16 x 14 x 6 inches |
| Material: | Plastic |
| Item Weight: | 3.01 pounds (1.37 Kilograms) |
| Number of Pieces: | 1 (refers to the kit as a single product, not individual parts) |
| Recommended Age: | 15 years and up |
Warranty and Support
For product support, inquiries, or to explore other Kotobukiya products, please visit the official Kotobukiya store or contact their customer service.
Official Store: Kotobukiya Store on Amazon
Please retain your purchase receipt for any warranty-related claims, though specific warranty details are not provided with this kit.


