1. Introduction
The FlareSeal Mini-Split Pack model # MSP-0406 provides a leak-free solution for SAE flare connections, particularly in HVAC, refrigeration, and mini-split applications. This product is designed to eliminate refrigerant leaks that commonly occur due to vibration, high pressures, misalignment, or debris on the flare surface. FlareSeal compensates for these issues by providing a reliable crush fitting.
This pack is specifically suited for 7,000 BTU, 9,000 BTU, or 12,000 BTU mini-split systems with 1/4" liquid lines and 3/8" suction lines.
2. Product Overview
FlareSeal is an engineered copper gasket featuring a special multi-ring design on its flare surface. The entire copper base metal is coated with a leak-proof material. This combination of a multi-ring flare seal and the coating offers an easy clip-on solution that addresses scratches in the sealing surface and other alignment imperfections between male and female flares.
Key Features:
- Easy Installation - Clips Onto Male Flare
- Eliminates Flare Leaks in Existing Flare Fitting or New Systems
- Variety of sizes to address any SAE 45 degree flare connection
- Trusted by many Original Equipment Manufacturers for their leak free equipment
- Typical system sizes 7,000 BTU, 9,000 BTU or 12,000 BTU / 1 ton systems with 1/4" liquid line and 3/8" suction line
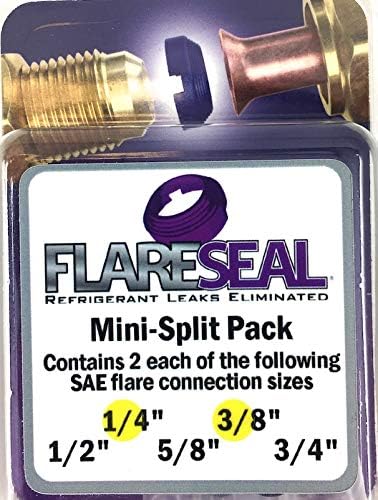
Figure 2.1: FlareSeal Mini-Split Pack packaging. This pack contains seals for 1/4" and 3/8" SAE flare connections.
3. Setup & Installation
Follow these steps for proper installation of FlareSeal gaskets to ensure a leak-free connection:
- Prepare the Flare Connection: Ensure both the male and female flare surfaces are clean and free of debris, burrs, or deep scratches. While FlareSeal can compensate for minor imperfections, a clean surface is always recommended.
- Select the Correct Size: Choose the FlareSeal gasket that matches the size of your male flare connection (e.g., 1/4" or 3/8" for this pack).
- Clip FlareSeal onto Male Flare: Carefully clip the FlareSeal gasket onto the male flare fitting. The multi-ring side of the gasket should face outwards, towards the female connection. Ensure it is seated securely around the flare.
- Align and Connect: Carefully align the male flare (with FlareSeal attached) with the female flare connection. Ensure the connection is straight to avoid cross-threading.
- Tighten the Connection: Hand-tighten the flare nut until snug. Then, use appropriate wrenches to tighten the connection to the manufacturer's recommended torque specifications. The FlareSeal will compress, creating a secure, leak-free seal.
- Leak Test: After tightening, perform a leak test using an approved leak detection method (e.g., soap bubbles, electronic leak detector) to confirm the integrity of the connection.

Figure 3.1: Clipping the FlareSeal onto the male flare. The gasket is designed to snap into place.

Figure 3.2: Male flare with FlareSeal positioned for connection to the female flare.

Figure 3.3: Cross-section illustrating the FlareSeal compressed within a tightened flare connection, ensuring a leak-free seal.
4. Operation
Once installed, FlareSeal gaskets operate passively to maintain a leak-free connection. They are designed to withstand the pressures and vibrations common in HVAC and refrigeration systems. No further operational steps are required beyond the initial installation and leak testing.
FlareSeal can be used for both new installations and to stop existing leaks in flare connections. It is also effective for Schrader valves when used with a brass flare cap to secure the connection and create a crush seal.
5. Maintenance
FlareSeal gaskets are designed for long-term reliability and typically require no specific maintenance after proper installation. However, it is good practice to:
- Periodically inspect all flare connections in your system for any signs of wear or damage.
- If a connection needs to be disassembled and reassembled, it is recommended to replace the FlareSeal gasket with a new one to ensure optimal sealing performance.
- Store unused FlareSeal gaskets in a clean, dry environment away from direct sunlight and extreme temperatures to preserve their integrity.
6. Troubleshooting
If a leak is detected after installing a FlareSeal gasket, consider the following troubleshooting steps:
- Insufficient Torque: Ensure the flare nut has been tightened to the manufacturer's recommended torque specifications. Under-tightening can prevent the FlareSeal from fully compressing and creating a proper seal.
- Damaged Flare Surfaces: While FlareSeal helps with minor imperfections, severe damage (deep gouges, cracks) on the male or female flare surfaces may still lead to leaks. Inspect the flare surfaces carefully.
- Incorrect Gasket Size: Verify that the correct size FlareSeal gasket was used for the specific flare connection.
- Improper Seating: Ensure the FlareSeal gasket was clipped onto the male flare correctly and was not dislodged during assembly.
- Debris: Even small particles of dirt or debris on the sealing surfaces can compromise the seal. Disassemble, clean thoroughly, and reassemble with a new FlareSeal.
- Schrader Valve Leaks: If using FlareSeal for a Schrader valve, ensure a brass flare cap is used to secure the connection and create the necessary crush seal.
If issues persist, consult a qualified HVAC/refrigeration technician.
7. Specifications
| Feature | Detail |
|---|---|
| Brand | FlareSeal |
| Model Number | MSP-0406 |
| Product Type | Leak Free SAE Flare Connections (Gaskets) |
| Pack Contents | (2) 1/4" and (2) 3/8" FlareSeal Gaskets |
| Material | Coated Copper |
| Connector Type | Flare |
| Thread Size Compatibility | 0.25 inch (1/4"), 0.375 inch (3/8") |
| Exterior Finish | Brass (referring to typical flare fittings) |
| Item Weight | 0.01 Ounces (per unit) |
| Package Dimensions | 3.66 x 2.56 x 0.94 inches |
| UPC | 850004076002 |
| Manufacturer | FlareSeal, LLC |
8. Warranty & Support
For specific warranty information and customer support, please refer to the official FlareSeal website or contact FlareSeal, LLC directly. Keep your purchase receipt as proof of purchase.
For technical assistance or inquiries regarding product application, please reach out to the manufacturer's support channels.


