1. Introduction
Thank you for choosing the PROGEAR 1600 Power Cage. This manual provides essential information for the safe assembly, operation, and maintenance of your new fitness equipment. Please read this manual thoroughly before assembly and use. Keep this manual for future reference.
The PROGEAR 1600 Power Cage is engineered with a heavy-duty 2" x 2" tubular steel frame, offering a robust and stable platform for various strength training exercises. It features a large walk-in space, adjustable safety bars, and J-hooks to accommodate a wide range of workouts and user heights.
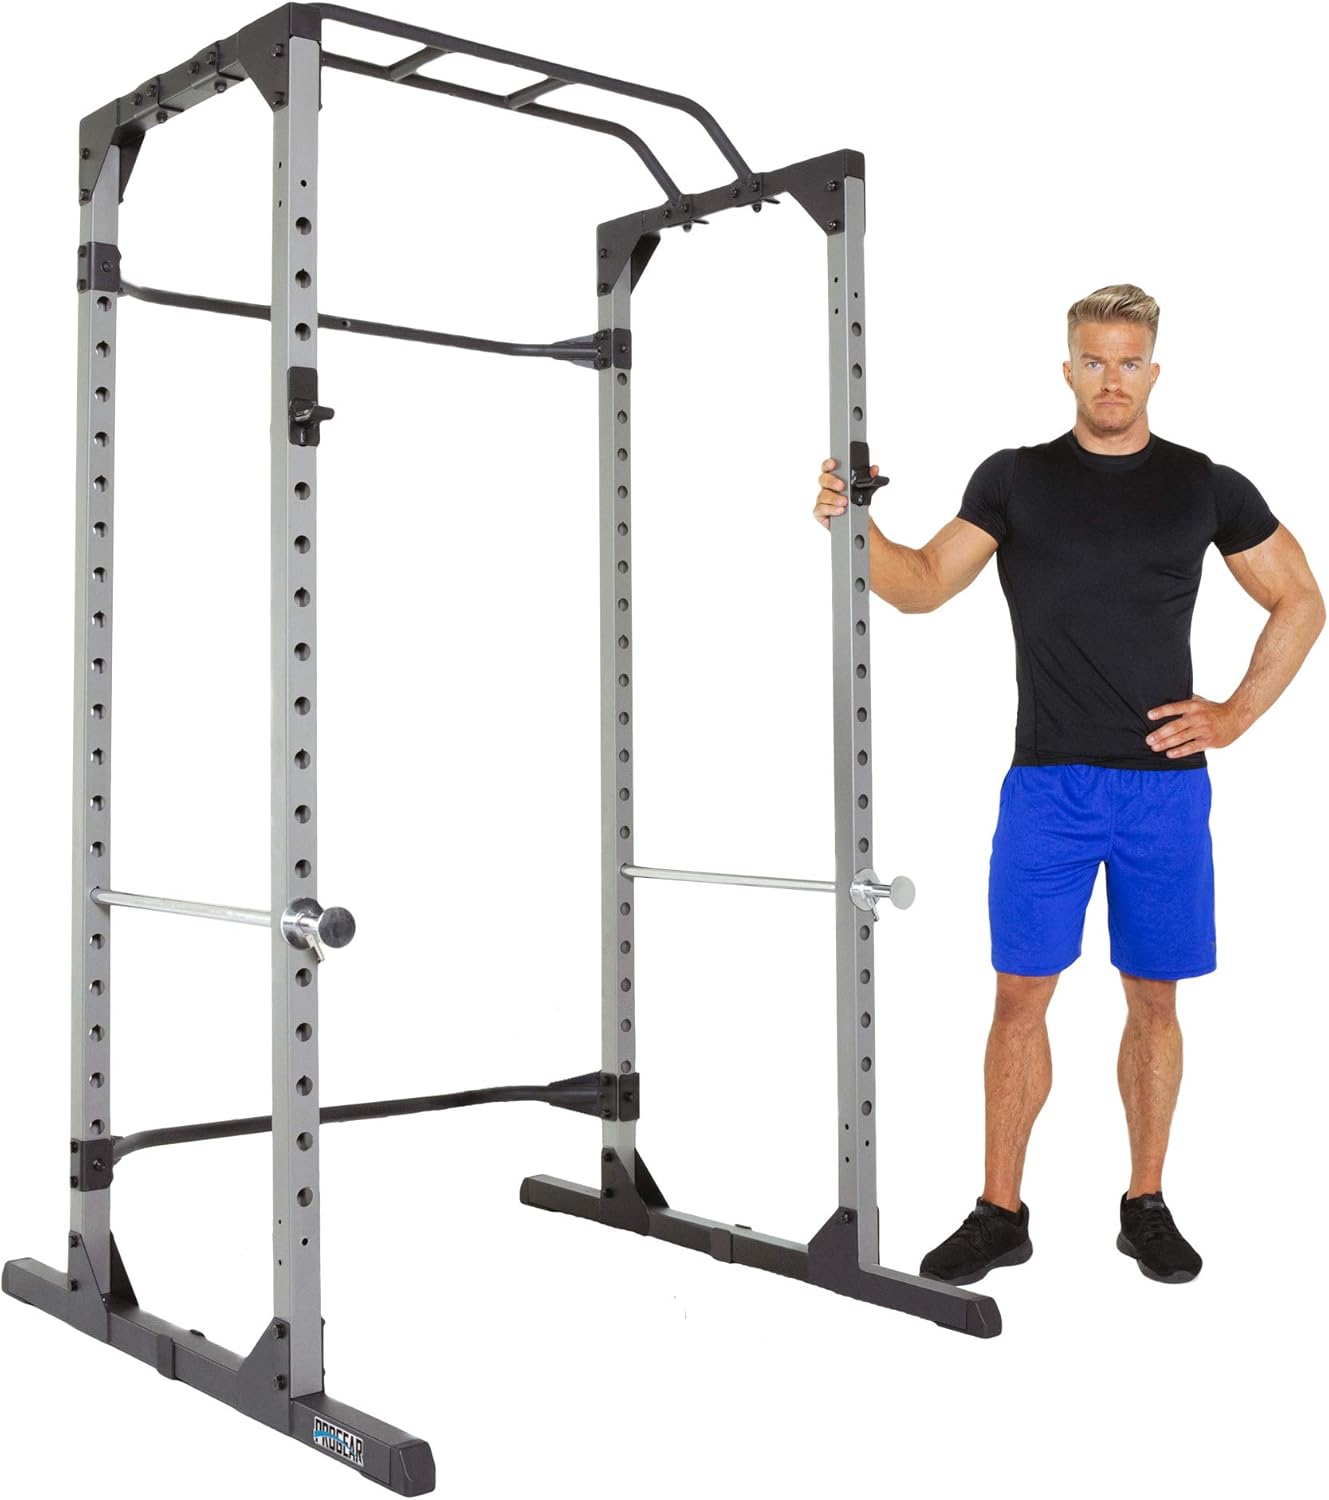
Figure 1.1: The PROGEAR 1600 Power Cage, showcasing its robust design and ample workout space.
2. Safety Information
WARNING: Serious injury or death can occur if safety precautions are not followed. Consult with a physician before beginning any exercise program. This equipment is for home use only.
- Always inspect the power cage for loose parts, damage, or wear before each use. Do not use if any components are compromised.
- Ensure all bolts and nuts are securely tightened before and during use.
- Place the power cage on a flat, stable surface. Do not use on uneven ground.
- Maintain a clear area of at least 2 feet (0.6 meters) around the power cage during use.
- Do not exceed the maximum weight capacity of 800 lbs (363 kg) for the J-hooks and safety bars.
- Always use the safety bars when performing exercises that involve heavy weights, especially when training alone.
- Children and pets must be kept away from the equipment during operation.
- Wear appropriate athletic footwear and clothing during exercise.
- If you experience pain, dizziness, or shortness of breath, stop exercising immediately and consult a physician.
3. Package Contents
Verify that all components listed below are present and undamaged before beginning assembly. If any parts are missing or damaged, contact customer support immediately.
- Main Frame Components (Uprights, Base Supports, Crossbars)
- 2 x J-Hooks
- 2 x Chrome Dual Mounted Safety Bars
- 2 x Chrome Lock-on Safety Bars
- Multi-grip Pull-up Bar
- Assembly Hardware (Bolts, Washers, Nuts)
- Assembly Tools
- Instruction Manual
4. Assembly Instructions
Assembly typically requires two adults. Refer to the included assembly diagram for detailed steps. Ensure all connections are secure before proceeding to the next step.
- Unpack and Organize: Carefully remove all components from the packaging. Lay them out in an organized manner and compare them against the package contents list.
- Assemble Base Supports: Attach the front and rear base supports to the main uprights using the provided bolts and nuts. Do not fully tighten yet.
- Install Rear Stability Bars: Secure the two rear stability bars between the rear uprights. These bars provide additional rigidity to the structure.
- Attach Pull-up Bar: Mount the multi-grip pull-up bar to the top front section of the power cage. Ensure it is level and securely fastened.
- Tighten All Hardware: Once all components are loosely assembled, go back and securely tighten all bolts and nuts. This ensures the cage is stable and safe for use.
- Install J-Hooks and Safety Bars: Insert the J-hooks and safety bars into the desired height levels. Ensure they are fully seated and locked into place.

Figure 4.1: Detail of the rear stability bar, crucial for structural integrity.
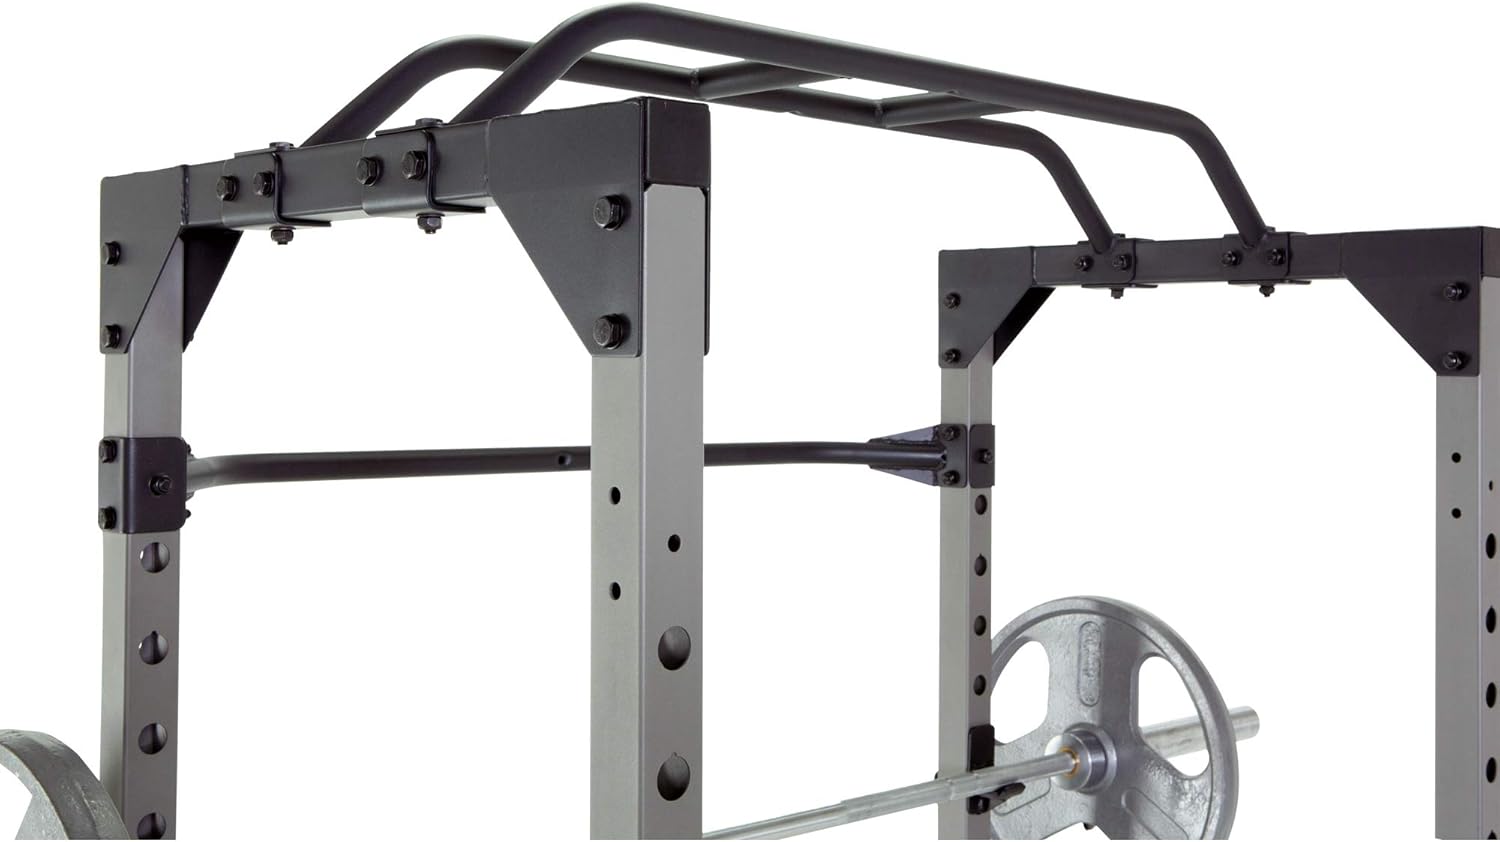
Figure 4.2: The multi-grip pull-up bar, offering various grip options for upper body exercises.

Figure 4.3: A J-hook securely mounted on the upright, ready to support a barbell.

Figure 4.4: The adjustable safety bar mechanism, allowing for precise height settings.
5. Operating Instructions
The PROGEAR 1600 Power Cage is designed for a variety of strength training exercises. Its large walk-in space allows for easy side-to-side movement and accommodates various workout styles.
5.1 Using J-Hooks and Safety Bars
- J-Hooks: These are used to rack and un-rack your Olympic bar. They feature an easy lock-in design for secure placement. Always ensure both J-hooks are set at the same height and are fully engaged before placing a barbell on them.
- Safety Bars: The power cage includes two chrome dual-mounted safety bars and two chrome lock-on safety bars. These are crucial for user safety, especially when lifting heavy weights or training alone. Adjust them to a height that will catch the barbell if you fail a lift, preventing injury. The cage offers 19 adjustable height levels for precise positioning.
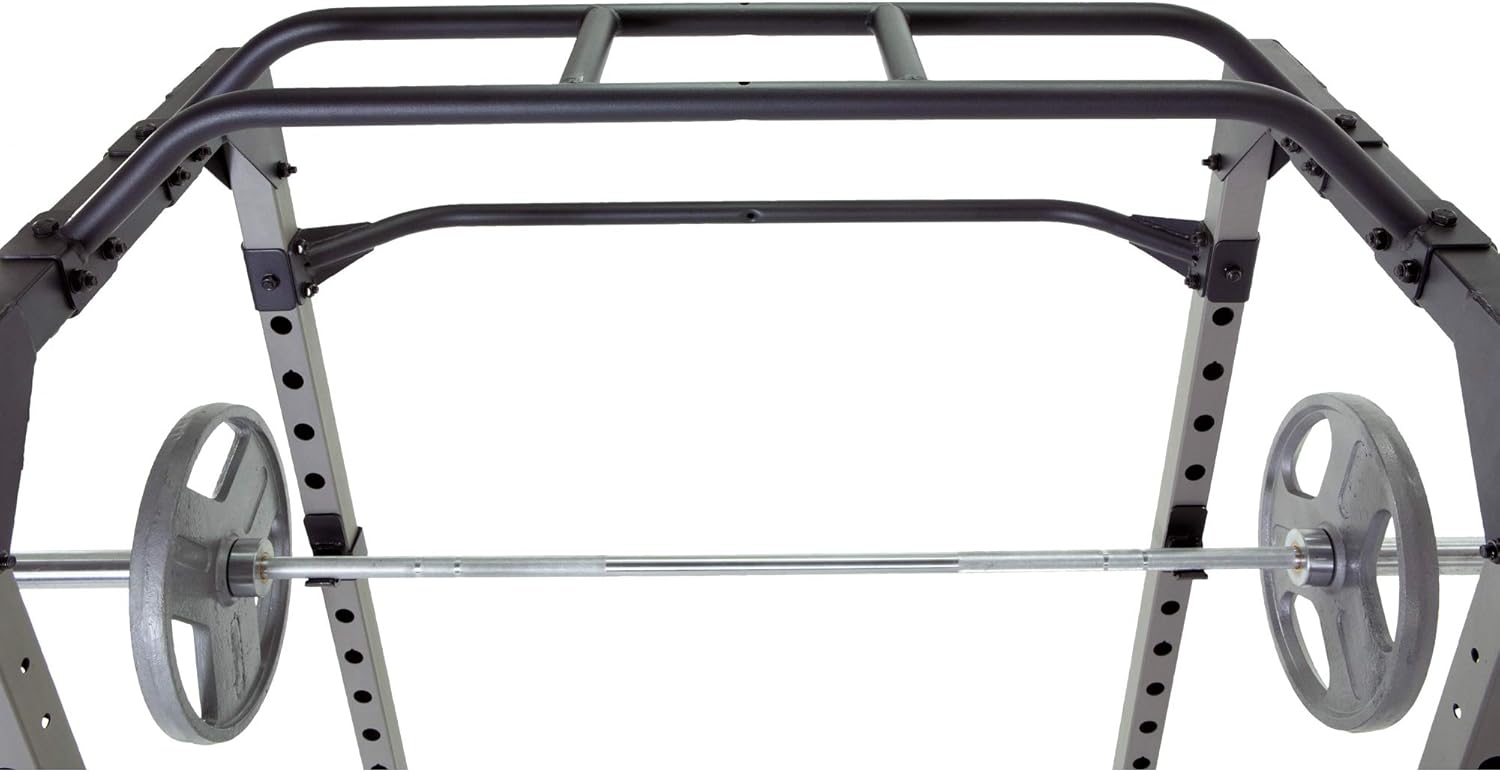
Figure 5.1: Interior view of the power cage, showing the J-hooks and safety bars in position.
5.2 Exercise Examples
The PROGEAR 1600 Power Cage supports a wide range of exercises. Always use proper form and spotters if necessary.
- Squats: Position the J-hooks at shoulder height. Load the barbell, un-rack, perform squats, and re-rack. Set safety bars just below your lowest squat depth.
- Bench Press: Use with a compatible weight bench (e.g., PROGEAR 1300 Adjustable Weight Bench). Position J-hooks and safety bars appropriately for your bench press range of motion.
- Overhead Press: Similar to squats, adjust J-hooks for comfortable un-racking and re-racking.
- Pull-ups/Chin-ups: Utilize the multi-grip pull-up bar at the top of the cage for various grip positions.
- Barbell Rows/Bicep Curls: Can be performed inside or outside the cage, utilizing the J-hooks for racking.
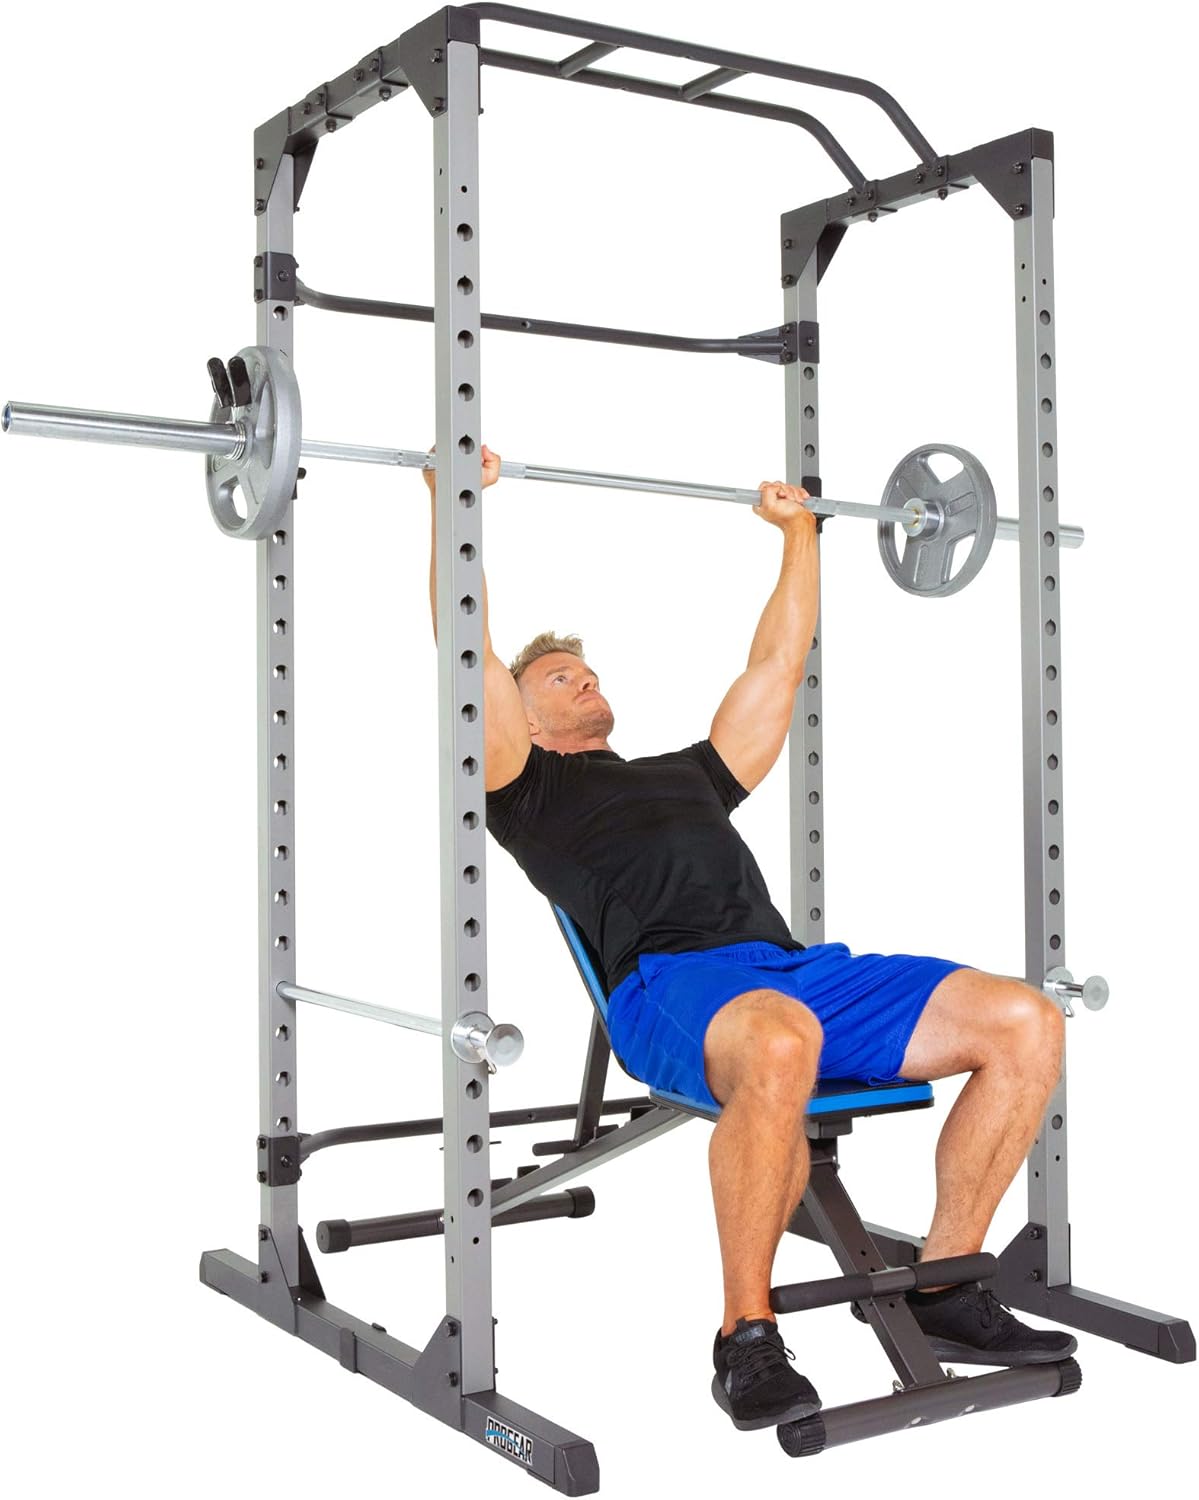
Figure 5.2: An individual performing a bench press exercise within the power cage, demonstrating the use of a weight bench.

Figure 5.3: An individual performing bicep curls with a barbell, illustrating the ample space within the cage.
6. Maintenance
Regular maintenance will ensure the longevity and safe operation of your PROGEAR 1600 Power Cage.
- Cleaning: Wipe down the frame and components with a damp cloth after each use to remove sweat and dust. Avoid abrasive cleaners.
- Inspection: Periodically inspect all bolts, nuts, and connections for tightness. Re-tighten as necessary.
- Wear and Tear: Check for any signs of rust, cracks, or excessive wear on the frame, J-hooks, and safety bars. Replace worn or damaged parts immediately.
- Lubrication: No lubrication is generally required for this type of equipment.
7. Troubleshooting
If you encounter issues with your PROGEAR 1600 Power Cage, refer to the following common problems and solutions:
| Problem | Possible Cause | Solution |
|---|---|---|
| Cage feels unstable or wobbly. | Loose bolts or uneven surface. | Ensure all assembly bolts are fully tightened. Move the cage to a flat, level surface. |
| J-hooks or safety bars do not sit securely. | Not fully inserted or debris in holes. | Ensure the pins are fully engaged through both sides of the upright. Check for any obstructions in the adjustment holes. |
| Squeaking noises during use. | Loose connections or metal-on-metal friction. | Tighten all bolts. If noise persists, apply a small amount of silicone spray to contact points (avoiding areas that contact skin or clothing). |
If the problem persists after attempting these solutions, please contact customer support.
8. Specifications
| Feature | Detail |
|---|---|
| Model Number | 3810 |
| Weight Capacity | 800 lbs (363 kg) |
| Frame Construction | Heavy-duty 2" x 2" tubular steel |
| Product Dimensions (L x W x H) | 128.02 x 117.6 x 212.6 cm (50.4 x 46.3 x 83.7 inches) |
| Item Weight | 57.8 kg (127.4 lbs) |
| Adjustable Height Levels | 19 levels for safety bars |
| Included Components | Power cage, J-hooks, safety bars, pull-up bar, assembly tools, manual |
| Color | Black |
9. Warranty and Support
PROGEAR products are manufactured with quality and durability in mind. For specific warranty information regarding your PROGEAR 1600 Power Cage, please refer to the warranty card included with your purchase or visit the official ProGear website.
For technical support, replacement parts, or any inquiries not covered in this manual, please contact ProGear customer service. Have your model number (3810) and purchase date ready when contacting support.
Manufacturer: Paradigm Health & Wellness Inc. (CA) - DROPSHIP


