
Introduction
Thank you for purchasing the SINGER SN773K Electric Sewing Machine. This manual provides essential information for the safe and efficient operation of your new sewing machine. Please read these instructions carefully before use and keep them for future reference.
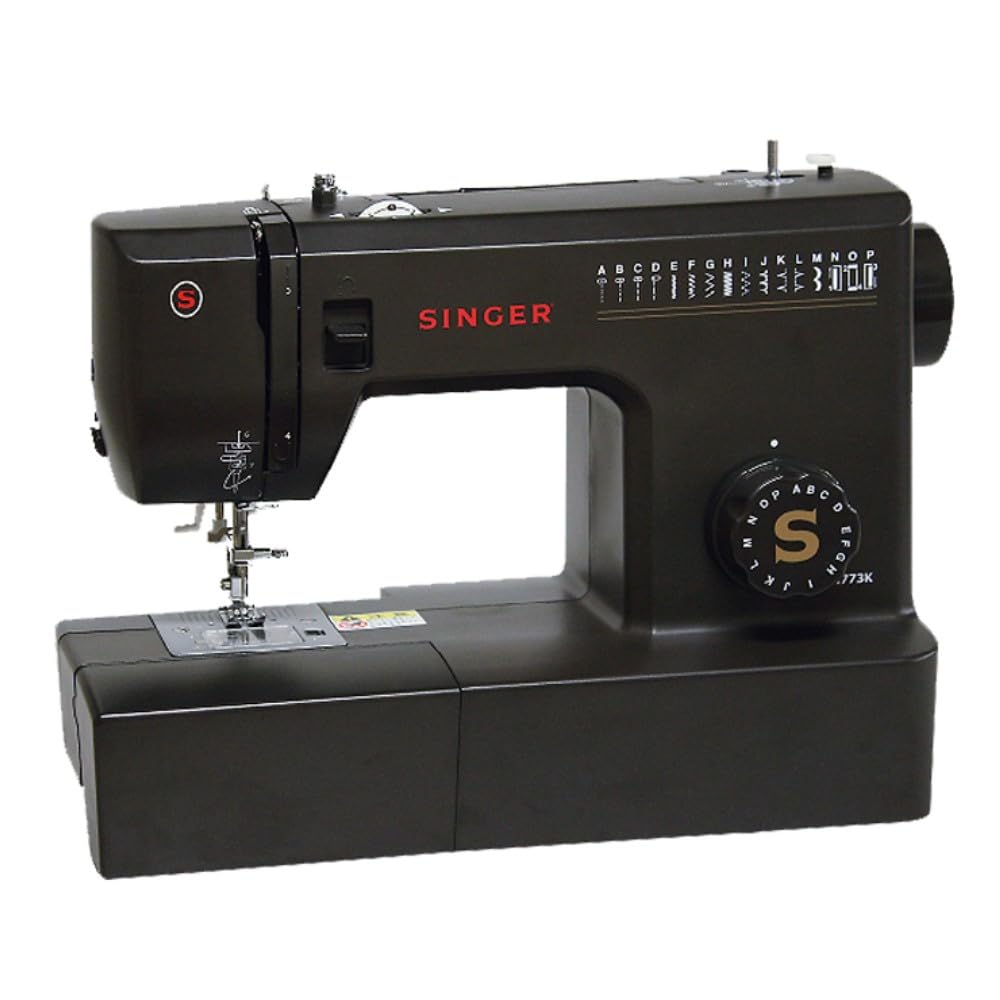
Image: The SINGER SN773K electric sewing machine, a black-colored unit designed for home sewing tasks.
Safety Instructions
To ensure safe operation, always follow these basic safety precautions:
- Always unplug the machine from the electrical outlet when cleaning, lubricating, or when removing any covers.
- Keep fingers away from all moving parts. Special care is required around the sewing machine needle.
- Use only accessories recommended by the manufacturer.
- Never operate the machine if it has a damaged cord or plug, if it is not working properly, or if it has been dropped or damaged.
- Do not use outdoors or operate where aerosol (spray) products are being used or where oxygen is being administered.
Product Overview
The SINGER SN773K is an electric sewing machine designed for ease of use and durability. It features a robust construction suitable for various sewing projects, including handling thicker fabrics like denim. Its compact design ensures it fits well in most workspaces while offering ample room for fabric manipulation.
Key Features
- Automatic Needle Threader: Simplifies the threading process, making it quick and easy.
- Thick Fabric Capability: Designed to sew through multiple layers of denim (up to 10 oz denim).
- Optimal Workspace: Provides a comfortable and spacious area for various sewing tasks, including cylindrical items.
- LED Light: Illuminates the sewing area for improved visibility and precision.
- Horizontal Full Rotary Hook: Ensures smooth and quiet operation, with easy bobbin insertion and removal.
- Stitch Pattern Dial: Allows for easy selection of essential stitch patterns.

Image: The SINGER SN773K sewing machine with its dimensions (Width 399mm, Height 297mm, Depth 180mm) and a comparison table showing its weight (5.65kg) and ability to sew up to 10 layers of denim, highlighting its balance between compactness and capability.
Setup
Unpacking and Initial Inspection
Carefully remove the sewing machine from its packaging. Ensure all accessories are present according to the standard accessories list. Inspect the machine for any visible damage.
Power Connection
Connect the power cord from the foot controller to the machine, then plug the power cord into a suitable electrical outlet. Ensure the machine is switched off before connecting to power.
Winding the Bobbin
Follow the illustrated steps on the machine or in the detailed manual to correctly wind the bobbin. Proper bobbin winding is crucial for consistent stitch quality.
Threading the Upper Thread
Refer to the threading guide on the machine body or the detailed manual for the correct upper thread path. Utilize the automatic needle threader for convenience.

Image: An illustration demonstrating the step-by-step process for threading the SINGER SN773K sewing machine, including the use of the automatic needle threader.
Operating Instructions
Stitch Selection
Turn the stitch pattern dial to select the desired stitch. The machine offers a range of basic and decorative stitches suitable for various projects.

Image: A visual guide to the various stitch patterns available on the SINGER SN773K, including straight stitch, zigzag, dotted zigzag, blind hem, shell tuck, scallop, and buttonhole options.
Basic Sewing
Place your fabric under the presser foot. Lower the presser foot lever. Gently press the foot controller to start sewing. The sewing speed is controlled by the pressure applied to the foot controller.
Using the Foot Controller
The foot controller allows for hands-free speed control, enabling you to focus on guiding the fabric. Press lightly for slower speeds and more firmly for faster speeds.
Special Stitch Functions
For buttonholes, attach the buttonhole presser foot and follow the specific instructions in the detailed manual for precise buttonhole creation.
Maintenance
Cleaning the Machine
Regularly clean lint and dust from the bobbin area and feed dogs using the provided brush. Always unplug the machine before cleaning.
Replacing the Needle
Replace the needle frequently, especially when sewing thick fabrics or if the needle becomes bent or dull. Use the correct needle type and size for your fabric.
Troubleshooting
| Problem | Possible Cause | Solution |
|---|---|---|
| Thread breaks | Incorrect threading, tension too high, dull needle, wrong needle size. | Re-thread the machine, adjust tension, replace needle, use correct needle. |
| Skipped stitches | Bent needle, wrong needle type, incorrect threading, fabric not feeding properly. | Replace needle, use appropriate needle for fabric, re-thread, clean feed dogs. |
| Machine not sewing | Power not connected, bobbin not inserted correctly, machine not threaded. | Check power, re-insert bobbin, re-thread machine. |
Specifications
- Model Number: SN773K
- Dimensions (D x W x H): 18 cm x 39.9 cm x 29.7 cm
- Product Weight: 5.65 kg
- Material: Acrylonitrile Butadiene Styrene (ABS)
- Power Source: Corded Electric
Standard Accessories
The SINGER SN773K comes with the following standard accessories:

Image: A visual representation of the standard accessories included with the SINGER SN773K, such as various presser feet, screwdrivers, bobbins, needles, and the foot controller.
- Zigzag Presser Foot (pre-installed)
- Zipper Presser Foot
- Buttonhole Presser Foot
- Button Sewing Presser Foot
- Screwdriver
- Seam Ripper / Brush
- Needle Set
- Bobbins
- Seam Guide
- Spool Pin (Large/Small)
- Auxiliary Spool Pin
- Spool Cap
- Instruction Manual
- Soft Cover
- Foot Controller (integrated power cord)
Important Notes
Regarding the Black Finish: Due to the black color of the sewing machine body, fine scratches and fingerprints may be more noticeable. Additionally, depending on the surface finish and how light reflects, minor scratches may appear. Returns due to slight color unevenness or small scratches from the manufacturing process are not accepted for quality reasons. Your understanding is appreciated.

Image: A warning banner explaining that due to the black finish of the sewing machine, minor imperfections like scratches or fingerprints may be more visible, and returns for such cosmetic issues are not accepted.


