1. Introduction
About Your TOOLCRAFT USB Microscope
The TOOLCRAFT USB Microscope is a versatile digital microscope designed for detailed observation, photography, and video recording of magnified objects. Featuring a 5-megapixel sensor and up to 150x magnification, it is suitable for various applications from educational and hobby use to industrial surface testing and research. Its dual-axis lens and precisely adjustable stand ensure clear and stable imaging.
Key Features
- 5 Megapixel Camera Sensor
- Up to 150x Digital Magnification
- Precisely Adjustable Stand for Stable Imaging
- Dual-Axis Lens with a Focus Range of 10 mm to 150 mm
- 8 Integrated White LEDs for Object Illumination
- Specialized Software for High-Precision Measurements and Image Management
- USB Connectivity for Direct Transfer to PC/Laptop
2. Package Contents
Please check the box for the following items:
- TOOLCRAFT USB Microscope Unit
- Adjustable Stand
- Integrated USB Cable
- Software CD
- Quick Start Guide
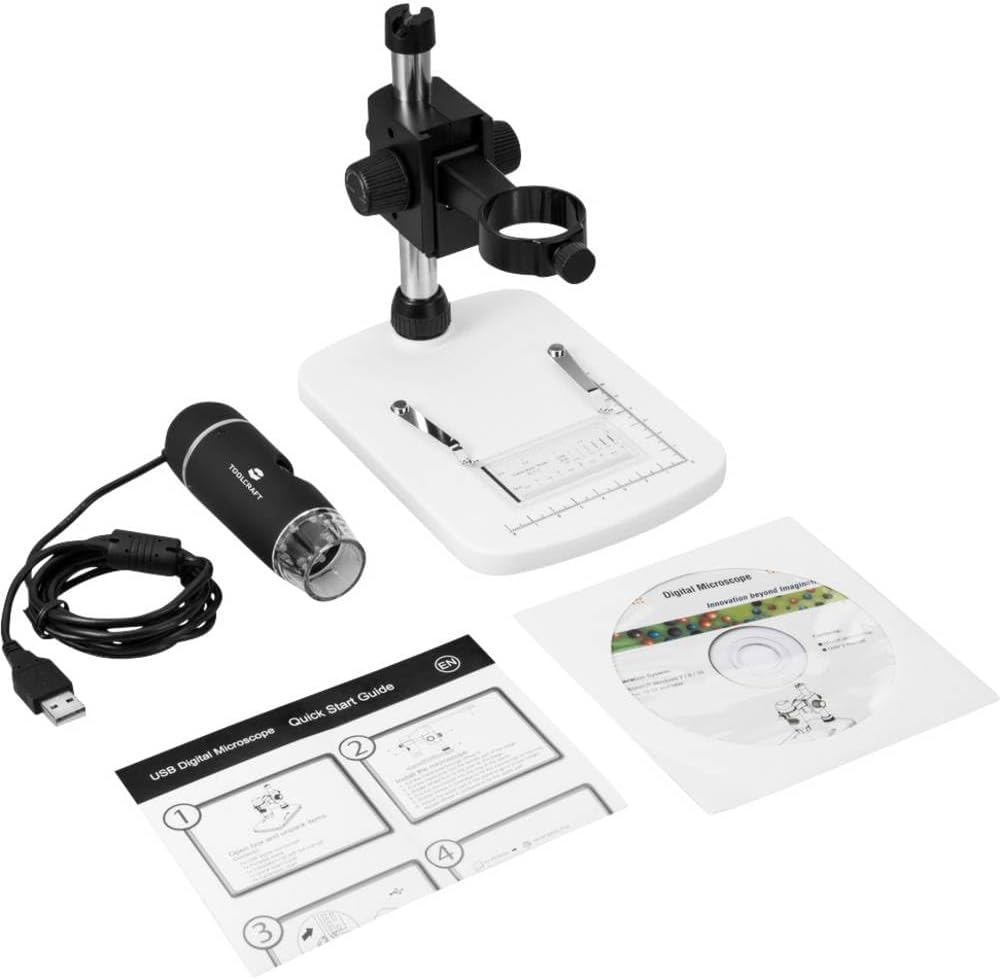
Image: All components included in the package, showing the USB microscope, its adjustable stand, the quick start guide, and the software installation CD.
3. Setup
Hardware Assembly
- Carefully unpack all components from the packaging.
- Attach the USB microscope unit to the adjustable stand. Ensure it is securely fastened using the provided clamps or screws on the stand.
- Place the assembled microscope on a stable, flat surface.
- Connect the USB cable from the microscope to an available USB port on your computer or laptop.

Image: The TOOLCRAFT USB microscope fully assembled on its white stand, with the USB cable connected and ready for use.
Software Installation
- Insert the provided software CD into your computer's CD/DVD drive.
- Follow the on-screen instructions to install the microscope's driver and application software.
- If your computer does not have a CD/DVD drive, please visit the TOOLCRAFT support website to download the latest software and drivers.
- After installation, restart your computer if prompted.
4. Operating Instructions
Connecting and Launching
- Ensure the USB microscope is connected to your computer.
- Launch the installed microscope software from your desktop shortcut or Start Menu.
- The software should automatically detect the microscope and display a live feed. If not, check the device selection within the software settings.
Placing and Focusing Objects
- Place the object you wish to examine on the base plate of the stand, directly beneath the microscope lens.
- Use the focus knob on the microscope body to adjust the clarity of the image. Rotate it slowly until the object appears sharp on your screen.
- For fine adjustments and to change magnification, use the height adjustment knob on the stand to move the microscope closer to or further from the object. The focus range is 10 mm to 150 mm.

Image: An angled view of the TOOLCRAFT USB microscope on its stand, highlighting the focus and height adjustment knobs for precise control.
Adjusting Illumination
The microscope features 8 built-in white LEDs to illuminate your subject. The brightness of these LEDs can typically be adjusted via a control wheel on the microscope body or through the software interface.
Capturing Images and Videos
The microscope software allows you to capture still images and record videos.
- Still Images: Click the "Capture" or "Snapshot" button within the software interface. Images are typically saved in JPEG or BMP format.
- Video Recording: Click the "Record" button to start recording and click it again to stop. Videos are usually saved in AVI or MP4 format.

Image: A top-down view of the TOOLCRAFT USB microscope, illustrating the integrated LED ring around the lens for optimal object illumination.
5. Maintenance and Care
- Cleaning the Lens: Use a soft, lint-free cloth specifically designed for optical lenses to gently wipe the microscope lens. Do not use abrasive cleaners or solvents.
- Cleaning the Body: Wipe the microscope body and stand with a dry or slightly damp soft cloth.
- Storage: When not in use, store the microscope in a clean, dry, and dust-free environment. Avoid extreme temperatures and direct sunlight.
- Handling: Handle the microscope with care. Avoid dropping it or subjecting it to strong impacts.
- Software Updates: Periodically check the TOOLCRAFT website for software and driver updates to ensure optimal performance and compatibility.
6. Troubleshooting
| Problem | Possible Cause | Solution |
|---|---|---|
| No image on screen / Microscope not detected | USB connection issue | Ensure the USB cable is securely connected to both the microscope and the computer. Try a different USB port. |
| No image on screen / Microscope not detected | Driver/Software not installed or corrupted | Install the software from the CD or download the latest drivers from the TOOLCRAFT website. Reinstall the software if necessary. |
| Image is blurry | Incorrect focus | Adjust the focus knob on the microscope body. |
| Image is blurry | Incorrect working distance | Adjust the height of the microscope on the stand to change the distance to the object. |
| Image is too dark | LEDs are off or dim | Check the LED brightness control on the microscope or within the software. |
| Software crashes or freezes | Software incompatibility or system resources | Close other applications. Update the software to the latest version. Ensure your computer meets the minimum system requirements. |
7. Technical Specifications
| Feature | Detail |
|---|---|
| Model Name | TO-5139594 |
| Sensor Resolution | 5.0 Megapixels |
| Max. Magnification | 150x |
| Focus Range | 10 mm - 150 mm |
| Illumination | 8 White LEDs |
| Objective Lens | High-quality lens |
| Connectivity | USB |
| Color | Black |
| Package Dimensions | 22.4 x 18.3 x 8.5 cm |
| Manufacturer | TOOLCRAFT |
| First Available Date | December 11, 2018 |
8. Warranty and Support
For warranty information, technical support, or to download the latest drivers and software, please visit the official TOOLCRAFT website or contact their customer service. Keep your purchase receipt as proof of purchase.


