1. Introduction
The Einhell TE-DH 50 Demolition Hammer is an ideal tool for DIY enthusiasts, designed to handle heavy demolition tasks. With a powerful 1700 W motor, it delivers high demolition performance for home and garden projects. Its robust and durable construction ensures suitability for demanding continuous operation.
This manual provides essential information for the safe and efficient use of your Einhell TE-DH 50 Demolition Hammer. Please read it thoroughly before initial operation and keep it for future reference.
2. Safety Instructions
Always observe the following safety precautions to prevent injury and damage to the tool:
- Personal Protective Equipment: Always wear safety goggles, hearing protection, and heavy-duty gloves when operating the demolition hammer. A dust mask is recommended for dusty environments.
- Work Area: Ensure your work area is well-lit and clear of obstructions. Keep bystanders and pets away from the operating area.
- Electrical Safety: Before connecting the tool to the power supply, ensure the voltage matches the rating on the tool's label. Do not use the tool in damp or wet conditions. Always use a residual current device (RCD) for added protection.
- Secure Grip: Always hold the tool firmly with both hands, utilizing the main handle and the auxiliary handle.
- Tool Condition: Inspect the tool and accessories for any damage before each use. Do not use if damaged.
- Avoid Overreaching: Maintain proper footing and balance at all times.
- Unplug When Not in Use: Always unplug the tool from the power supply before making adjustments, changing accessories, or storing it.
- Soft Start: The tool features a soft start function for safe operation, preventing sudden jolts upon startup.
3. Package Contents
Verify that all items are present upon unpacking:
- Einhell TE-DH 50 Demolition Hammer
- Pointed Chisel
- Flat Chisel
- Transport and Storage Trolley Case
- Industrial Cleaning Cloth
- User Manual (this document)

Image: The Einhell TE-DH 50 Demolition Hammer, along with the included pointed and flat chisels, and its robust red transport case.

Image: Close-up view of the pointed and flat chisels, positioned above the red transport case.

Image: The transport case opened, revealing the molded interior designed to securely hold the demolition hammer and its accessories.
4. Components Overview
Familiarize yourself with the main parts of the demolition hammer:
- Main Handle with Vibration Damping: Provides a secure grip and reduces vibration during operation.
- Auxiliary Handle: Adjustable for optimal positioning and control.
- SDS-Hex Tool Holder Chuck (33 mm): For quick and easy tool changes.
- Power Cable: Robust 4-meter rubber cable for maximum mobility.
- Motor Housing: Contains the powerful 1700 W motor.
- On/Off Switch: Controls the power to the tool.

Image: Detailed view of the SDS-hex tool holder chuck, designed for quick and secure chisel attachment.
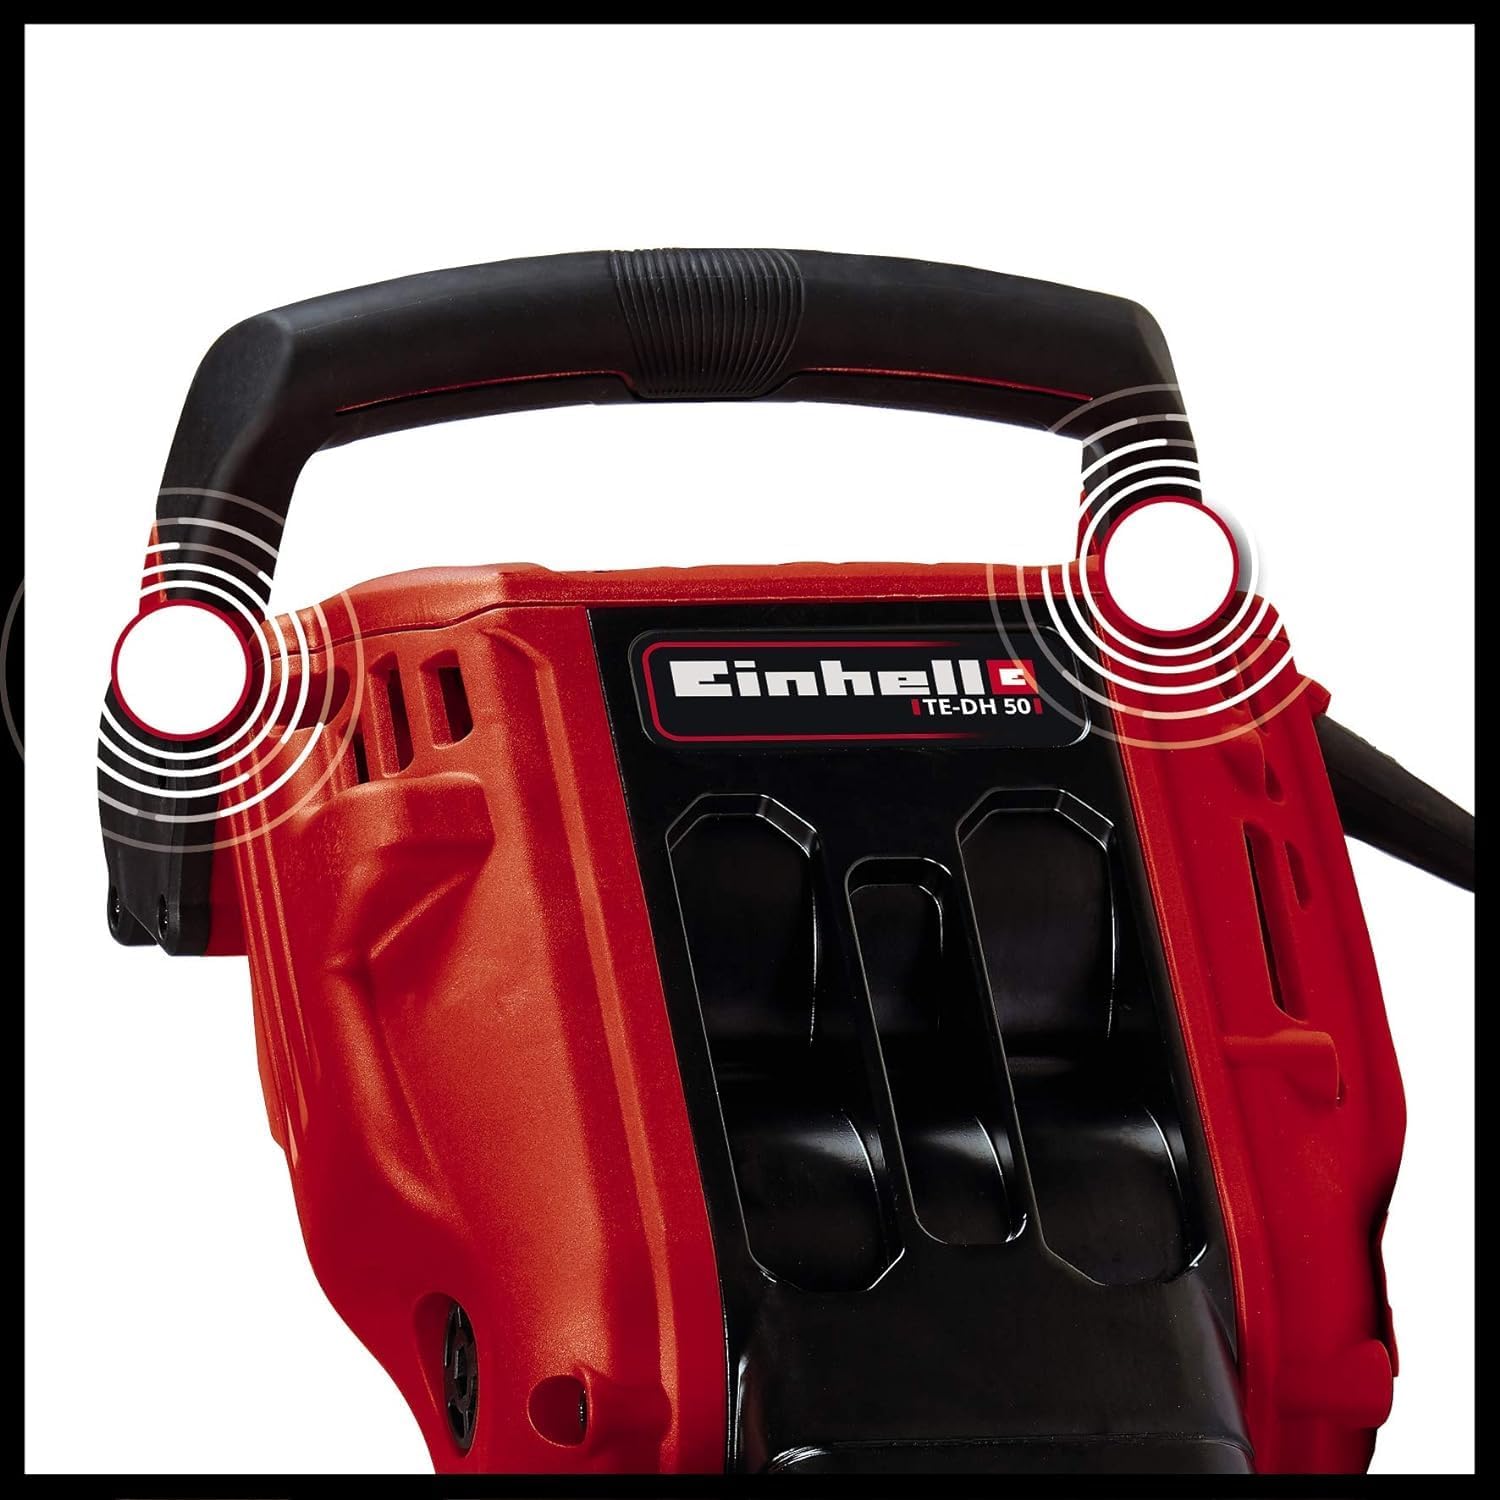
Image: Close-up of the main handle, highlighting its vibration damping features for comfortable operation.
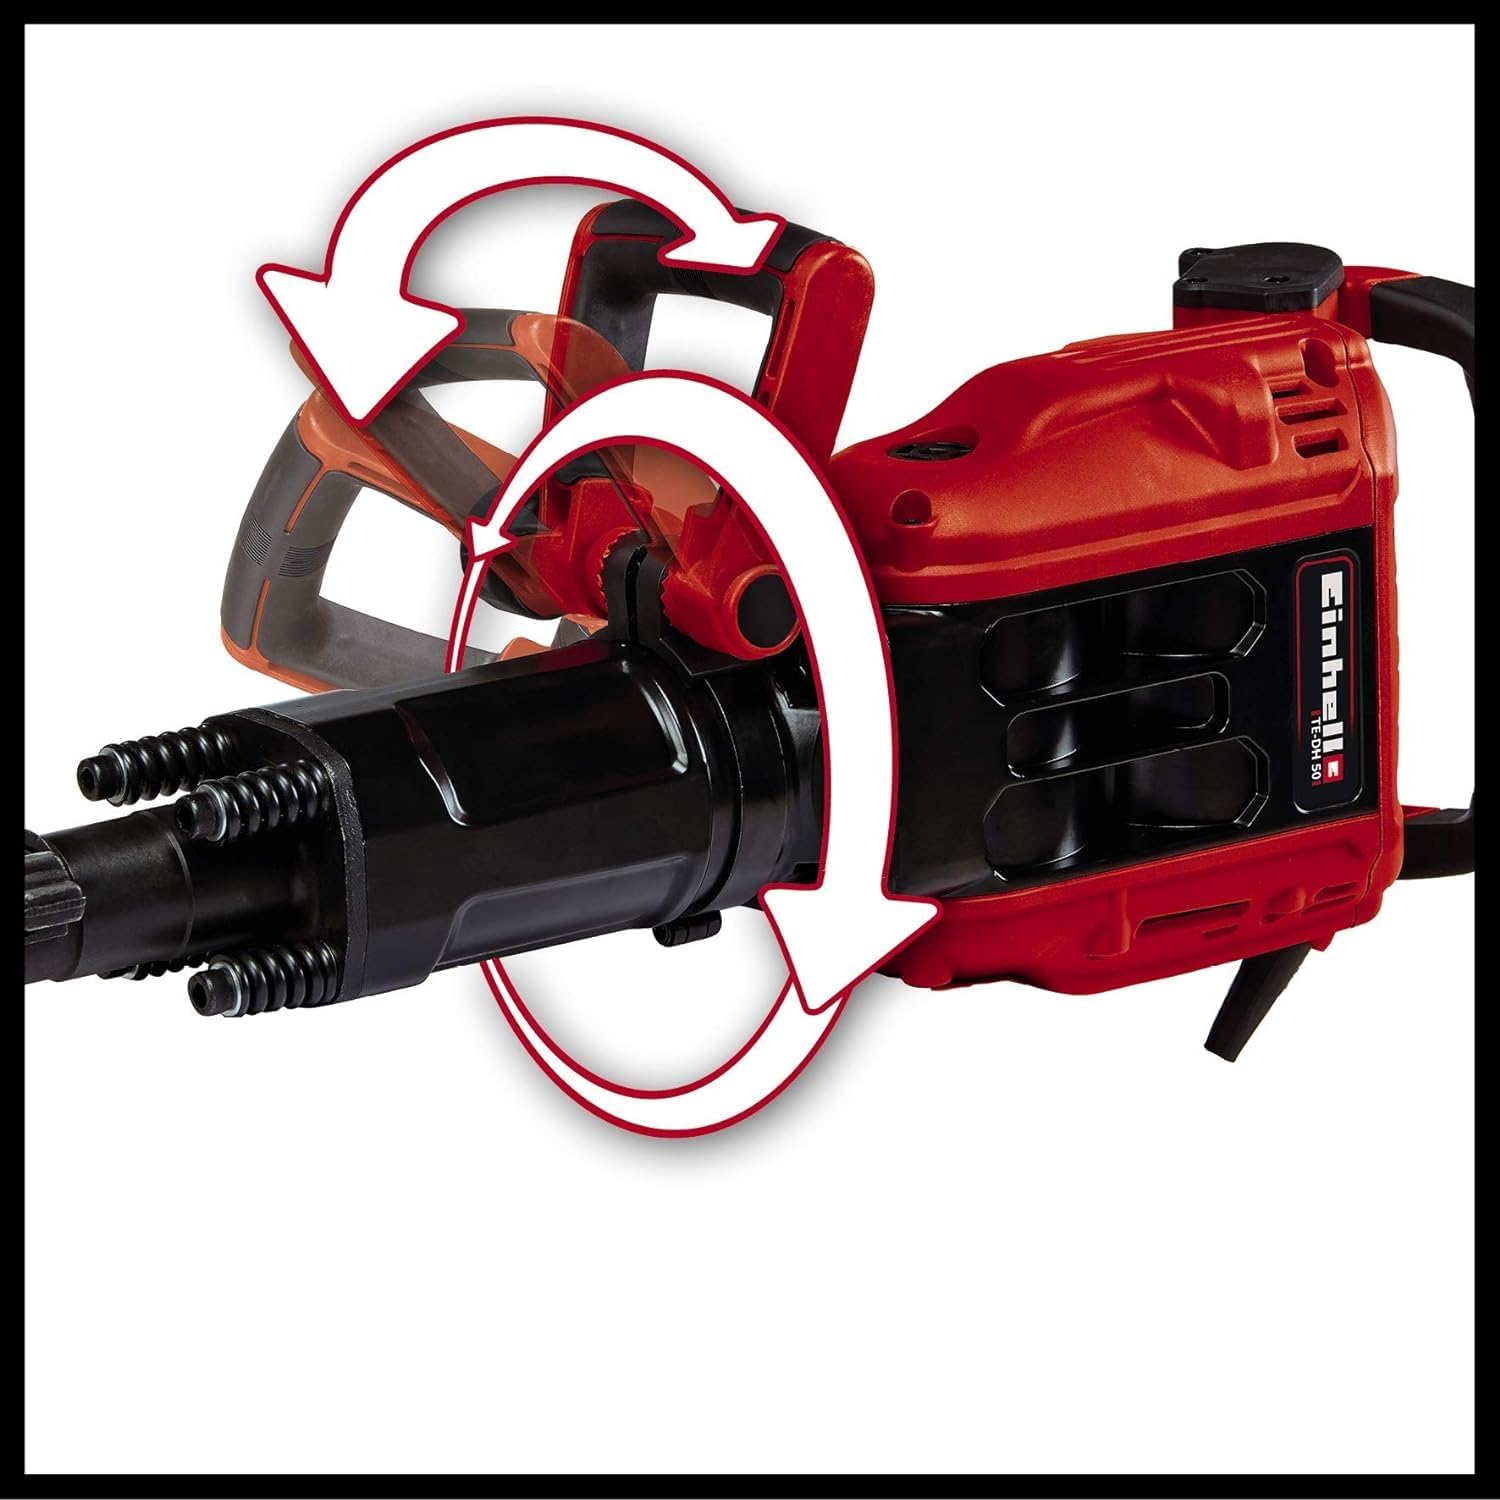
Image: Illustration demonstrating the flexible adjustment capabilities of the auxiliary handle, allowing for 180-degree vertical and 360-degree horizontal rotation.

Image: The robust 4-meter power cable, providing ample reach and mobility during use.
5. Setup
5.1 Attaching the Auxiliary Handle
The auxiliary handle can be adjusted to suit your working position. Loosen the clamping screw on the auxiliary handle, position it as desired (180 degrees vertically, 360 degrees horizontally), and then tighten the clamping screw firmly.
5.2 Inserting/Changing Chisels
- Ensure the tool is unplugged from the power supply.
- Clean the shank of the chisel before insertion.
- Insert the chisel into the SDS-Hex chuck until it clicks into place. Pull on the chisel to ensure it is securely locked.
- To remove, pull back the chuck collar and pull out the chisel.
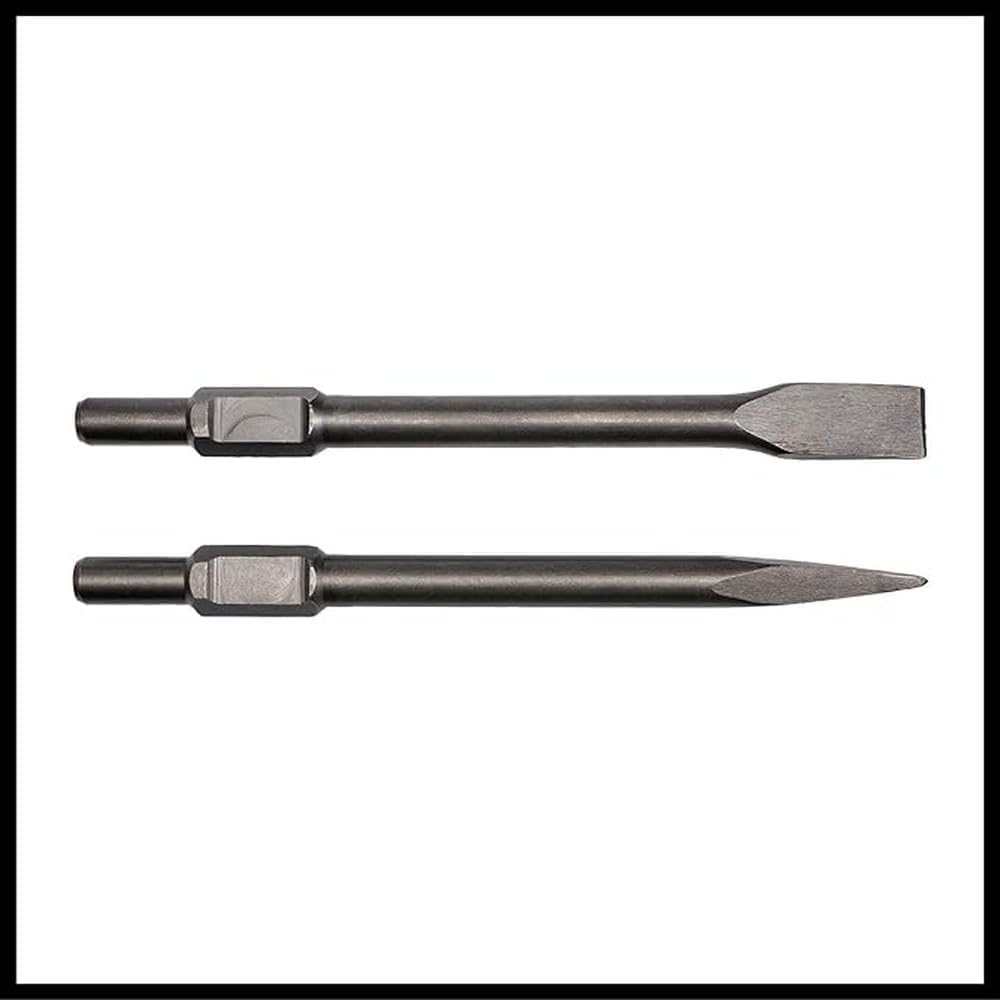
Image: The pointed and flat chisels included with the demolition hammer, ready for insertion into the SDS-hex chuck.
6. Operation
6.1 General Operation
- Ensure the chisel is correctly installed and the auxiliary handle is adjusted.
- Connect the tool to a suitable power outlet.
- Hold the demolition hammer firmly with both hands.
- Press the On/Off switch to start the tool. The soft start function will ensure a smooth power-up.
- Apply steady pressure to the work surface. Allow the hammer's impact force to do the work; do not force the tool.
- To stop the tool, release the On/Off switch.
6.2 Demolition Techniques
- Breaking Concrete/Masonry: Use the pointed chisel for initial penetration and breaking up large sections. Use the flat chisel for shaping, channeling, or removing tiles.
- Working Position: Adapt your stance and the auxiliary handle's position for optimal leverage and control, especially during prolonged use.
- Continuous Operation: The robust design allows for demanding continuous operation. However, take regular breaks to prevent fatigue and ensure tool longevity.

Image: A worker demonstrating the use of the Einhell TE-DH 50 Demolition Hammer for breaking concrete, emphasizing proper posture and handling.
7. Maintenance
Regular maintenance ensures the longevity and optimal performance of your demolition hammer.
- Cleaning: After each use, clean the tool thoroughly. Use the provided industrial cleaning cloth to wipe down the surfaces. Ensure no dust or debris accumulates in the ventilation slots.
- Chisel Care: Keep chisels sharp and clean. Apply a thin layer of machine oil to the chisel shank before insertion to reduce wear on the chuck.
- Carbon Brushes: The tool is equipped with auto-shutoff carbon brushes. If the brushes wear down, the tool will automatically stop to prevent damage to the motor. Replacement should be performed by qualified personnel.
- Storage: Store the tool and accessories in the transport and storage trolley case in a dry, secure place, out of reach of children.
8. Troubleshooting
Before contacting customer support, try these common solutions:
| Problem | Possible Cause | Solution |
|---|---|---|
| Tool does not start. | No power supply; Worn carbon brushes. | Check power connection and circuit breaker. If still no power, carbon brushes may need replacement (contact service). |
| Reduced impact force. | Worn chisel; Insufficient lubrication; Internal wear. | Replace chisel. Apply lubrication to chisel shank. If problem persists, contact service. |
| Chisel not locking in chuck. | Dirty chuck; Damaged chuck. | Clean chuck thoroughly. If damaged, contact service for repair. |
| Excessive vibration. | Improper grip; Internal issue. | Ensure firm two-hand grip. If vibration is unusual or excessive, discontinue use and contact service. |
9. Technical Specifications
| Feature | Specification |
|---|---|
| Model | TE-DH 50 |
| Power Input | 1700 W |
| Impact Rate | 1900 impacts/min |
| Single Impact Force | 50 J |
| Tool Holder | SDS-Hex (33 mm) |
| Power Supply | Corded Electric (240 Volts) |
| Cable Length | 4 meters (approx.) |
| Weight | 18.37 kg |
| Dimensions (L x W x H) | 30.12 x 10.87 x 6.73 cm |
| Special Features | Vibration-damped main handle, Adjustable auxiliary handle, Soft start function, Auto-shutoff carbon brushes |
10. Warranty and Support
Einhell stands behind the quality and longevity of its products.
10.1 Warranty Information
Einhell offers an extended 3-year warranty on all Einhell devices upon online registration. To activate this service, your product must be registered on the official Einhell website within 30 days of purchase. Please refer to the official Einhell website for detailed warranty terms and conditions.
10.2 Customer Support
For technical assistance, spare parts, or warranty claims, please contact Einhell customer service. You can find contact information on the official Einhell website or through your local retailer.
When contacting support, please have your product model number (TE-DH 50) and purchase date ready.


